West Coast Brewer Home Brewing Blog

Month: April 2017

John Palmer Beer Recipe Sale

John Palmer Beer Recipe Kits

John Palmer Beer Recipe Kits

Coupon Code Date: 4-20-2017 to 4-21-2017
Promotion Details: Save 15% On John Palmer Beer Kits!
Promo Code: PALMER15
Coupon Description: Celebrate 420 with More Beer and Save 15% On John Palmer home brewing kits! These delicious homebrew beer kits were designed by John Palmer, author of the best selling book How to Brew.  John also co wrote Brewing Classic Styles with brewer Jamil Zainasheff, and these world class home brewing recipes come directly from that great book. These kits are all inclusive and come with all the ingredients you need to brew a great batch of beer.  Here are the beer ingredient kits available for this More Beer Coupon Code:
  • Weed, Feed, and Mow – Cream Ale
  • JZ Früh – Kolsch
  • Kent’s Hollow Leg – American Wheat
  • All-American Pale Ale – American Pale Ale
  • Black Widow – Robust Porter
  • Biere De L’inde – English IPA
  • Hoppiness is an IPA – American IPA
  • Munich Madness – Oktoberfest
  • Programmers Elbow – Extra Special Bitter (ESB)
  • Strict Observance – Belgian Tripel


MoreBeer.com Promo Code John Palmer Beer Kits


Juicy IPA Recipe

Juicy IPA Recipe #juicy #ipa #recipe #homebrew #homebrewing #home #brewing

Juicy IPA Recipe #juicy #ipa #recipe #homebrew #homebrewing #home #brewing

So I started doing some research and decided that I was going to start with the “HAZE CRAZE IPA” all grain hazy IPA beer kit from More Beer.  The name did not sell me on the kit, but the recipe and hop additions certainly did.  I made a couple of small tweaks to the recipe, but they were pretty insignificant. Here is what I ended up with:


Water Additions:
1 tsp Calcium Chloride (Mash 60 min)
1/2 tsp Gypsum (Mash 60 min)


Grain Bill: (Mash at 150F)
12 lb Pale Ale Malt
1 lb Flaked Oats
1 lb Flaked White Wheat
8 oz Flaked Barley
4 oz Honey Malt


Hop Additions:

60 min .5 oz Warrior
5 min 1oz Citra
0 min 2oz Mosaic
0 min 1oz Citra Bavaria (I love this hop)
Whirlpool 15 min
Whirlpool 15 min


Dry Hop Additions:
I know this is not typical, but add the dry hops about 3 days after the start of fermentation.  Begin fermenting at 65F and then boost the temp to 70F when adding the dry hops.
1oz Citra (Did I mention I love this hop?)
2oz Mosaic

7 days after the start of fermentation
2oz Citra
1oz Mosaic


Yeast:
London Ale III (This is important for fruity ester and haze production)


The beer came out fantastic! If you are considering brewing up a Hazy IPA, I highly recommend this recipe.  Homebrew Supply also has a extract version of the recipe available for extract brewers.  The beer kits can be found here:


Haze Craze IPA Home Brewing Recipe


Home Brewing

Home Brew #homebrew

Home Brew #homebrew


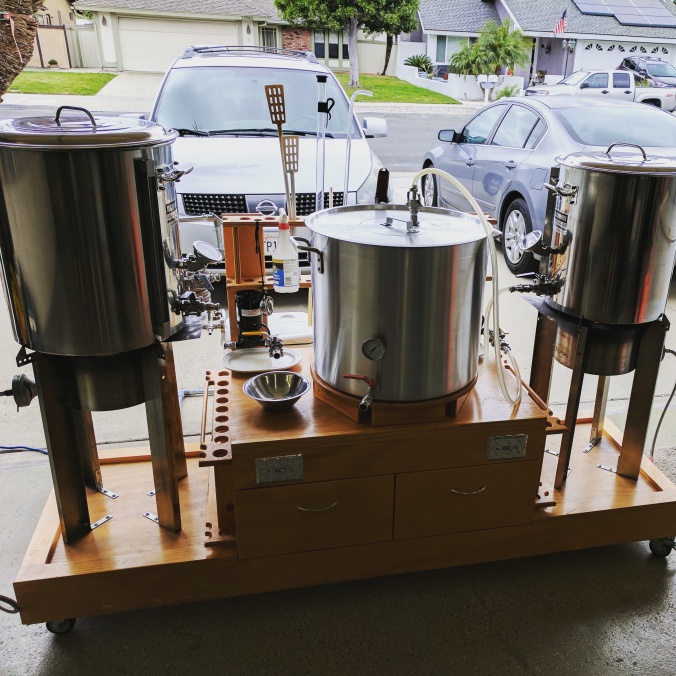
Recently I had the pleasure of brewing up a batch of home brew on one of my friends home brewing system. I always look forward to the opportunity to get another home brewers perspective on home brewing. I find that I learn a lot about the home brewing craft from examining other home brewers methods and practices.  Even better, both of us use similar home brewing hardware and like similar styles of beer so we can share home brew recipe tips as well.


Home Brewing Rig

Home Brewing Rig


One of the biggest differences in our home brewing systems and our beer brewing practices is when it comes to the mash. Where I have made my mashing process complicated (possibly over complicated) over time, doing my best to make sure my mash is at a specific temperature for the entire 60 minutes, he sets his mash temp, closes the lid and does not attempt to correct for any temperature loss over time.  By the time his mash has completed, the temperature in his tun has only dropped by approximately 6F.


My concern with a drop in mash temp would be that perhaps the finished beer would come out too dry or thin due to the lower average mash temp, the starches would only be converted to very simple sugars. Yet after sampling several of his beers, that did not turn out to be the case. I sampled 4 of his beers that day, varying from stouts to IPA’s and all of them were fantastic.  I would not describe any of his beers as too thin or too dry.


Home Brewing Mash Conversion Temperatures

Home Brewing Mash Conversion Temperatures


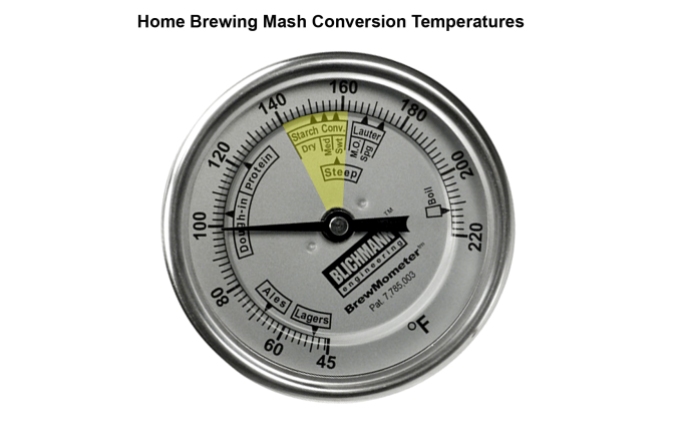
The image above is of my Blichmann BrewMomerter. I hi-lighted the segment that pertains to the mash conversion. As all grain home brewers, for the most part we mash at between 150-152 F to get a well rounded mash conversion. When I asked my friend if he was concerned with the temp dropping, he said that he felt that most of the starch conversion was occurring early in the mash process while his temperature was on target and that he had never noticed a degradation in the quality of his finished beer since he started conducting his mash in this manner. I am inclined to agree with him based on the high quality beer that he produces.


I think that sometimes as home brewers, out of our desire to brew “perfect” beer, sometime we go too far and over complicate things (or at least I do).  I am not saying to ignore your mash temperature or to only mash for 10 minutes. My point is more that modern varieties of beer have been produced for over 600 years, well before yeast was even discovered in 1857. Considering that our ancestors created beer with out having the benefit of such instruments as a Blichmann BrewMometer, perhaps there can be some flexibility when it comes to brewing.


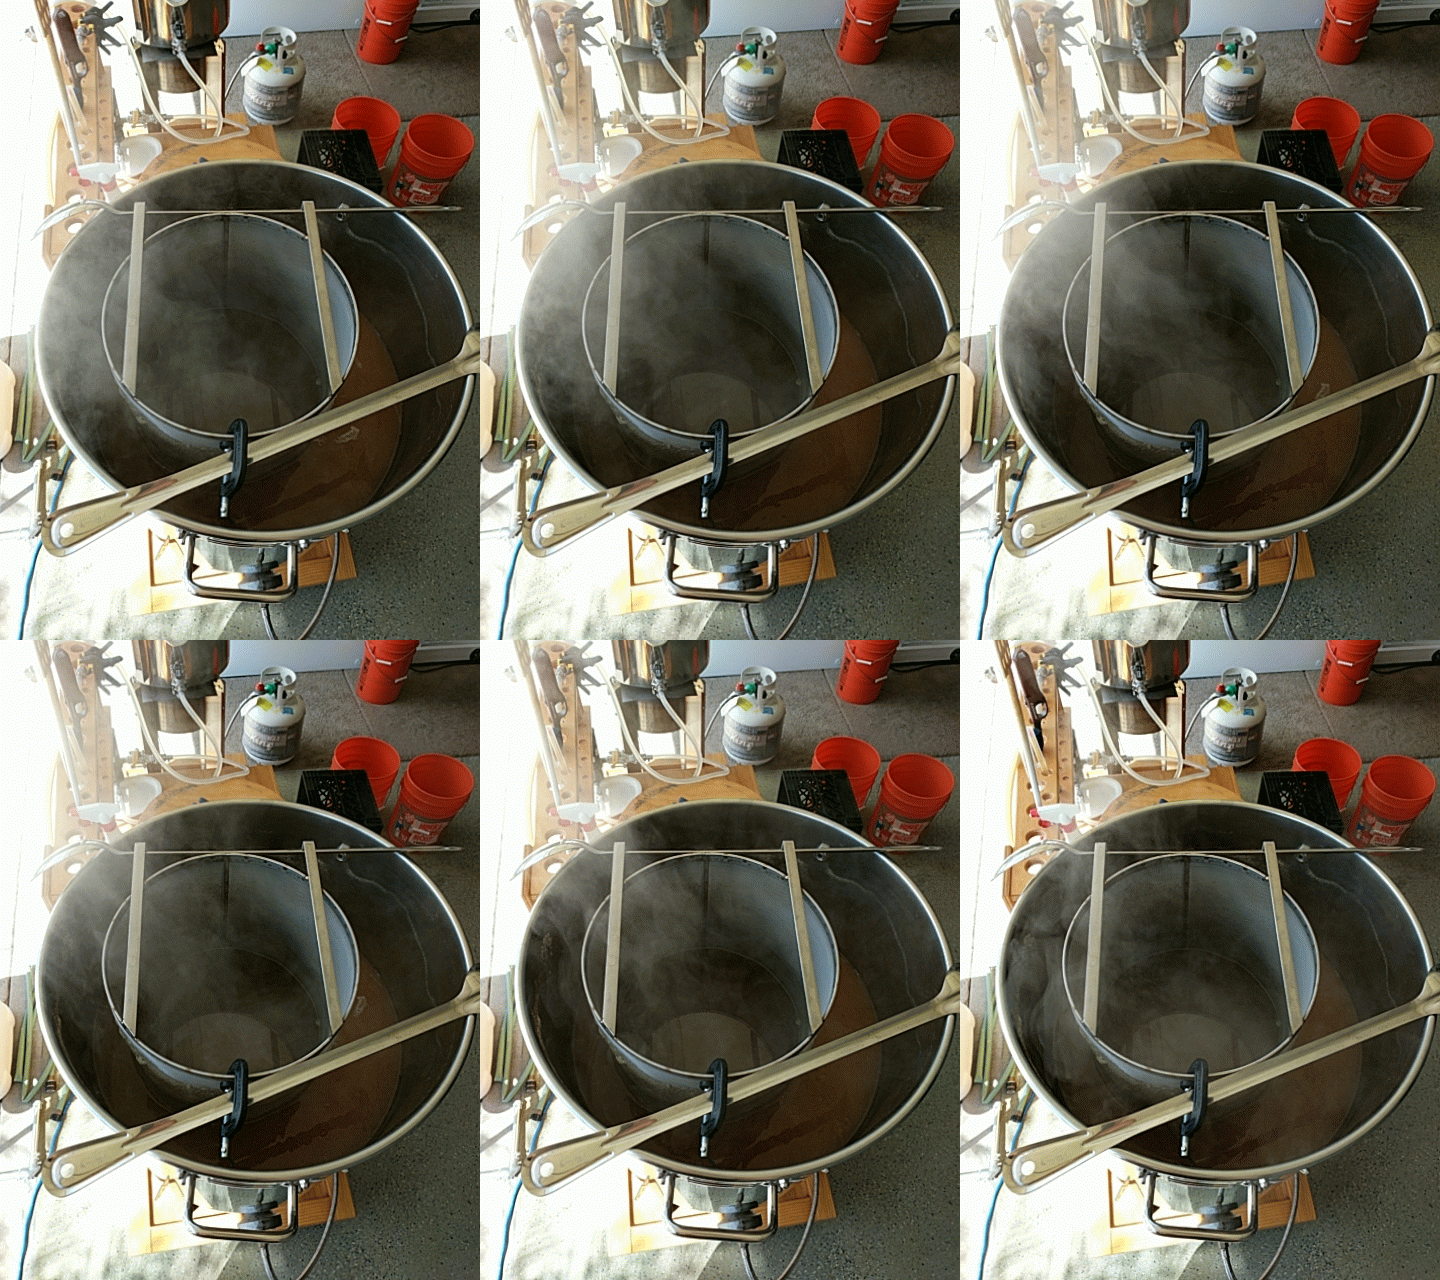
One of the home brewing items that he possess that I am pretty envious of is a large sized stainless steel hop spider.  When I say large sized, I mean large sized, this thing is giant as you can see from the animated image.  The photos were taken during the whirlpool process after the boil had completed. I have been trying to get a hop filtering system to work out on my home brew system for the last few batches with out a great deal of success.  I have been trying to overcome some challenges with clogging issues in my hop filter and he shared some great advice with me.  He said that in order for a hop filter to work properly and to get similar hop utilization compared to not using one, you need to have a hop filter that is at least half the diameter of your home brewing kettle. The size of the filter made a dramatic difference. I could see the wort moving around inside of his filter and he had hardly any clogging issues.


Home Brewing With A Hop Spider Animation

Home Brewing With A Hop Spider

I look forward to brewing with him again to see what else I can pick up from him. He has mastered the art of the Hazy IPA so I hope to pick his brain on that next.

How To Clean Beer Lines and Draft Beer Systems


Beer Line Cleaning Kit

Beer Line Cleaning Kit


Just about any good home brewer will tell you that one of the first rules of home brewing beer and making good home brewed beer is cleanliness. Unfortunately humans are not the only beer lovers on the planet.  Beer is loved by everything from insects to bacteria and your home brewing and keg systems are highly susceptible to bacterial growth. Beer lines, keg fittings and taps are often times places where the like to hang out and they should be cleaned regularly.  Thankfully there are several products out there to help you keep your systems sanitary and your beer tasting good!


The downside of having a home draft beer system means that you also have to care for it. So I purchased a draft beer line cleaning kit and some liquid beer line cleaner which is shown above. The kit was great, it came with instructions and everything that I needed in order to do the job. The beer keg line cleaning kit came with a 1 quart hand pump that pushes Beer Line Cleaner through the draft beer system. The faucet gets removed and cleaned with the included faucet wrench and brush.  The process is relatively quick and easy and takes about 20 minutes to clean a couple beer taps out.


If you are interest in purchasing a draft beer line cleaning kit you can find it here:

Keg line cleaning kit


Keg Line Cleaning Solution


Here are some instructions on how to clean your keg beer lines and draft beer system:

1) Remove the tap from the keg. Use a beer faucet wrench to remove the faucet (the piece that the beer actually flows though to your glass) from the draft beer shank. The beer faucet collar should have a few holes in it, insert the wrench end into a hole and spin the collar clockwise to remove.


2) Next, disassemble the faucet to the point that the shaft inside can slide out. Place these parts in a bowl with 2 cups of warm water and ¼ teaspoon of Beer Line Cleaner. Put one cap full of beer line cleaner into the beer line pump jar and fill with warm water. Attach the lid pump unit back on the jar. Get a bucket to collect the fluid running from the tap. Insert the cleaning brush small end into the bottom of the tap to allow the flow to go through if needed.


3) Pump the cleaning solution though line and tap allowing the solution to sit in the lines for 10–15 minutes, then pump through. Follow this with 1–2 jars of water to rinse. Remove the brush from the tap.


4) Use the brush and a towel to clean the draft beer faucet and then rinse with clean water. Reassemble the faucet, hand tighten parts, leave loose enough so that they move freely. Attach the faucet back onto the shank again, using the wrench, do not over tighten, just tighten enough so that it does not leak any precious beer!


Just let me know if you have any questions on how to clean your draft beer system and keg lines.