West Coast Brewer Home Brewing Blog

Tag: blog (Page 1 of 2)

Pliny the Younger Review

Pliny the Younger, if you are not familiar with it, is one of Russian Rivers most elusive beers and by many, considered to be one of the worlds best examples a West Coast IPA \ Triple IPA. Many of you may be familiar with Pliny the Elder. Well,  Pliny the Younger is the Elder’s bad ass offspring. Where Pliny the Elder is a double IPA clocking in at 8% ABV, Pliny the Younger is a tripple IPA with an ABV of 10.25%. Pliny the Younger is not sold in bottles, you can not get a growler of it, and to make things worse it is only distributed by keg to a limited number of breweries; most of those are located in California. Ohhhh and did I mention that they only brew it once per year? The good news for me is that one of my local breweries, Tustin Brewing Company, out of Tustin, California is one of the distribution points in California for Russian River beer and Pliny the Younger. That being said, I have been trying to get the beer for 8 years now and not until yesterday had I succeed. The problem is that as it turns out, I am not the only person interested in having a glass. Every year at about this time the Tustin Brewery celebrates Russian River week! They bring in a wide array of Russian River beers including some of their most prized sour and wild beers like Consecration and Supplication. They also offer some of Russian Rivers best pale ales and IPA’s like Blind Pig and Pliny the Elder; but the crown jewel is Pliny the Younger. In order to secure yourself a pour of Pliny the Younger, you must line up in the parking lot at approximately 9-10:AM on a Wednesday morning.  If you are one of the approximately first 70 people in line, you are provided with a wrist band that will entitle you to a 8 oz pour of Pliny the Younger once the brewery opens at 11:AM.  Unfortunately for me, I have a job with a not so flexible work schedule that has not allowed me to take the time off for this event. This year was no different. As my hopes had all but faded, the Tustin Brewery sent out a tweet late yesterday afternoon.  It turns out that they received not 1 but 2 kegs of Pliny the Younger this year. If you were one of the first 70 to claim a ticket, and could reach the brewery by 6:PM, you could receive a pour from their 2nd Pliny the Younger keg. The process was a little confusing, and I was not certain that I had properly claimed my ticket, so I raced to the brewery. It felt as though I was competing in some form of craft beer Olympics. I had to accomplish a variety of tasks, and only the fastest participants would receive the prize.

When I finally arrived at the brewery, the parking lot was a mad house. It was packed with beer lovers and moms dropping off kids with colorful belts to Taekwondo practice. I drove to the furthest reaches of the parking lot and found one of the only available parking spots. It was hidden away behind all the buildings far from the brewery. I speedily walked towards the Tustin Brewery entrance with other middle aged men all thirsty for a taste of this rare beer. I narrowly avoided being struck on the sidewalk by a man apparently not familiar with how to park his over sized truck in a sub compact parking space; I was almost to the door. This was clearly one of those situations where nobody was going to hold the door open and let you go in ahead of them. I entered the brewery behind a chubby man who was huffing and wheezing from his long brisk walk from his parking space. The brewery was packed and energized with the voices of hundreds of patrons reveling in the atmosphere and drinking their beers.

At first I was a little overwhelmed. Trying to take it all in, I thought to myself; shit, this is a lot of people, how do I get my Pliny the Younger and I hope this ticket thing worked. Thankfully a couple of the girls who work at the brewery, Krystle and Rachel were kind enough to help me figure out where to go and what to do. I proceeded to go to a table where they verified my name on their list, collected my cash and provided me with a red ticket!

Pliny the Younger Beer Ticket

Pliny the Younger Beer Ticket

From there I was directed to a sign hung high on the wall of the brewery near the bar exclaiming  “Redeem Ticket Here, Pliny the Younger, Tustin Brewery Loves You”! I walked through the crowded bar, and stood behind another man as we waited for them to tap the Pliny the Younger keg and begin serving. Finally I could begin to relax; my beer was nearly in hand.  I heard one pub patron complain about Russian River Week as he awkwardly tried to move around the crowded bar to get a refill of his mug with Golden Spike Blonde Ale. He was clearly not impressed by the rare keg that was now being connected just feet from him. Others were just happy that Friday was upon us and that there were so many hard to find and great beers available this week. I stood silently, waiting in anticipation.  Finally, after 8 years, the moment had arrived. The man in front of me, received his Pliny the Younger and it was my turn.  I handed the bartender my ticket and he pulled back the tap handle, like some form of epic beer slot machine and filled my glass!

Pliny the Younger Animated Gif

Pliny the Younger Animated Gif

I grabbed my beer securely and began to walk to the patio. I took a quick sip; just in the off chance that an earthquake would strike and cover me in falling beams, I was at least going to get one mouthful of Pliny the Younger first! I did my best to move through the brewery, avoiding the mobs of people and avoid spilling even a drop of this rare and special beer. Thankfully there was no earthquake, but there was Juan. Juan is one of the best things about the Tustin Brewery, he is always wearing a smile, cracking a joke and slapping you on the back with the strength or Hercules and Oden combined as his way of saying, great to see you, let me rearrange your vertebrae for you. As he turned and saw me approaching, I remember thinking f#&k, here comes Juan.  A smile came to Juan’s face and I knew exactly what was next. I grabbed my Pliny the Younger as securely as I could with both hands; all I could do was hope that the collateral damage would not be too severe. WHAPPP, the shock of Juan’s hand on my shoulder sent reverberations down my arm, to my elbow and finally to my hands.  As hard as I tried, I could not stop the glass from bucking. A small wave of the cold beer rolled over my hand and slapped the hard tile floor. Juan just smiled and laughed as he saw dismay form on my face. He was right, it was a little funny. After all, I still had a nearly full glass and this was a time for celebration. After saying hello to Juan, I quickly made my way to the patio before he could shake any additional beer from my glass.

There was a small table available on the crowded patio; I set my beer down and took a seat.  This was it. I braced myself for disappointment. Recently I had watch the movie Dunkirk. I had heard so many wonderful reviews and yet when I watched it I was left so disappointed. It looked great, but there was not much to it. Was Pliny the Younger going to be the Dunkirk of beer I wondered? 8 years is a long time to wait for something, I have had Pliny the Elder probably 40 times in that time period, was this really going to be any better? Often times, Triple IPA’s are terribly unbalanced and sometimes painful to drink, would that be the case with Pliny the Younger?


Pliny the Younger

Pliny the Younger Russian River Beer

I am not one of those people who likes over the top beer reviews. You are no going to hear me say things like it washed my taste buds with the pleasant essence of virgin pine drippings, or the mouthfeel is reminiscent of  water from pristine deep water brackish caves. So here it goes.  I rate Pliny the Younger a 100 out of 100. I was not let down in anyway. I had extremely high expectations and it exceeded every one of them. Pliny the Younger is hands down the most well balanced triple IPA I have ever had and more importantly the most well balanced beer I have ever had.  Simply put, it was perfect. This sounds a little lame as I write it, but the mouth feel was exceptional.  As I slowly drank it, trying to appreciate every sip, I analyzed it; wondering if they added salt to the mash and how much; what hops were in the boil and what did they dry hop it with. I wanted to make it or myself!  The volume of my glass kept being depleted with each taste and I just kept hoping I would not have to wait another 8 years for my next glass.  If you have the chance to get some, even if it will be a pain in the ass, in my opinion it would be well worth it.

Cider, The Gateway Drug To Beer!

Hey, I thought that West Coast Brewer was a home beer brewing site, why are you making cider?

Yes, it is a homebrewing blog; but I figure that cider making is in the same wheelhouse and that I would share what I learned on the topic in case anyone else was interested in making a batch. The idea of making a batch of cider came to me when I was considering what I wanted to fill my next batch of kegs with. My goal was to having something for everybody. That got me thinking. We all know one of those people who is “Not a beer person”. Whenever I hear someone mutter those words I immediately think that they just have not found the right beer or had a bad beer experience where instead of someone easing them in to beer, they pushed a double IPA on them or gave them a poorly made sour.  Although Hard Cider is not beer, many people consider them to be somewhat synonymous with one another and it has to be one of the most approachable alcohols on the planet. It has a low ABV, it is relatively sweet, can be bubbly and has next to no bitterness; it is the gateway drug to beer!

Making cider is easy! Making good cider is a bit more difficult but not too hard if you have the right equipment and a little bit of patience. The good news is that if you are a home beer brewer, you probably have just about everything that you will need in order to make a batch of cider.  If not, do not worry, I will go over all of that with you. So you have a few options.  If you are happy with mediocrity, I highly recommend you purchase a cider making kit! For approximately $45, you can purchase a Mangrove Jack apple cider kit and create a 5 gallon batch of hard cider that will produce somewhere between a bad and mediocre cider. These kits come with all of the ingredients that you will need, include instructions and make the process very simple. It may not be the best cider you have ever tasted, but it you have never made cider before and have no home brewing experience, this may be a great way to go.  You can purchase a Mangrove Jack Apple Cider kit here. You can also find some helpful information on making cider from a kit at HomebrewingDeal.com.

If you have higher aspirations and want to try and create a good to great cider then keep reading and I will do my best to help you reach that goal. The batch of cider that I ended up making was a hard apple cider aged on oak and Oregon Sour Cherries. To make a good cider it is critical to start with the best ingredients possible.  Your base ingredient will be apple cider.  If you have it available to you from a local apple orchard, pick up fresh pressed cider! If like most people you do not, a great alternative is Musselman’s 100% Apple Cider.  It can be purchased at Walmart for approximately  $4.50 a gallon.  It is pasturized, so there are no additives that will negatively impact your cider and is a great compromise between cost and quality. You need minimal equipment to make cider and the most important item is a fermenter that can hold approximately 7 gallons.  If you can swing the price, I highly recommend a Stainless Steel fermenter that will last you a life time.  You can purchase a 7 Gallon Stainless Steel Brew Bucket Fermenter here for $199 with free shipping.  You will also need to bottle or ideally keg your cider when fermentation has completed.  Items for kegging and bottling cider can be found here at MoreBeer for a reasonable price and ship free on orders of $59+. If you need any specific suggestions or help with this, please leave a comment or shoot me an email and I would be happy yo help you.  Okay, so here is the recipe that I used to make my cider:


How to guide to making hard cider

How to guide to making hard cider


Step 1: Prepare for fermentation

Clean and sanitize your fermenter and anything that will come in contact with you cider.  If you need a food grade sanitizer, I highly recommend Star San Sanitizer.

Add 5 Gallons of Musselman’s 100% Apple Cider to your fermenter
Add 1 (12oz) container of 100% frozen apple juice concentrate (make sure that there are no preservatives aside from Ascorbic Acid(Vitamin C))
Add 2 Tablespoons of Pectic Enzyme (for clarity)
Add 1 Tablespoon of Yeast Nutrient (for yeast health and a strong fermentation)
Make sure that your cider is at an ideal fermentation temperature for your yeast strain (typically 68 F)
Add your yeast, I like Wyeast 4766 or Cote Des Blancs dry wine yeast; both are great choices for cider yeast.
If possible, take a specific gravity reading. Make sure that your gravity is above 1.045 or else you may have stability issues with your finished cider. You can add additional apple juice concentrate if needed to boost your gravity.
Next seal your fermenter, place it in a temperature controlled location and let it fermenter for 2-3 weeks until your fermentation has completed.

Step 2: Post Fermentation

Once your fermentation has completed there are just a few more tweaks.
Add 1 Teaspoon of Malic Acid  (gives the cider a little zip) You may want to add a little more or less depending on your taste


Step 3: Back Sweeten Your Cider or Add Fruit (Optional)

At this point your cider will probably be somewhat dry. I suggest that you back sweeten it to help highly some of the apple flavor it in. In order to do so, you will need to render the yeast unable to ferment the new sugars that you will be adding to the cider. To do so conduct the following steps:
Crush 5 campden tablets and mix it with 1 teaspoon of potassium sorbate  and it to your cider.  If possible, drop your fermentation temperature down to 45F.  Wait 24-48 hours.  At this point your fermentation should be completely halted.
A 1 (12oz) container of 100% frozen apple juice concentrate (make sure that there are no preservatives aside from Ascorbic Acid(Vitamin C)) for sweetness and flavor
Add fruit if desired.  I added 2 can of Oregon Sour Cherries
Let the cider age at 45 F for an additional 7 Days

Step 4: Transfer Your Cider To The Keg

I use a keg partially because I am lazy and partially because it is the best choice.  If you want your cider to be carbonated and you chose to back sweeten or add fruit to it, kegging is your only reasonable choice. Otherwise you will need to add yeast to it once again to force carbonate it in the bottle and risk both over carbonating and undoing all of the effort you placed in to back sweetening the cider in the first place. If you keg, you are able to bottle once the carbonation level that you desire is reached and the cider will come out much cleaner!

Clean and sanitize your keg and anything that will come in contact with the cider.
Transfer your cider from the fermenter to the keg, doing your best to avoid drawing in any of the particulates that have settled to the bottom of your fermenter.
Add oak sticks or oak cubes to the keg for additional complexity if desired. I think it adds a nice touch to the cider. Oak takes time to impact the flavor of your cider, so as it ages in the keg its flavor will become more noticeable.
Let the cider carbonate and condition in the keg for approximately 2 weeks. Your first few pours from the tap will be a little cloudy but after that it should begin to clarify rapidly.

That is it. If all goes well, you should now have a delicious glass of cider in front of you!  Please let me know how yours turns out or if you have any comments, questions or suggestion.
 

The Kegerator Has Been Filled

The Kegerator has been filled to capacity once again thanks to lots of holiday home brewing. I am carbonating a hazy New England IPA and MoreBeer’s Hop Gatherer IPA. I plan on reviewing them in a week or two once they are fully carbonated and have some time to condition.

I dry hopped both of these batches, but what was unique about the Hop Gatherer IPA beer kit is that it came with something I had not previously used, Chinook distilled Hop oil. It comes in a tiny vial but smells incredibly potent! It is used as an alternative to dry hopping but I decided to use it in conjunction to help really develope the aroma in this West Coast IPA!

Distilled Hop Oil

Distilled Hop Oil

As you can see from the photo above, the vial is tiny and only holds about 10 drops or so of the distilled Hop oil. I dumped it right in to the keg immediately prior to putting the hatch on the keg to carbonate. The oil smelled strong to say the least. I put the empty vial on a shelf and my garage still smells like hops, which makes me happy; talk about aromatherapy!

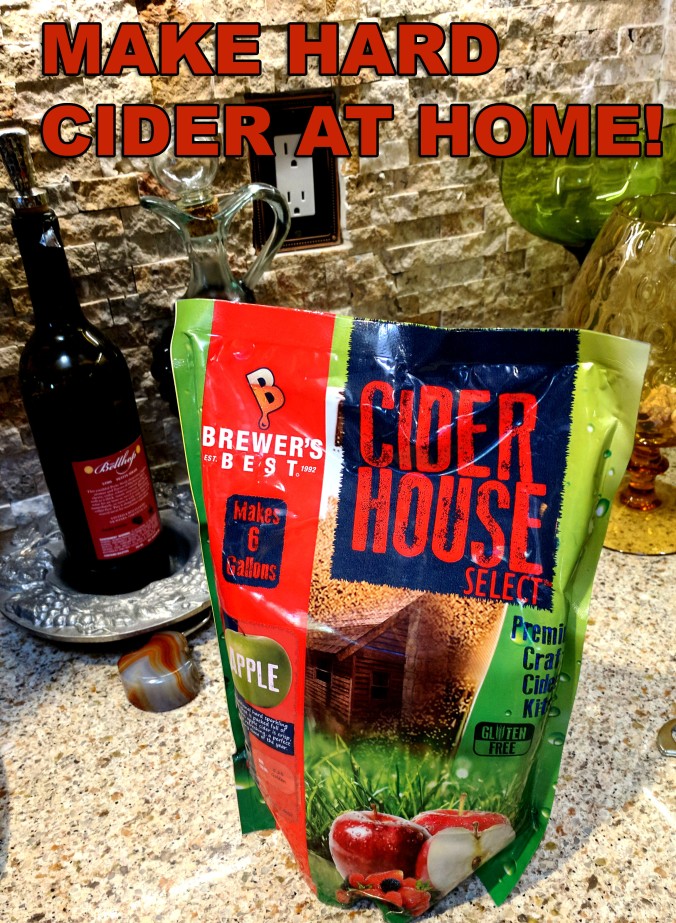
Making Hard Apple Cider At Home!

How to make hard cider at home #cider #brew #brewing #hard #howto

How to make hard cider at home #cider #brew #brewing #hard #howto

I have been an avid home brewer for over 8 years now and In that time I have probably brewed more than 70 batches of home made beer. I will always love beer and brewing it, but sometimes it is fun to trying something different. Not to mention, sometimes the different seasons of the year impact what my taste buds desire. With fall is upon us, I figured I would try brewing up a batch of hard apple cider and add a little diversity to my kegerator selection!


So I started to do a little research on home cider making, and just like home brewing, there are a few ways to go about making cider at home. Some methods are simple and others are a little more complicated and require more equipment. Since this is my first time trying my hand at home apple cider making, I figured I would keep it simple and use one of the home apple cider making kits that are available on the market. One of the great things about these home cider making kits is that they include almost everything you need to get started making your first batch of cider! One thing to be aware of is that most of the cider making kits that I checked out do require you to supply dextrose / corn sugar; so if that is the case with the kit you purchase, make sure you purchase some. You can also pick up optional items to personalize your home cider making recipe. For instance, I also decided to add some medium toast American oak cubes to my batch of home made hard apple cider to add a little additional complexity to my cider; it is not required to make a great hard cider but I think it will be a nice touch.


Here is a list of the items that I purchased for my batch of home made hard apple cider. You can click any of the links for more information or if you need to purchase any of the items:

1) Cider House 6 Gallon Home Cider Kit
(There are a variety of kits available, this was one I found at a good price)
2) Wyeast Liquid Cider & Mead Yeast
(The kit actually comes with yeast, but I figured I would step things up a notch with some specialized liquid yeast)
3) Toasted American Oak Cudes
(Not required but should enhance the complexity of the cider)
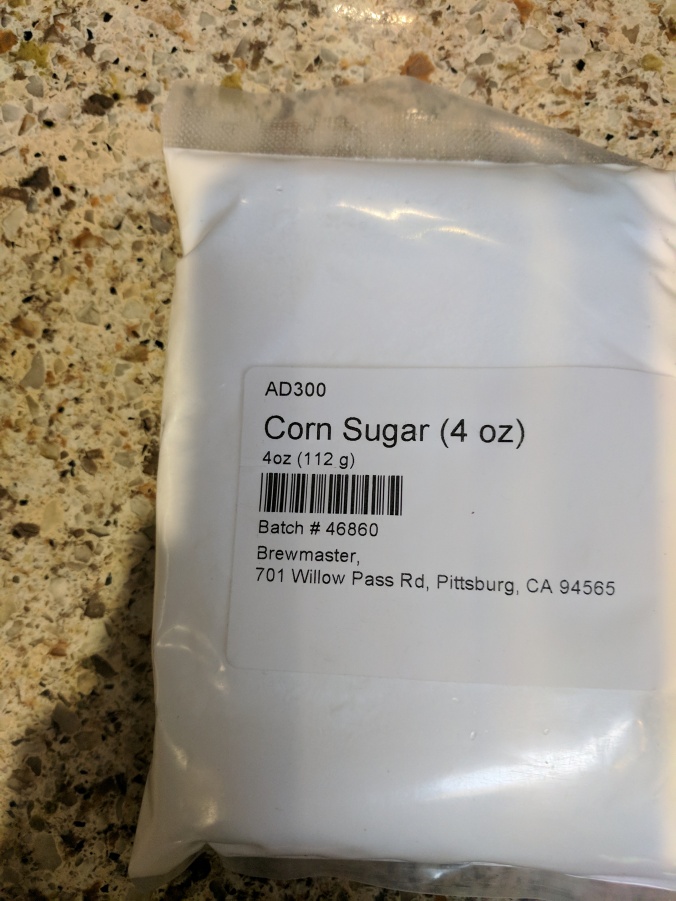
4) 3 LBS of Corn Sugar / Dextrose
(The recipe called for 2 LBS but I like to live on the edge)

STEP 1 – Read Your Cider Making Instructions

I know it is boring and you just want to get started, but…. it is always wise to read all of your instructions and home cider making recipe first.  Sometimes your kit may not include all of the ingredients you need or you may be missing an import piece of hardware that you will need to make your cider and this is your chance to determine that before it is too late!  You will probably also enjoy the process more if you understand what it is that you are doing before you begin.  Now that we have have that out of the way, we can get down to business and make some hard apple cider!


STEP 2 – Boiling Water & Sugar

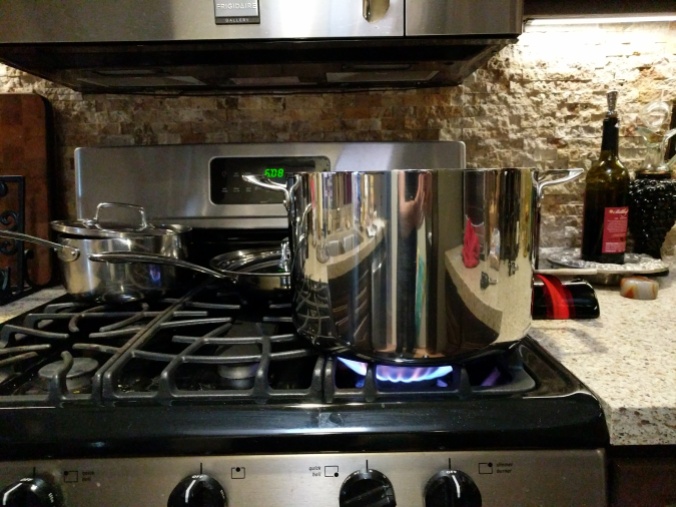
After reading all of the directions that were included with my home cider making kit, I was pleased to learn how simple the process was. Step #1 was to boil 1 gallon of water with the dextrose that I purchased. The dextrose that I used was actually initially purchased for carbonating beer, but since I almost always keg now, I decided it to put it to good use for my batch of home made hard cider!

Corn Sugar - Dextrose for making cider at home

Corn Sugar – Dextrose for making cider at home


I used a large stainless steel kettle to heat 1 gallon of water.  Once the water was hot, I began to add the dextrose and slowly stir it.


How to make hard cider #cider

How to make hard cider #cider


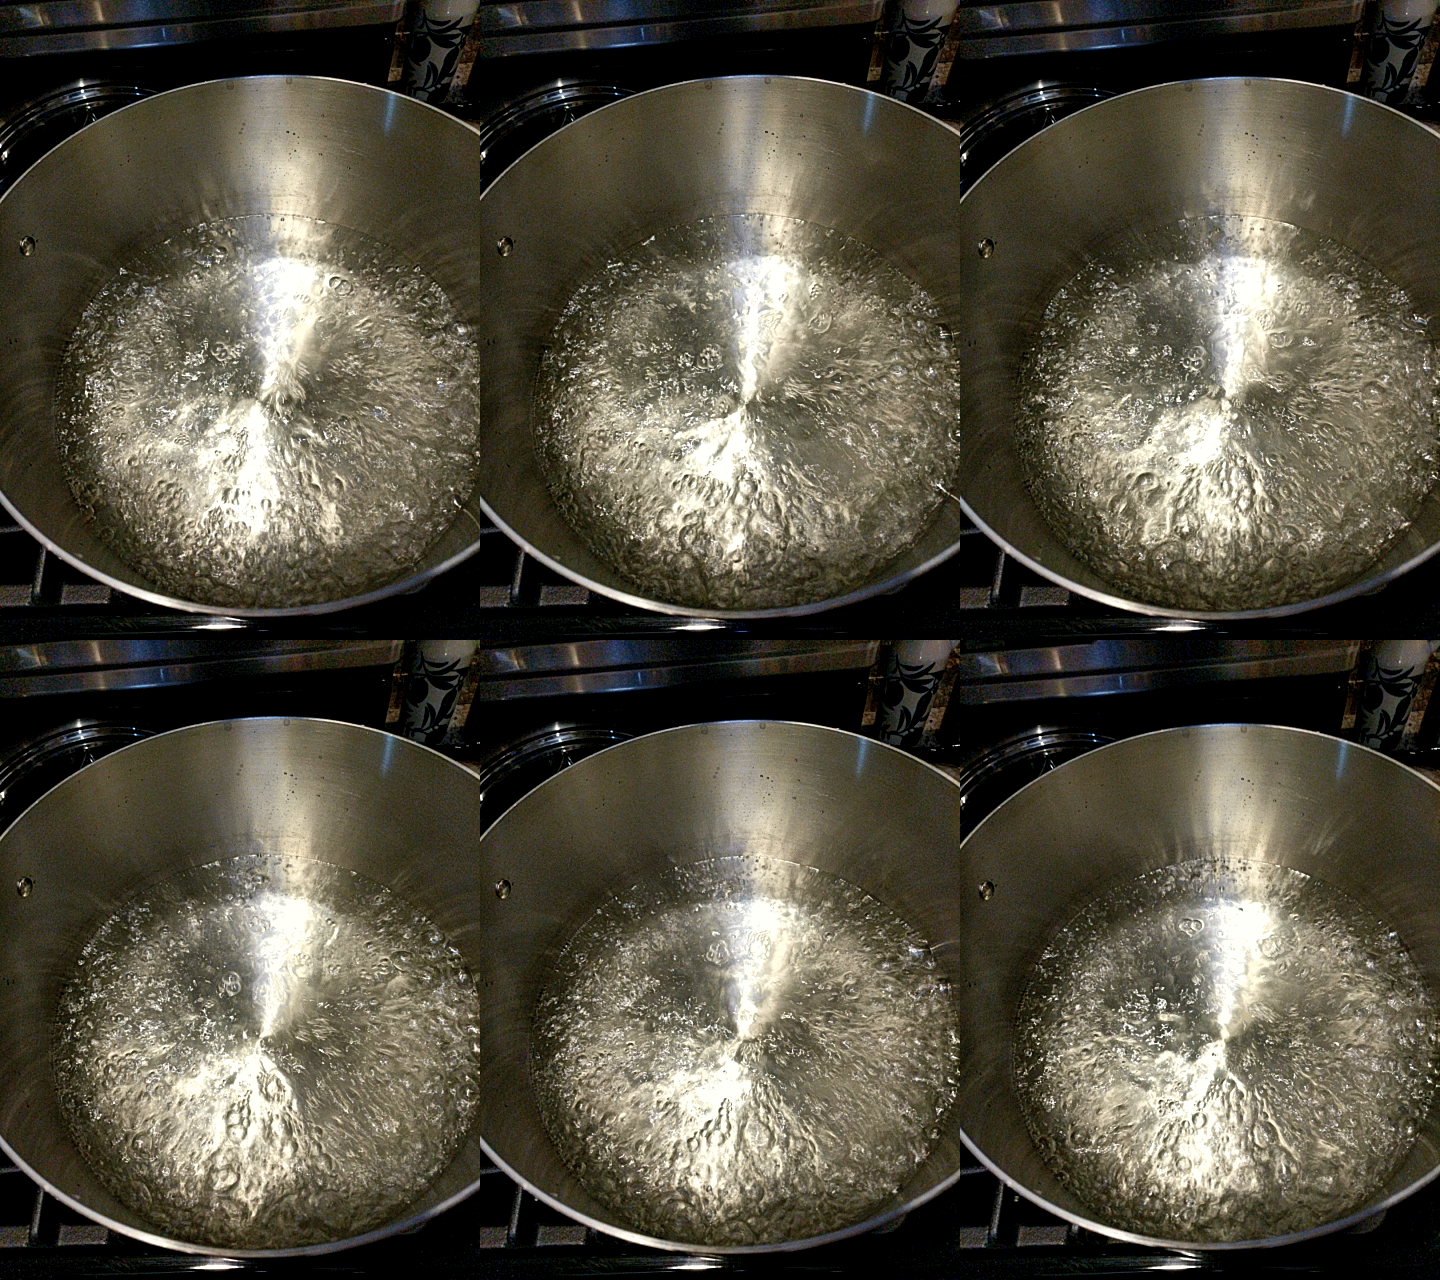
Make sure that you use a large enough pot to boil the water and dextrose. If the boil becomes to rapid, you can have a boil over and those are no fun to clean up!  I let my water and sugar boil for approximately 10 minutes and then turned the burner off. At that point your should let your water and dextrose solution cool down.  You can either let it sit in an ice bath with a lid covering the kettle, use an immersion chiller or add some ice to the kettle; just be careful to keep everything sanitary.


Animated Cider Making Gif

Animated Cider Making Gif

STEP 3 – Clean, Sanitize & Prepare Your Fermentor


Just like home beer and wine making, cleanliness and sanitization are critical to making great cider! At this point you will want to make sure that you clean and then sanitize anything that will come in contact with your cider or water dextrose solution! Both the water and apple cider concentrate are loaded with sugars and any bacteria or wild yeast strains lurking about would just love to get hold of it! So make sure you sanitize your fermentor and any implements that will come in contact with your home made cider.  I recommend Star San, but you can use any odorless and tasteless food grade sanitizer.


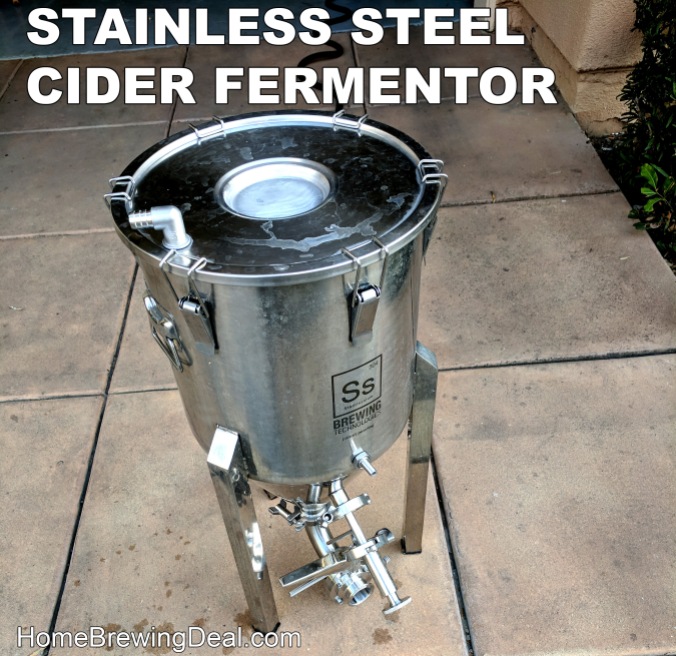
The cider fermentor that I use is a 7 gallon stainless steel fermenter which I first cleaned with PBW and then sanitized with Star San. If you are looking for an incredible cider fermenter, I highly recommend this one and you can get it for a great price and with free shipping. You can also use plastic fermentation buckets, or glass carboys as cider fermentors. If using a glass carboy, just be very careful not to add boiling hot liquids as the fermentors can shatter making for an incredibly dangerous situation! There are also stainless steel 7 gallon brew bucket fermenters for just $229.


Stainless Steel Cider Fermenter #cider #fermenter #fermentor

Stainless Steel Cider Fermenter #cider #fermenter #fermentor

STEP 4 – Add Your Apple Cider Ingredients To The Fermentor


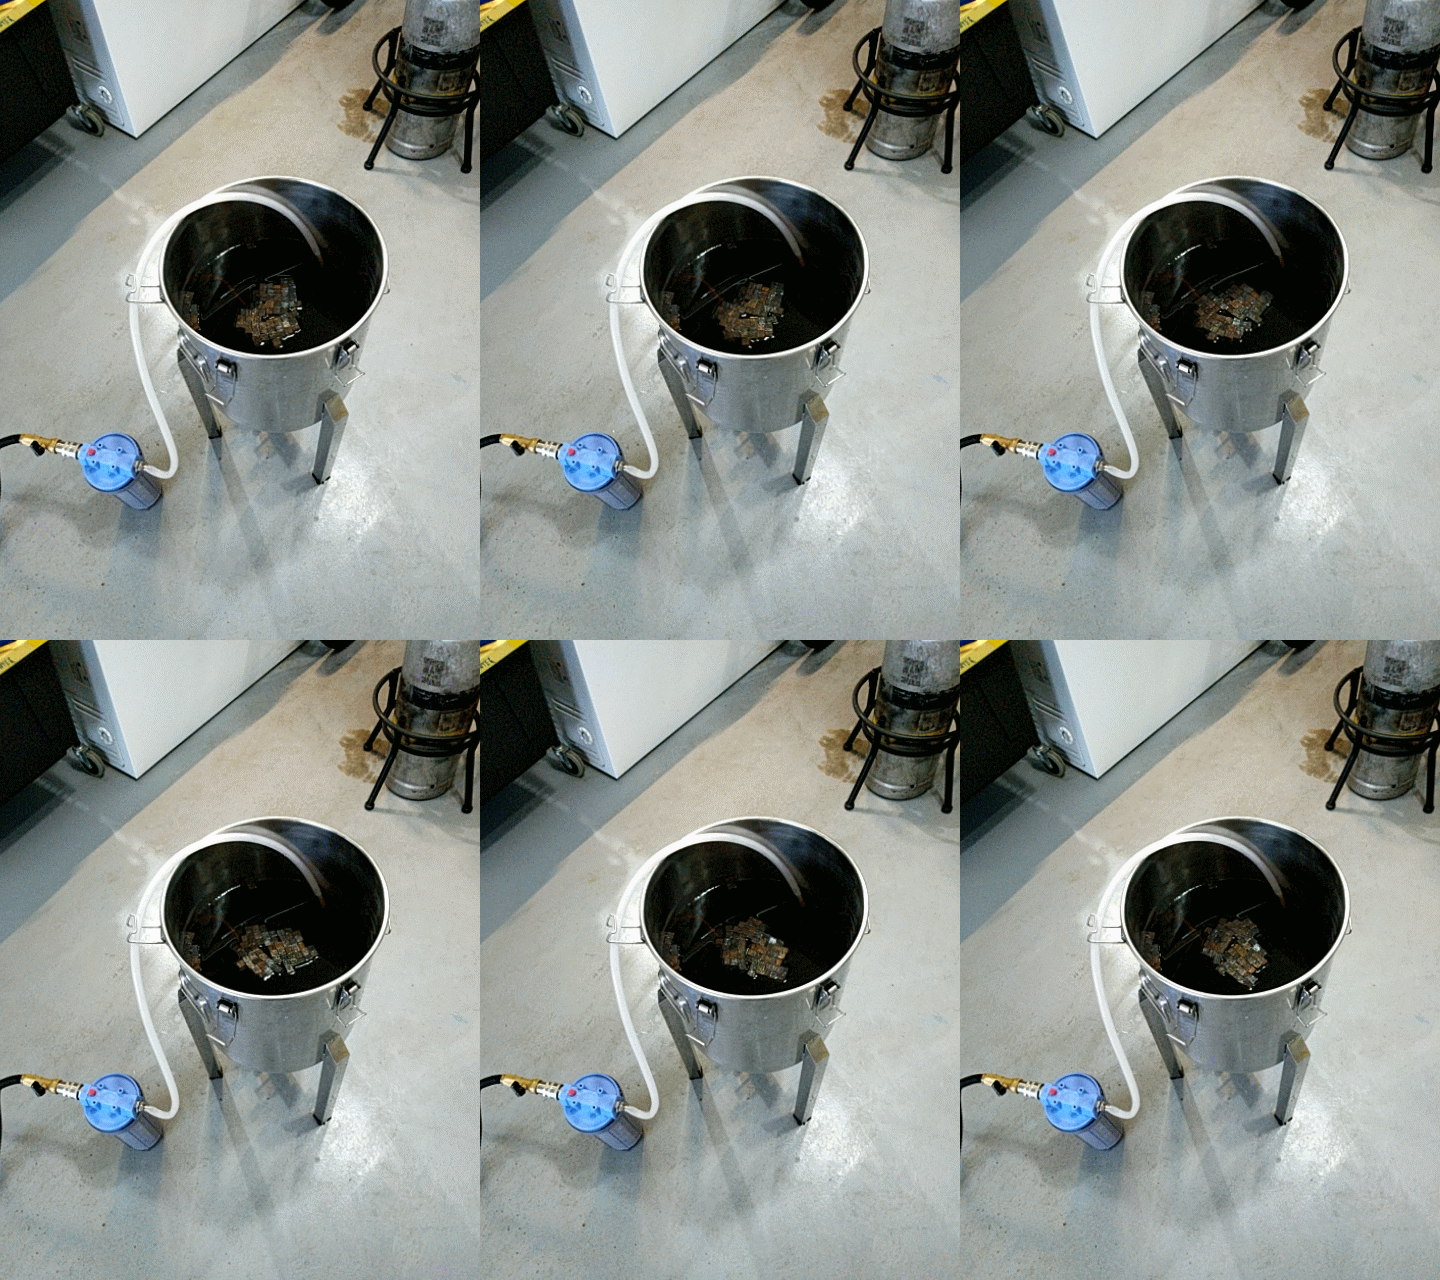
The next step is to add your different home cider ingredients to the sanitized fermenter.  I first added in my boiled water and dextrose solution.  Be careful as this still may be very hot!  Next I added in the package of apple cider concentrate that came with my kit.  Make sure that you sanitize the outside of the package and even the scissors that you use to open the kit, just to be safe! After pouring in the mixture, rinse the pouch with filtered and dechlorinated water (I use a carbon filter and seen in the photo, which highly reduces chlorine levels); and add the water to the fermentor.  I then tossed in my oak cubes and filled the fermentor to the 5.5 Gallon level. The home made cider directions recommend filling it to the 6 gallon mark, but as I mentioned earlier, I like to live on the edge! You will want to make sure that your fermentor can support at least 7 gallons if not more!  Keep in mind, the more sugar you add and the less water you add, the stronger your cider will be!  So use caution!


Animated Gif On Making Hard Cider At Home #hard #cider #home #brewer #making #how #to

Animated Gif On Making Hard Cider At Home #hard #cider #home #brewer #making #how #to

STEP 5 – Check Your Cider Temperature


Yeast is a delicate and will parish if the temperature of your cider is too high! The ideal fermentation temperature for cider is between 65F – 70F.  So, cool your cider down to no more than 70F before you add your yeast to the cider mixture. You also do not want your temperature too low or else the yeast will not activate, so try to get it above 65F.  I use a converted chest freezer with a digital temperature controller as a fermentation chamber so that I can keep a stable fermentation temperature.  If you do not have access to one, do your best to keep your cider fermentor in an area that has a stable temperature of approximately 67F.  Keep in mind that the fermentation process generates heat and your cider will be warmer than the ambient temperature of the room that the fermentor is residing in.

STEP 6 – Add Your Yeast To The Cider


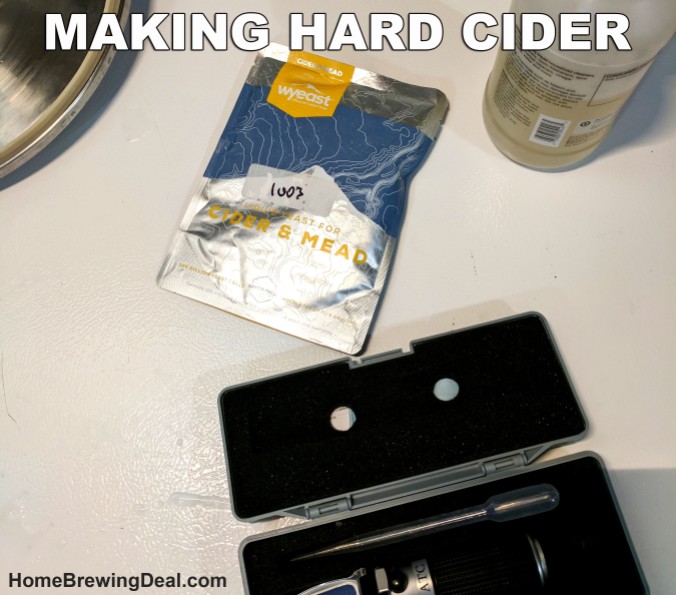
Next add your yeast to the fermentor! The fermentation process for you cider will take about a week to complete, but may take more or less time depending on a variety of factors including temperature, quantity of yeast, health of yeast, quantity of available sugar and type of yeast.


Brewing Hard Cider #cider #brewing


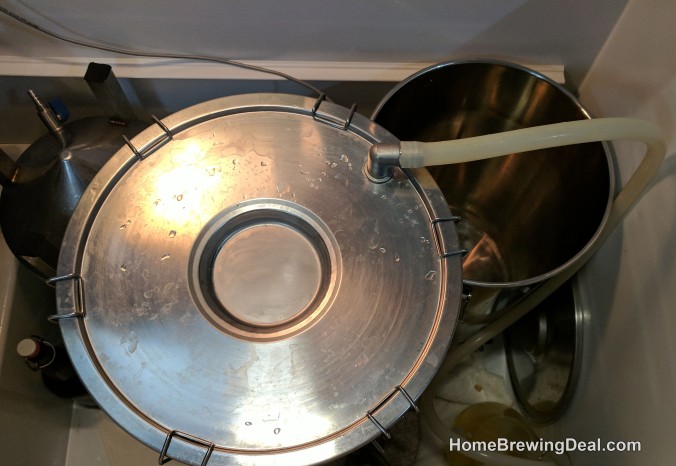
You should begin to see fermentation activity within 24-48 hours of pitching your yeast.  If bubbles are not forming in your air lock, your yeast may not have been healthy enough for fermentation and you will need to add new healthy yeast as soon as possible.  It is always wise to keep some dry cider yeast on hand, just in case this occurs.  Dry cider yeast is far more durable than liquid cider yeast.


Fermenting My Hard Cider #cider #fermenting #fermenter #fermentation

Fermenting My Hard Cider #cider #fermenting #fermenter #fermentation


After the fermentation is complete almost all of the sugars will have been converted over to alcohol and the cider will be very dry.  So at that point I will add a sweetener to the cider that the yeast in unable to convert.  This will help to intensity the apple flavors in the cider.  At that point I will also keg and carbonate my cider and it will be ready to server approximately 7 days after that.  Once completed I will post the results!


You can purchase everything that you need to make cider at home at MoreBeer.com.  Here are links to some of the items I use! MoreBeer is great because you get free shipping on any order over $59, they have some of the lowest prices available on home cider making ingredients and cider making equipment and incredible customer service!


Cider Making Ingredient Kits
7 Gallon Stainless Steel Cider Fermentor
Cider Yeast
Cider Oak Cubes


Home Brewing

Home Brew #homebrew

Home Brew #homebrew


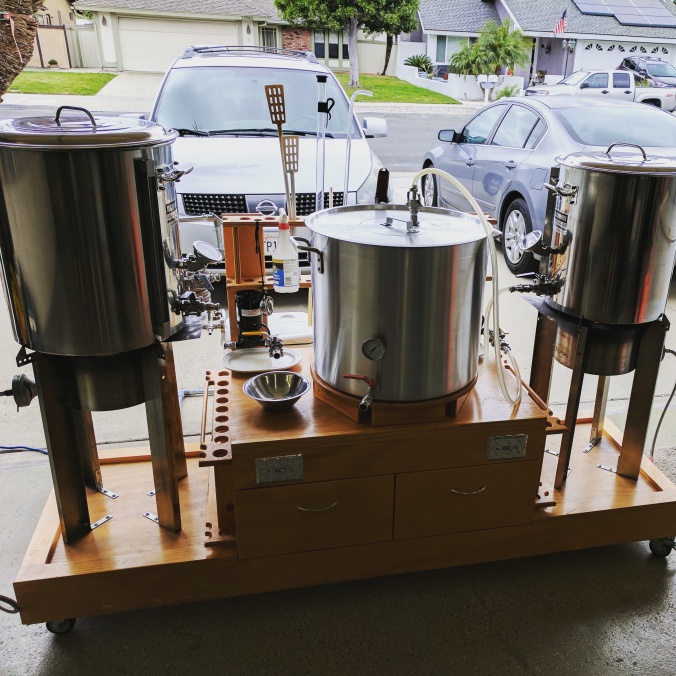
Recently I had the pleasure of brewing up a batch of home brew on one of my friends home brewing system. I always look forward to the opportunity to get another home brewers perspective on home brewing. I find that I learn a lot about the home brewing craft from examining other home brewers methods and practices.  Even better, both of us use similar home brewing hardware and like similar styles of beer so we can share home brew recipe tips as well.


Home Brewing Rig

Home Brewing Rig


One of the biggest differences in our home brewing systems and our beer brewing practices is when it comes to the mash. Where I have made my mashing process complicated (possibly over complicated) over time, doing my best to make sure my mash is at a specific temperature for the entire 60 minutes, he sets his mash temp, closes the lid and does not attempt to correct for any temperature loss over time.  By the time his mash has completed, the temperature in his tun has only dropped by approximately 6F.


My concern with a drop in mash temp would be that perhaps the finished beer would come out too dry or thin due to the lower average mash temp, the starches would only be converted to very simple sugars. Yet after sampling several of his beers, that did not turn out to be the case. I sampled 4 of his beers that day, varying from stouts to IPA’s and all of them were fantastic.  I would not describe any of his beers as too thin or too dry.


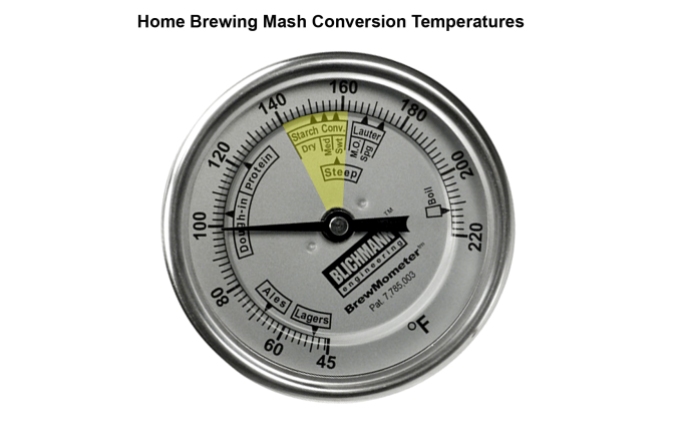
Home Brewing Mash Conversion Temperatures

Home Brewing Mash Conversion Temperatures


The image above is of my Blichmann BrewMomerter. I hi-lighted the segment that pertains to the mash conversion. As all grain home brewers, for the most part we mash at between 150-152 F to get a well rounded mash conversion. When I asked my friend if he was concerned with the temp dropping, he said that he felt that most of the starch conversion was occurring early in the mash process while his temperature was on target and that he had never noticed a degradation in the quality of his finished beer since he started conducting his mash in this manner. I am inclined to agree with him based on the high quality beer that he produces.


I think that sometimes as home brewers, out of our desire to brew “perfect” beer, sometime we go too far and over complicate things (or at least I do).  I am not saying to ignore your mash temperature or to only mash for 10 minutes. My point is more that modern varieties of beer have been produced for over 600 years, well before yeast was even discovered in 1857. Considering that our ancestors created beer with out having the benefit of such instruments as a Blichmann BrewMometer, perhaps there can be some flexibility when it comes to brewing.


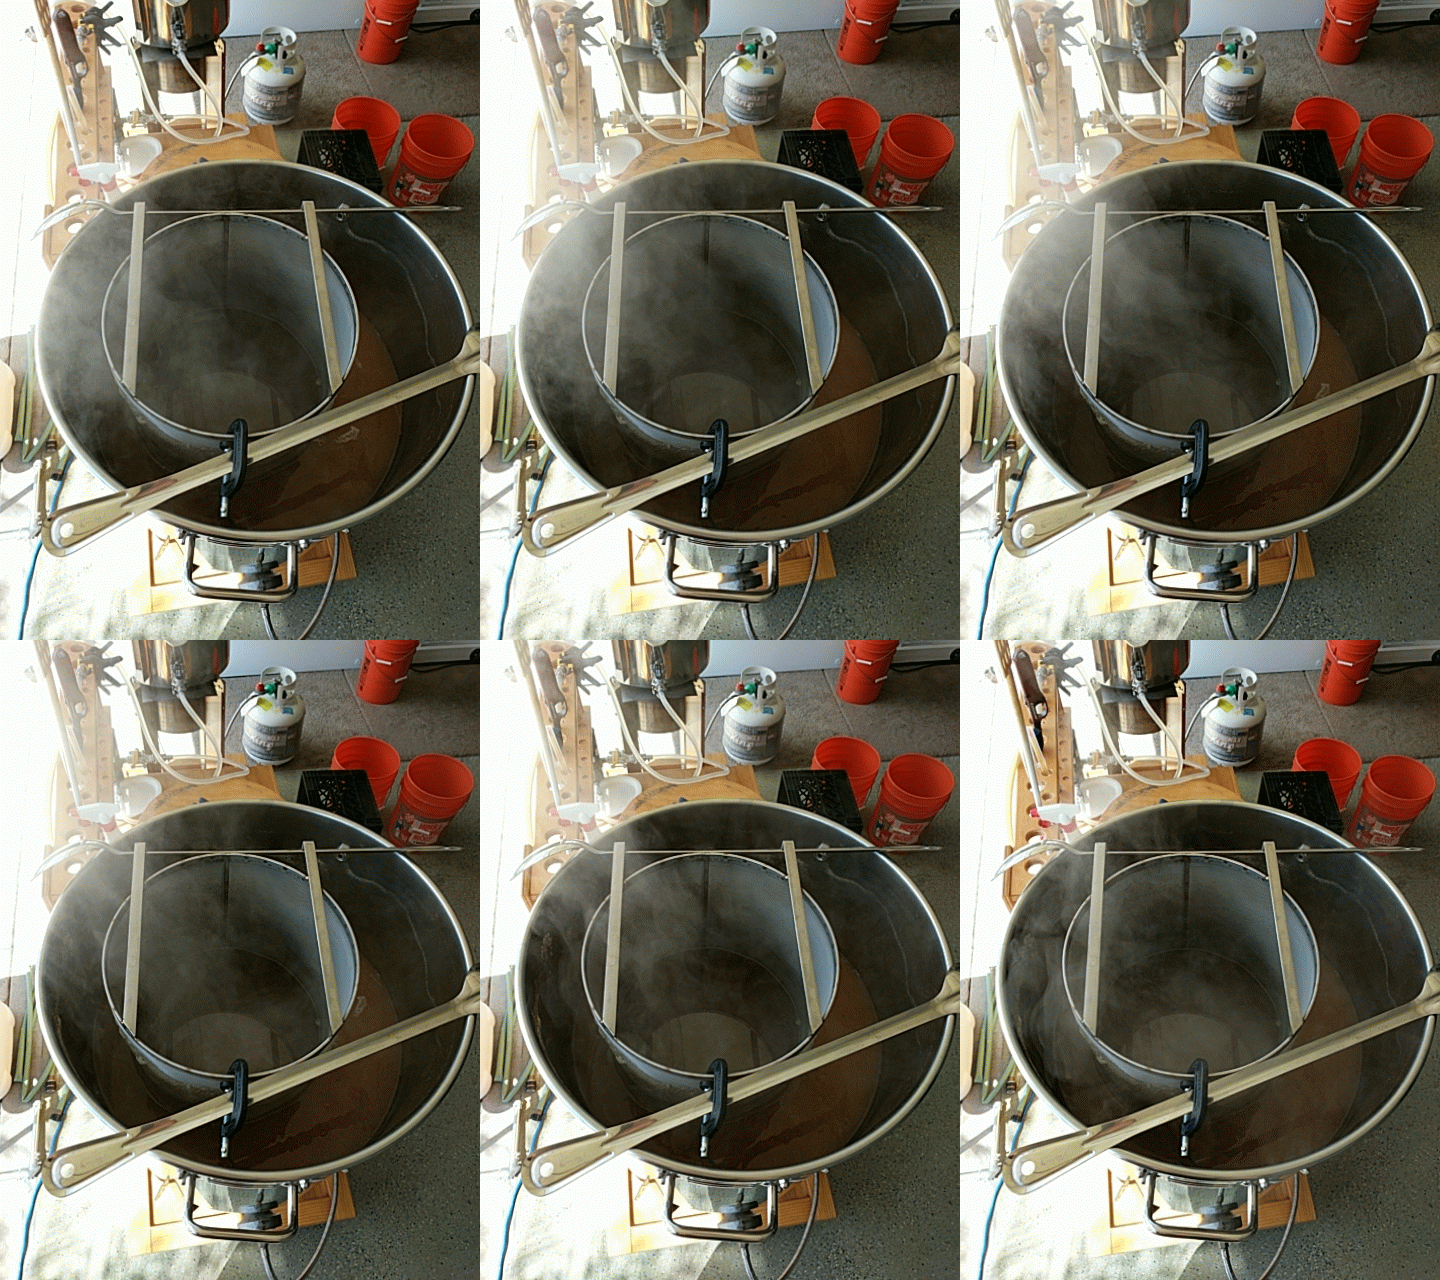
One of the home brewing items that he possess that I am pretty envious of is a large sized stainless steel hop spider.  When I say large sized, I mean large sized, this thing is giant as you can see from the animated image.  The photos were taken during the whirlpool process after the boil had completed. I have been trying to get a hop filtering system to work out on my home brew system for the last few batches with out a great deal of success.  I have been trying to overcome some challenges with clogging issues in my hop filter and he shared some great advice with me.  He said that in order for a hop filter to work properly and to get similar hop utilization compared to not using one, you need to have a hop filter that is at least half the diameter of your home brewing kettle. The size of the filter made a dramatic difference. I could see the wort moving around inside of his filter and he had hardly any clogging issues.


Home Brewing With A Hop Spider Animation

Home Brewing With A Hop Spider

I look forward to brewing with him again to see what else I can pick up from him. He has mastered the art of the Hazy IPA so I hope to pick his brain on that next.

How to Build a Kegerator

Guide on how to convert an old refrigerator in to a kegerator #kegerator #guide #howto #DIY

Guide on how to convert an old refrigerator in to a kegerator #kegerator #guide #howto #DIY


For the last several years, I have been using a boring old white refrigerator to store my kegs. Originally when it came time to purchase one, I was just looking for the best deal out there on a refrigerator that could keep my homebrew cold. I have been serving my beer from picnic \ cobra taps that sit lose on top of the kegs in my fridge. A couple of weeks ago I decided to take the keg fridge to the next level and convert it to a full fledged Kegerator with for taps to accommodate all of my kegs. After ordering the beer tap hardware at MoreBeer and taking a trip to the local hardware supply shop, I had everything that I needed to begin my work.


My goal for this homebrewing blog entry is to list out all of the basics of what you will need to conduct the process yourself but I am sure to miss something and if you need any specifics please feel free to ask; I am happy to help if I can.  Please keep in mind that I am not a carpenter, engineer or machinist; so there are probably 10 better ways of doing this, I am just trying to share my experience in case it helps someone else out.


Step 1 – Ordering your gear!
I figured that if I am going to take the time to do this project, I was going to do it right!  Recently MoreBeer started to carry Intertap stainless steel beer facuets – tap, which are basically the Holy Grail of beer taps and the best beer faucets currently available!


Intertap Stainless Steel Beer Faucets, Shanks and Beer Taps! #intertap #beer #taps #faucets #stainless #steel

Intertap Stainless Steel Beer Faucets, Shanks and Beer Taps! #intertap #beer #taps #faucets #stainless #steel


I chose these intertap beer faucets for a few different reasons.  For one, they offered an all stainless steel faucets which is important to me because I want it to last, I want my homebrew beer serving to be as sanitary as possbile and I do not want to be worrying about releasing strange metallic particulates in to my beer like I do when using an old chrome tap that erodes after time. Another great thing about  these Intertap beer faucets is that they are forward sealing and with forward-sealing faucets the faucet keeps beer in it so the inside doesn’t have a chance to get sticky. This makes cleaning your draft beer system far easier. It also reduces the chance of off flavors transferring to your beer while you are pouring. One of the things that sets Intertap beer taps apart from other forward sealing beer taps is that Intertap faucets use a sliding shuttle that guides the internal o-ring into the perfect position every time. The Intertap stainless steel faucets are also modularly designed  allowing you to add helpful items like a ball lock spout, stainless steel growler filling spout and an elongated stout beer spout! They have two varieties of beer faucets in all stainless and 1 features a flow control lever.  I ended up getting one of the stainless steel flow control beer faucet and three of the standard stainless steel beer faucets.


MoreBeer has the best price I have found for Intertap Faucets and they also offer free shipping on any home brewing equipment or supply orders over $59.  Here are links to them as well as links to the anti-microbial beer line which I also highly recommend. Do not forget to pick a shank for each beer faucet, I got the 4″ shanks and they have me plenty of extra room to run them into my refrigerator door.


Intertap Forward Sealing Stainless Steel Beer Faucet


Intertap Forward Sealing Stainless Steel Beer Faucet with Flow Control


Intertap Stainless Steel Beer Faucet and Beer Tap Shanks


Ultra Barrier  Antimicrobial and PVC Free Beer Tubing


West Coast Brewer Beer Tap Handles

West Coast Brewer Beer Tap Handles


For now, I am using chalkboard tap handles, which make it convenient to remind me which beer is on which which tap in case I consume a few too many and can no longer remember. At some point I would like to design a handle for each one of my home brewed beer that I make;  but for now, these look great and are very functional tap handles.  They come in both chalkboard style tap handles and white board dry erase tap handles:


Chalkboard Beer Tap Handles


Whiteboard Dry Erase Tap Handles


Depending on what draft beer equipment you are starting with or if you have anything at all for that matter, there may be a few other items that you want to pick up, such as a CO2 manifold (which permits you to dispence CO2 to multiple beer kegs from one tank or regulator), homebrewing beer kegs, a CO2 Tank and regulator. Here is a link to a great place to start if your are looking for an entire draft beer setup or just random draft beer and keg items:


Draft Beer and Keg Equipment


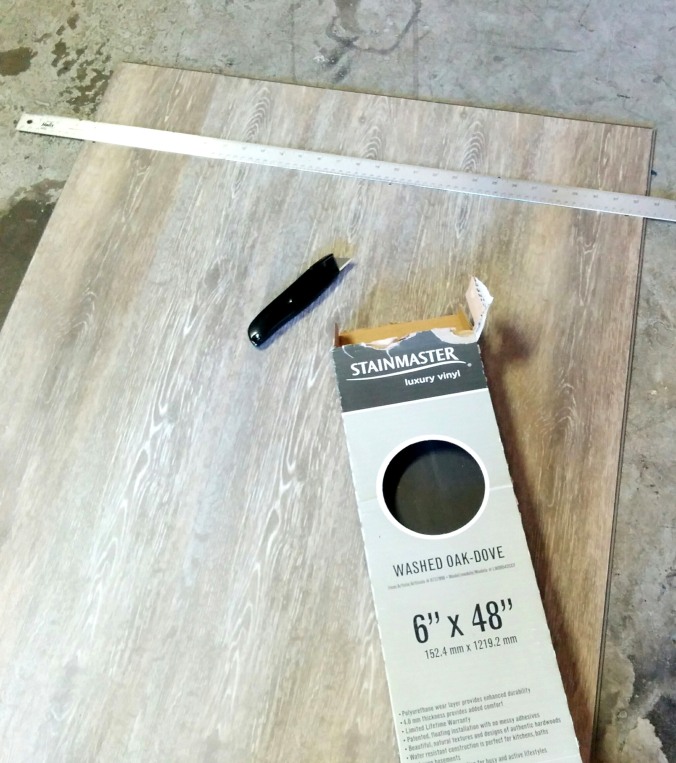
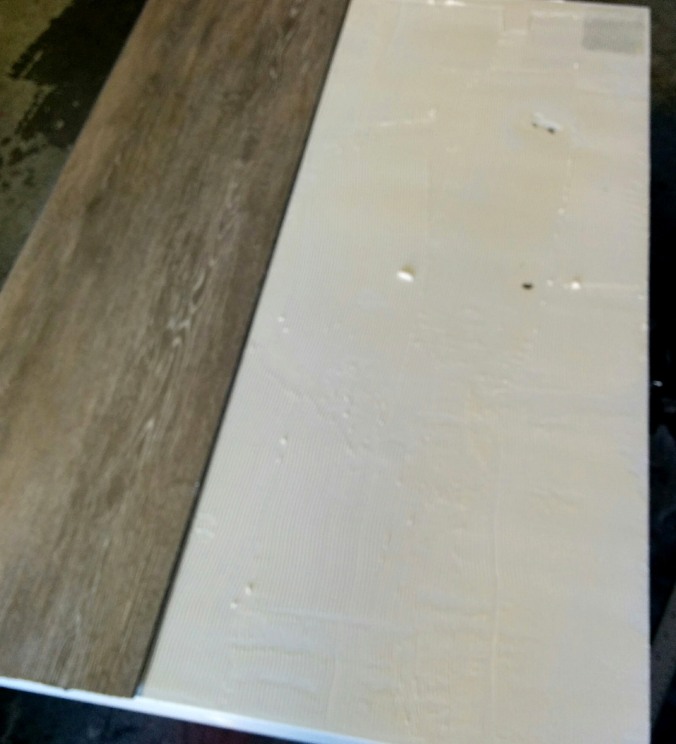
Those were the items that I picked up at MoreBeer, the remaining items I purchased at my local Lowes. I purchased 1 box of Stainmaster Vinyl flooring, which is great because it is resistant to liquid and stains; two things you need to consider when building your kegerator. Normal wood flooring does not do well with moisture so I would recommend avoiding it if possible.

I also picked up a small container of vinyl flooring adhesive, a plastic spreading knife, a razor blade cutting knife (to cut the vinyl flooring), a 1″ drill bill to cut the shank holes for the beer taps, chalkboard spray paint (for the refrigerator upper door), a 3″ wide plank of wood (to make a frame for the upper door), some wood stain to match the vinyl flooring, black duct tape for trim and a brushed aluminum kick plate to put on over the vinyl but under the beer faucets and tap handles.


Vinyl Fake Wood Flooring for my Kegerator Door

Vinyl Fake Wood Flooring for my Kegerator Door


Once you have all of your supplies in hand, it is time to get to work!  I started off my shutting off the refrigerator and giving it a good cleaning. Next I removed both of the refrigerator doors and all of the handles and hardware from the doors. I then sanded the refrigerator doors with a high grit sandpaper to make them more receptive to the vinyl adhesive and chalkboard spray paint. I did not remove all the paint but instead just roughed them up a bit. I then measured and cut the flooring so that it would fit my refrigerator door.  After making all of the needed cuts, I applied the adhesive to the lower refrigerator door. I waited approximately 10 minutes as per the instructions for my adhesive and began to put the vinyl planks in place. I tried my best to mix the planks up a bit so that it did not look to repetitive as can be the case with synthetic flooring.


Placing the vinyl flooring on the refrigerator door.

Placing the vinyl flooring on the refrigerator door.


These Stainmaster vinyl flooring planks were very easy to install. They locked in to place with one another crating a strong bond. After placing all of the vinyl wood planks, I put pressed down on each of the planks firmly and then set it to the side to allow it to dry.  Next I began work on painting the upper door, building the wood frame and preparing the mash paddle door handle for the kegerator.

After giving it a little thought, I figured that I would paint the upper door with a chalkboard spray paint. I was hoping it would add some contrast to the kegerator doors and would also give me the option of adding some notes about the beer being served or allow me to change the appearance of the fridge easily by modifying the drawing on the board. Painting the door was very easy and I gave it two coats of paint.


Chalkboard kegerator door

Chalkboard kegerator door


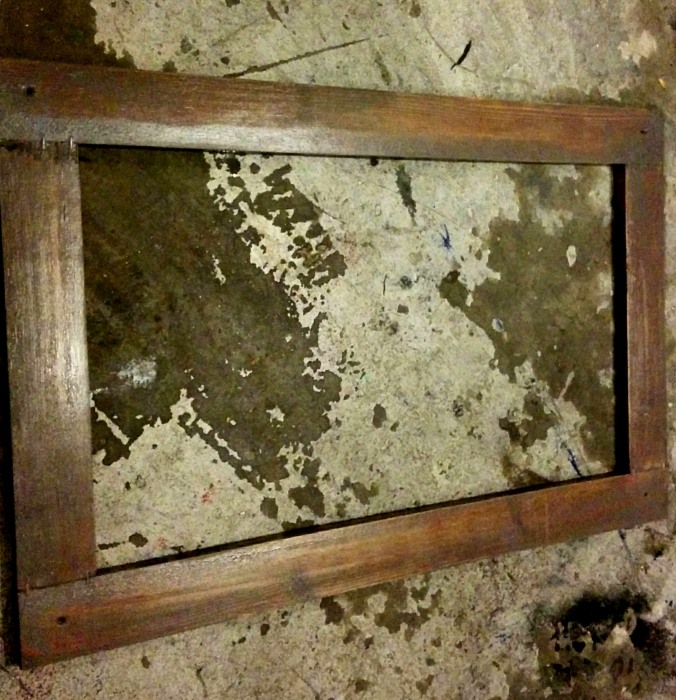
After the upper kegerator door was painted, I began my work on creating a simple frame to give it a border and add some cohesion with the rest of the kegerator. I searched for the cheapest 3″ wide plank I could find at Lowes and had them cut it to the appropriate sized lengths which they are always kind enough to do at no cost. I joined the pieces together with some wood glue and staples. I was going for a rustic look so was not too concerned with any rough edges or the staples showing. I sealed some of the gaps with putty, sanded it down a bit and then stained the wood. Lastly I applied a clear acrylic coat once the stain had dried.


Chalkboard upper door frame for the homebrewing kegerator

Chalkboard upper door frame for the homebrewing kegerator


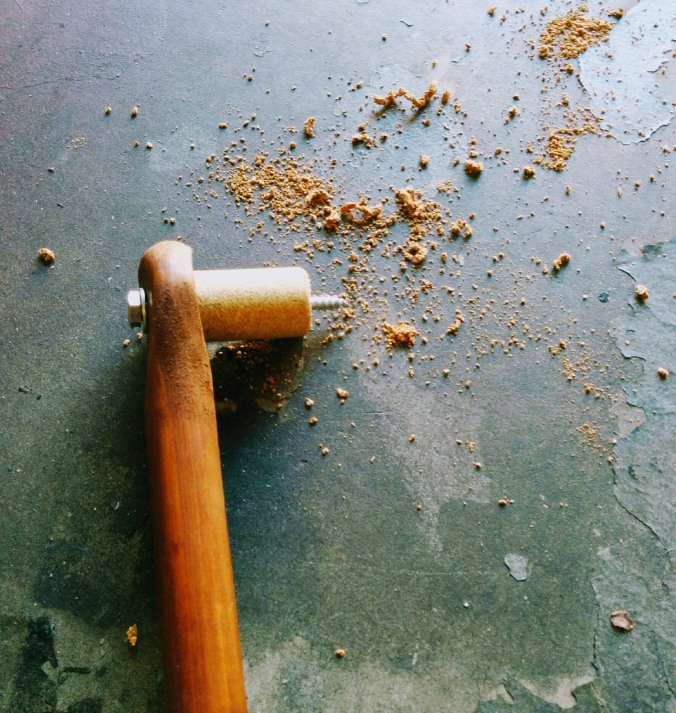
Next up was crating a door handle for my homebrew kegerator.  I wanted a door handle that said beer and homebrewing when you looked at it! So I decided to use an old mash paddle that I had hanging around the garage. I am really pleased with how it worked out, it is very functional and has the look and feel that I desired for my kegerator. I started by staining the mash paddle to a color that would contrast the wood on the doors but compliment the beer tap handles. I then drilled the mounting holes and used a wine cork as a spacer so that the top of the handle would have about an inch of gap between the kegerator door to make it more easy to open. I used a heavy stainless steel bolt to mount the top of the handle so that it would not pull off the door if one of my buddies starts lifting weights and pull the door open too hard.


Home Brewing Mash Paddle for a refrigerator door handle

Home Brewing Mash Paddle for a refrigerator door handle


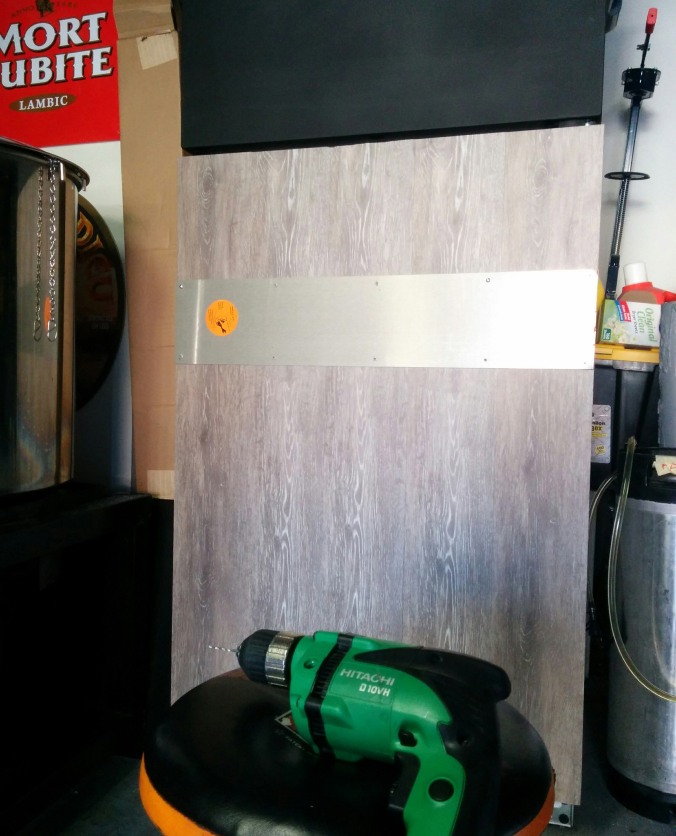
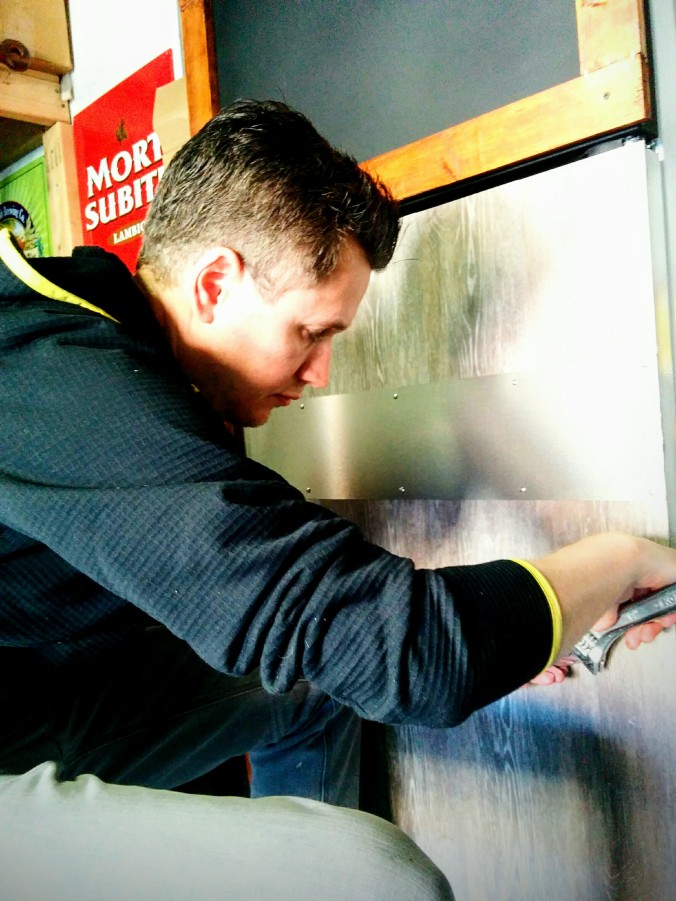
Once the kegerator door handle was completed I mounted the doors back on the kegerator after I had verified that the flooring had adhered well enough and the paint had dried. Next I installed the brushed aluminum kick plate to the lower door after measuring it and cutting the excess metal off with a pair of tin snips. I placed the kick plate in the center of the area where I was planning on installing my stainless steel beer taps. I simply drilled it in with screws that would be long enough length to make it into the door but not so long as to pass in to the interior of the kegerator.


Home Brewing Kegerator Stainless Steel Plate for Tap Handles and Faucets

Home Brewing Kegerator Stainless Steel Plate for Tap Handles and Faucets


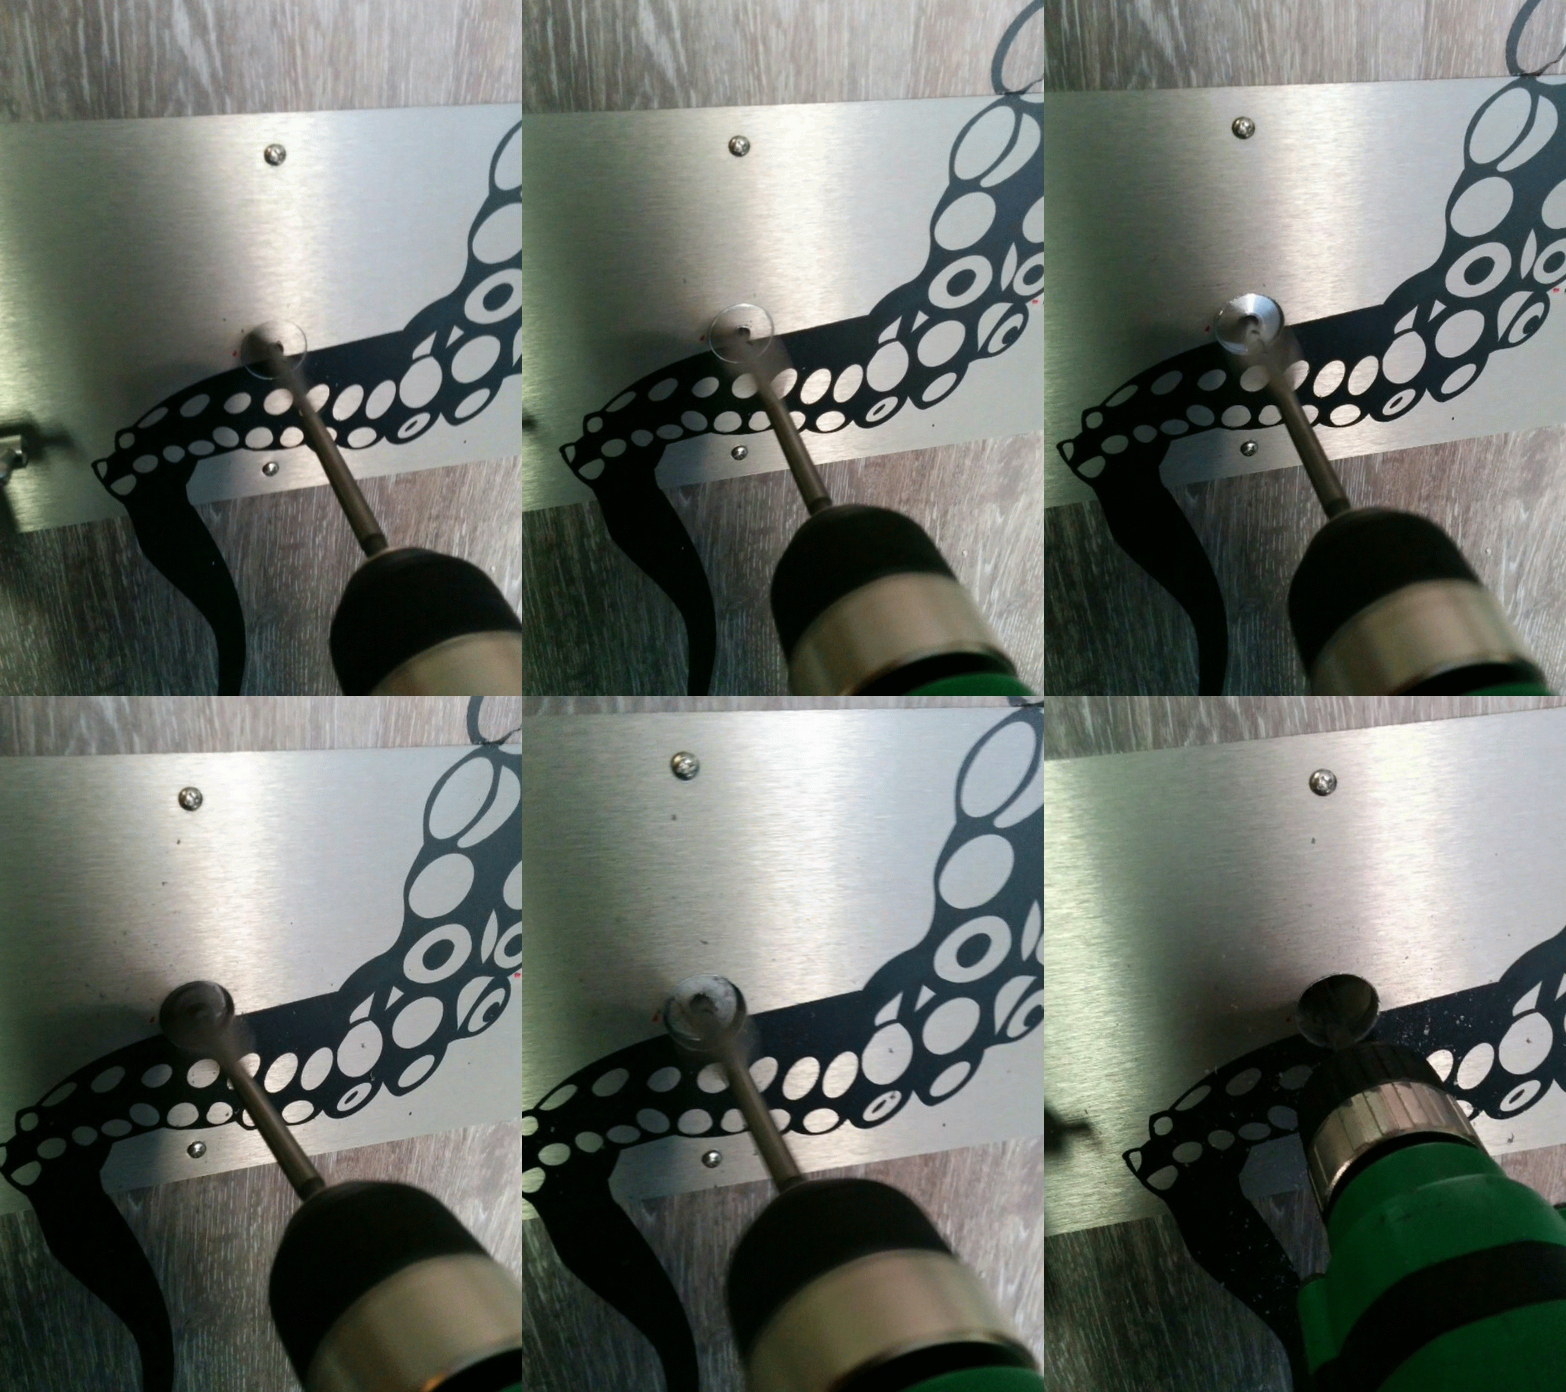
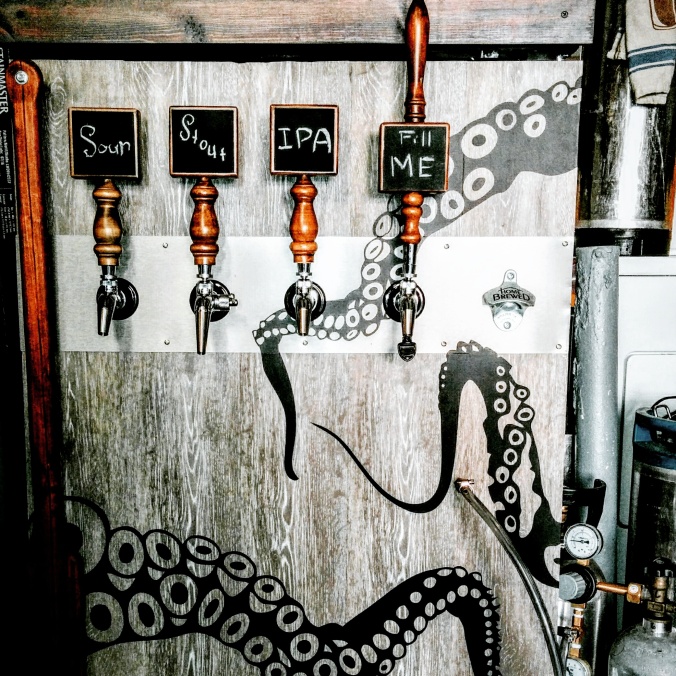
Once the kick plate was installed, it was time to position and install the frame for the upper kegerator door. I drilled some pilot holes and affixed the frame to the upper door with 4 screws. I then mounted the mash paddle kegerator door handle and applied some vinyl squid decals that I picked up online to add a little something different to the kegerator. It was then time to install the beer tap shanks! I drilled pilot holes and used my 1″ drill bit to cut the 4 holes for the stainless steel Intertap tap shanks.  If I had this part of the process to do over again, I think I would have switched drill bits to a 1″ saw style drill bit as I think the holes would have been a little cleaner. On one of the holes that I drilled, some of the plastic splintered on the inside of the kegerator.  It was not a big deal, but could have been better.


How to cut a draft beer tap hole for your kegerator

How to cut a draft beer tap hole for your kegerator


If you are like me and do not have room to fit your CO2 tank in your kegerator and or do not want to store your CO2 tank in the kegerator then you will need to drill a hole in the door to pass the CO2 line.  I did so with a 1/4″ stainless steel pipe and brass fittings. It works well and makes it easy to disconnect from the kegerator door if needed. Eventually I am also going to drill 3 additional holes so that I can connect my SS BrewTech conical fermenter chilling system; but that is for a later homebrewing blog!


Install the CO2 hardware for your kegerator

Install the CO2 hardware for your kegerator


if you are reading this while you are building your own kegerator, at this point all of the hard work is behind you and you are probably ready for a beer! Next clean up the mess that you have certainly created from drilling in to vinyl and styrofoam. Then slide the shanks in to the holes and tighten down the bolts on the inside of the homebrew kegerator.  Once the stainless steel tap shanks are tightened in to place, you can install the beer taps – faucets on to the front of your kegerator. They make an actual wrench specifically for doing this but if you do not have one, you can simply hand tighten them. Next, attach your beer tap handles.  All that is left is to connect the kegs, test for leaks and you are ready to enjoy a nice cold beer!

I really enjoyed this project and my hope is that some of this information will help a fellow home brewer or beer lover. If you have any questions or suggestions about converting a beer fridge in to a kegerator, please feel free to shoot me an email or leave a comment on the blog.


Building a kegerator!

Building a kegerator!

Save 20% On Wort Chillers During Day 1 of the MoreBeer.com 12 Days of Christmas Home Brewing Sale!

Save 20% on Counterflow and Plate Wort Chillers during the MoreBeer.com 12 days of Christmas Home Brewing Sale #homebrewing #christmas #gift #sale #promo #code #coupon

Save 20% on Counterflow and Plate Wort Chillers during the MoreBeer.com 12 days of Christmas Home Brewing Sale #homebrewing #christmas #gift #sale #promo #code #coupon

Limited time and quantity promo code from  More Beer
Promo Codes for the Month of December, 2016
Coupon Code Date: 12-1-2016
Promotion Details: Save 20% on Counterflow and Plate Wort Chillers
Promo Code: Counterflow20


Coupon Description:  During Day 1 of the MoreBeer 12 Days of Christmas homebrewing sale, you save 20% on More Beer counterflow and plate wort chillers plus get free shipping on any purchase over $59! Use More Beer promo Code Counterflow20.


Click Here for this MoreBeer.com Promo Code


More Beer Veteran’s Day Coupon – Save $25 on Orders of $150+

More Beer Promo Code #homebrewing #homebrew #morebeer #more #beer #promo #code #coupon

More Beer Promo Code #homebrewing #homebrew #morebeer #more #beer #promo #code #coupon


Coupon Code Date: 11-11-2016
Promotion Details: Save $25 On Your $150+ Order at More Beer
Promo Code: SAVE25

Coupon Description: I came across one of those promo codes that I had to share. More Beer is the best home brew supply shop around in my opinion, they have great every day prices but rarely have promotions.  Today they do!  Right now at MoreBeer they are having  a Veterans Day Sale going on that will save you $25 on any order of $150 or more!  More Beer also has free Shipping on orders of that size so if you have been wanting to make a large purchase or pick up a few home brewing kits, this is a great time to do it.  Click on the links for all of the details.


MoreBeer.com Veterans Day Promo Code


Stainless Steel Homebrewing Fermenters

Homebrewing Stainless Steel Conical Review

Homebrewing Stainless Steel Conical Review


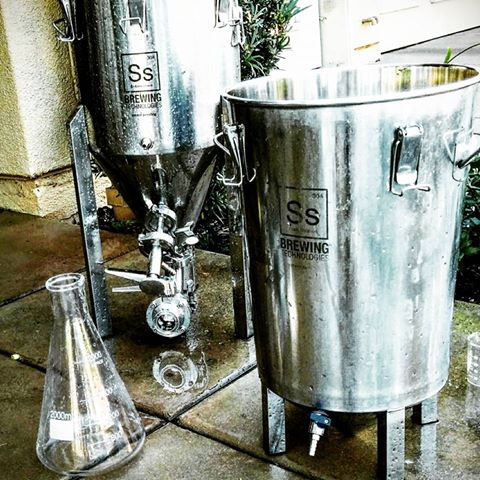
I own 4 different stainless steel homebrewing conical fermenters at this time:

2 Stainless steeel brew buckets


7 gallon SS BrewTech stainless steel conical fermenter 


14 gallon stainless steel conical fermenter


Prior to purchasing these home brew fermenters I tended to use glass carboys but would also use a plastic carboy on occasion. Often times I get asked if they are worth the money?  For me I can quickly and honestly answer yes! The main reason is they are more durable and I do not have to worry about dropping one of my glass carboys anymore and having it send me to the hospital.  I also got them for a great deal, or at least what I consider a great deal.  I picked the stainless steel brew buckets up for $195 each, the 7 gallon for $395, and the 14 gallon for $495. There are a few more reasons why I like them so much.


They are constructed from 100% stainless steel, so if I care for them they will last a life time. Since these homebrew fermenters are built from metal, it also means that I do not need to worry about light oxidization while the wort or beer is in it. They are incredible easy to clean. If I want to I can transfer via CO2 pressure.  My 14 gallon unit has a temperature control unit which makes fermenting an ale or a lager a breeze regardless of the time of year. My stainless brew buckets and 7 gallon conical fermenter all fit in my fermentation fridge and allow me to ferment about 18 gallons of beer as opposed to 10 gallons if I was still using my glass carboys! Dry hopping these are a snap since their lids come off, which make they a snap to clean as well.  The conicals come with a thermowell built in and the stainless brewbuckets have a add-on kit for them as well; that makes monitoring temperature easy if you have a temp controller and fermentation chamber since it give you an actual temperature reading of the fermenting beer as opposed to the outside of the fermenter or ambient chamber temp which may be off by several degrees.


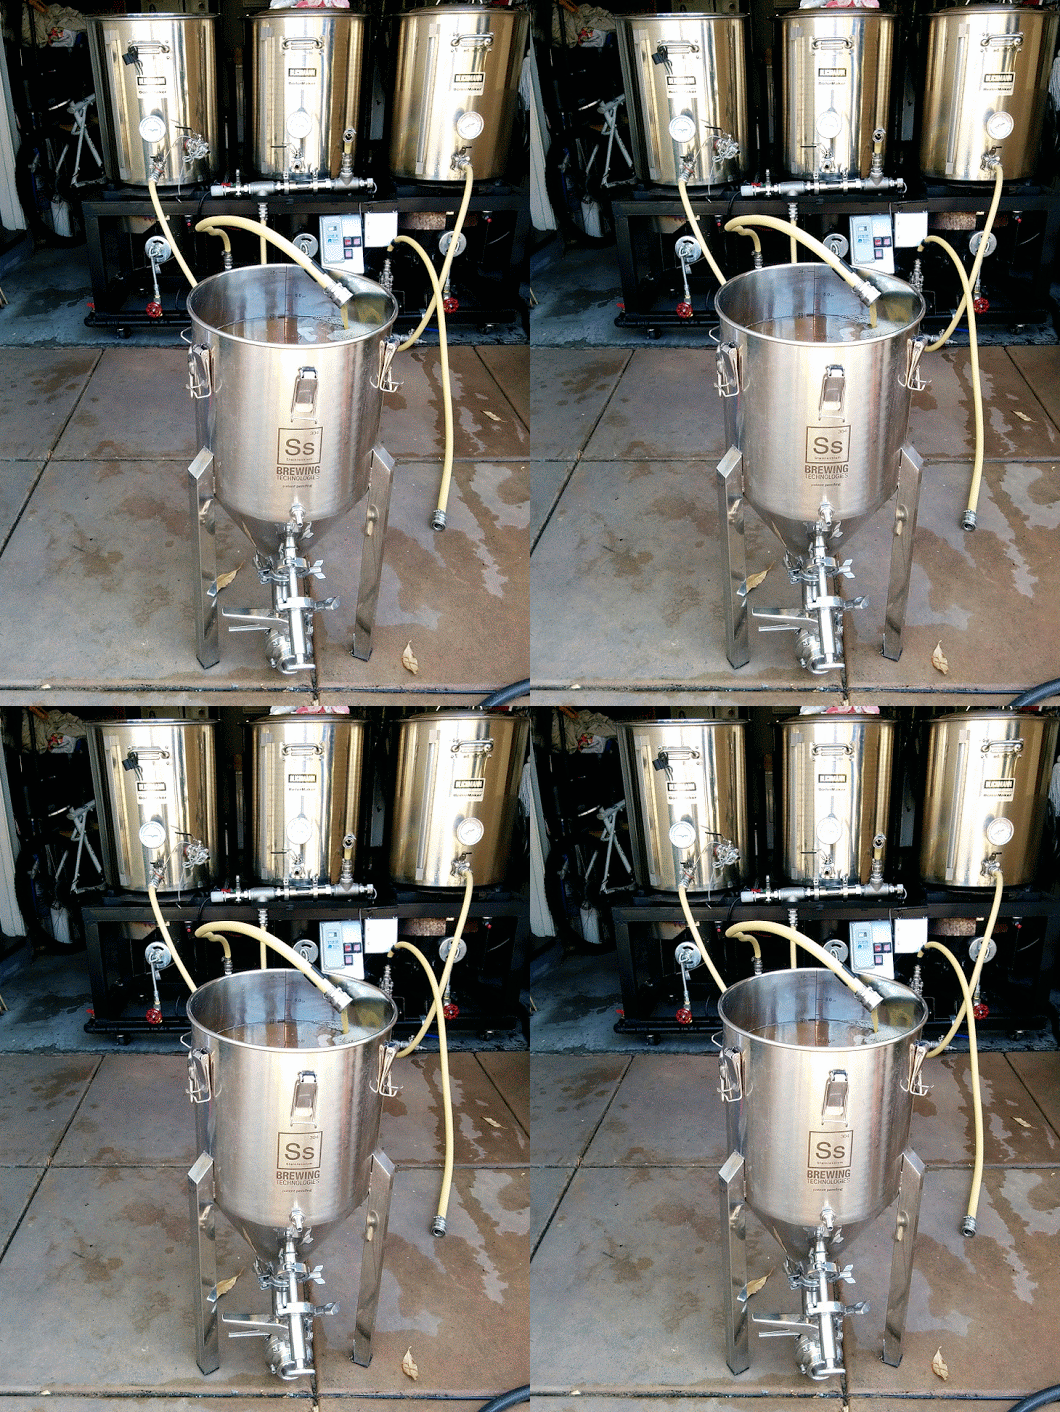
Filling mt 7 gallon stainless steel homebrew conical fermenter

Filling mt 7 gallon stainless steel homebrew conical fermenter

As you can see, filling the conical is as easy as it gets.  It even has easy to read gallon markers etched into the inside wall of the fermenter.  As you can see there are two ports on it.  One for dumping large volumes from the base of the conical or harvesting yeast (which is simple and can save you some money) and a second transfer and tracking arm port for siphoning beer above the sediment and or yeast bed.


Transferring beer from the stainless steel home brewing brew bucket fermenter.

Transferring beer from the stainless steel home brewing brew bucket fermenter.


As you can see in the above photo, transferring beer from the stainless steel brew bucket is about as easy as it gets. It has a single port and rotating internal racking arm that makes transferring clear beer to the keg as easy as turning a valve.  No more sanitizing siphons with these fermenters. Having less things to worry about or to clean is always a plus when it comes to home brewing.


Home Brewing Conical Fermenters

Home Brewing Conical Fermenters


As I had mentioned earlier, cleaning these fermenters in very easy.  I simply use some PBW, warm water and a nylon scrub sponge.  The lid comes off so it is easy to reach everything and the conical fermenters come with sanitary clamps so they break down and reassemble effortlessly. I have used these fermenters for over 3 years now and still do not have one complaint about them!


If you are interested in picking one up, here are the links and best of all, they are shipped free!


7 Gallon Stainless Steel Brew Bucket $195


7 Gallon Stainless Steel Conical Fermenter $395


14 Gallon Stainless Steel Conical Fermenter $495


The above listed stainless brewbucket is currently on a promotional deal.  It regularly sells for $225, so if you were looking to purchase one then now may be a great time!

Labor Day Homebrew Sale!

Labor Day Promo Code Homebrew Supply

Labor Day Promo Code Homebrew Supply

HomebrewSupply.com Coupon Codes and Promotional Code


Labor Day Sale For HomebrewSupply – Homebrew Supply
Promo Code for the Month of  September 2016
Homebrew Promo Code Date: 9-4-2016 to 9-5-2016
Coupon Details: Labor Day Homebrewing Sale – Save 15%
Homebrew Supply Coupon Code: LABOR15

Coupon Description: Happy Labor Day! Right now you can save 15% on your home brewing orders and get flat rate shipping!  Homebrew Supply is having a big sale right now to celebrate Labor Day and with coupon code LABOR15 you can save yourself 15%! These guys are great if you have not used them before for your homebrew equipment and supply needs.  They have a good and growing inventory and ship fast!


Click Here for this HomeBrew Supply Labor Day Coupon


Found at HomebrewingDeal.com


Homebrewing Yeast Starters


Yeast Starter Kit

Yeast Starter Kit

MoreBeer.com currently has a coupon code for a 2000 ml and you can pick it up for $15.99. I personally have about 4 of these.  There are a few reasons why you might want to consider getting one and I have conducted a little test, if you answer yes to any of these 3 question, you may want to buy one before this MoreBeer promo code expires.


  1.  Do you like to look like a scientist? (I think this is why I have 4)
  2.  Are you not currently creating yeast staters for your home brewed beer?
  3.  If you are creating yeast starters, are you using a pot to do so?


If you answered yes to any of the three questions above then you probably want to consider picking one up especially if you are not currently creating a yeast starter. Yeast is a critical and primary component of your beer and is as critical as the grains that you use when it comes to developing the flavor of your beer. Have you ever had a German Hefeweizen and an American Hefeweizen or American Wheat Beer?  The basic hop structure and grain bill is the same in both beers, yet they taste incredibly different and that is because of the yeast.  I mention this because many home brewers do not realize how big of a difference the yeast in a beer makes. It does not only ferment the sugars in your beer, it is creating flavors while it does so that impact your finished beer, that is why there are so many varieties available.


Also consider that it is not just the variety of yeast that you choose to brew your beer with that determines the impact on taste. It is also the quantity, health and state of activity at the start of your fermentation that is important. All of these factors are important when it comes to avoiding off flavors in your beer and achieving a complete fermentation. This is especially important when brewing lagers and higher ABV beers like strong single IPA’s, Double IPA’s and Imperial Stouts.  A flask and stir plate are the best ways of activating your yeast, replicating yeast cells and making sure your yeast is healthy prior to starting the actual fermentation process. If you are just using the same old SA-05 yeast packet (not that it is a bad all around yeast) I encourage you to try some liquid yeast strains and in either case to make a yeast starter or at least re-hydrate your yeast prior to staring your fermentation.


Here is the link to the More Beer Promo Code:


More Beer Coupon Code For A Homebrew Yeast Starter Flask


Here is a link to a Homebrewing YeastStir Plate:


More Beer Coupon Code For A Home Brewing Stir Plate


Homebrewing Whirlpool Arm

$30.95 Home Brewing Whirlpooling Arm

$30.95 Home Brewing Whirlpooling Arm

MoreBeer.com & MoreBeer Home Brewing Coupons
$30.95 Homebrewing Whirlpooling Arm
Promo Codes for MoreBeer.com Homebrewing

Promo Code Date: 1-29-2016
Promotion Details: $30.95 Home Brewing Whirlpooling Arm
Promo Code: BEERDEAL

Coupon Description:  MoreBeer.com currently has a coupon code for a $30.95 Home Brewing Whirlpooling Arm.  This stainless steel homebrewing whirlpool arm is designed for installation underneath the handle of your homebrew kettle. this piece of stainless steel home brewing equipment will allow you to achieve a perfect whirlpool in your Boil Kettle. Simply pump your wort from your ball valve, into this piece, which will jet around the inside of the kettle, forming a strong whirlpool. The advantages to a whirlpool are many. It will settle Trub in the center of your kettle, making it easy to pull clear wort from your ball valve. The whirlpool will result in a much higher chilling efficiency if using an immersion chiller, due to the increased turbulation of wort. On top of this, the increased flow will result in higher extraction of hop oils and flavor during flameout additions! This homebrewing spigot is made of stainless steel, ensuring it will be used in your brewing for years to come. It features a 1/2″ Full Port ball valve and a 1/2″ barb. The inner barbed elbow is 3/8″. The bulkhead is a specifically engineered piece of stainless, made for brewing! It features a 1/2″ MPT outlet for hooking up your ball valve directly, along with FPT on the inside for connection of any brewing accessory you might want.


Click Here For MoreBeer.com Whirlpool Arm Promo Code


whirlpool arm

whirlpool arm

« Older posts