West Coast Brewer Home Brewing Blog

Tag: Cider

Cider, The Gateway Drug To Beer!

Hey, I thought that West Coast Brewer was a home beer brewing site, why are you making cider?

Yes, it is a homebrewing blog; but I figure that cider making is in the same wheelhouse and that I would share what I learned on the topic in case anyone else was interested in making a batch. The idea of making a batch of cider came to me when I was considering what I wanted to fill my next batch of kegs with. My goal was to having something for everybody. That got me thinking. We all know one of those people who is “Not a beer person”. Whenever I hear someone mutter those words I immediately think that they just have not found the right beer or had a bad beer experience where instead of someone easing them in to beer, they pushed a double IPA on them or gave them a poorly made sour.  Although Hard Cider is not beer, many people consider them to be somewhat synonymous with one another and it has to be one of the most approachable alcohols on the planet. It has a low ABV, it is relatively sweet, can be bubbly and has next to no bitterness; it is the gateway drug to beer!

Making cider is easy! Making good cider is a bit more difficult but not too hard if you have the right equipment and a little bit of patience. The good news is that if you are a home beer brewer, you probably have just about everything that you will need in order to make a batch of cider.  If not, do not worry, I will go over all of that with you. So you have a few options.  If you are happy with mediocrity, I highly recommend you purchase a cider making kit! For approximately $45, you can purchase a Mangrove Jack apple cider kit and create a 5 gallon batch of hard cider that will produce somewhere between a bad and mediocre cider. These kits come with all of the ingredients that you will need, include instructions and make the process very simple. It may not be the best cider you have ever tasted, but it you have never made cider before and have no home brewing experience, this may be a great way to go.  You can purchase a Mangrove Jack Apple Cider kit here. You can also find some helpful information on making cider from a kit at HomebrewingDeal.com.

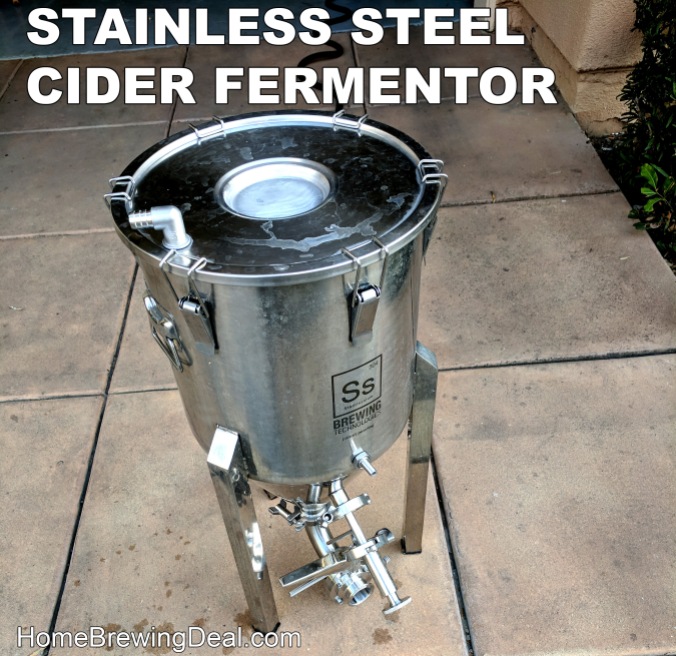
If you have higher aspirations and want to try and create a good to great cider then keep reading and I will do my best to help you reach that goal. The batch of cider that I ended up making was a hard apple cider aged on oak and Oregon Sour Cherries. To make a good cider it is critical to start with the best ingredients possible.  Your base ingredient will be apple cider.  If you have it available to you from a local apple orchard, pick up fresh pressed cider! If like most people you do not, a great alternative is Musselman’s 100% Apple Cider.  It can be purchased at Walmart for approximately  $4.50 a gallon.  It is pasturized, so there are no additives that will negatively impact your cider and is a great compromise between cost and quality. You need minimal equipment to make cider and the most important item is a fermenter that can hold approximately 7 gallons.  If you can swing the price, I highly recommend a Stainless Steel fermenter that will last you a life time.  You can purchase a 7 Gallon Stainless Steel Brew Bucket Fermenter here for $199 with free shipping.  You will also need to bottle or ideally keg your cider when fermentation has completed.  Items for kegging and bottling cider can be found here at MoreBeer for a reasonable price and ship free on orders of $59+. If you need any specific suggestions or help with this, please leave a comment or shoot me an email and I would be happy yo help you.  Okay, so here is the recipe that I used to make my cider:


How to guide to making hard cider

How to guide to making hard cider


Step 1: Prepare for fermentation

Clean and sanitize your fermenter and anything that will come in contact with you cider.  If you need a food grade sanitizer, I highly recommend Star San Sanitizer.

Add 5 Gallons of Musselman’s 100% Apple Cider to your fermenter
Add 1 (12oz) container of 100% frozen apple juice concentrate (make sure that there are no preservatives aside from Ascorbic Acid(Vitamin C))
Add 2 Tablespoons of Pectic Enzyme (for clarity)
Add 1 Tablespoon of Yeast Nutrient (for yeast health and a strong fermentation)
Make sure that your cider is at an ideal fermentation temperature for your yeast strain (typically 68 F)
Add your yeast, I like Wyeast 4766 or Cote Des Blancs dry wine yeast; both are great choices for cider yeast.
If possible, take a specific gravity reading. Make sure that your gravity is above 1.045 or else you may have stability issues with your finished cider. You can add additional apple juice concentrate if needed to boost your gravity.
Next seal your fermenter, place it in a temperature controlled location and let it fermenter for 2-3 weeks until your fermentation has completed.

Step 2: Post Fermentation

Once your fermentation has completed there are just a few more tweaks.
Add 1 Teaspoon of Malic Acid  (gives the cider a little zip) You may want to add a little more or less depending on your taste


Step 3: Back Sweeten Your Cider or Add Fruit (Optional)

At this point your cider will probably be somewhat dry. I suggest that you back sweeten it to help highly some of the apple flavor it in. In order to do so, you will need to render the yeast unable to ferment the new sugars that you will be adding to the cider. To do so conduct the following steps:
Crush 5 campden tablets and mix it with 1 teaspoon of potassium sorbate  and it to your cider.  If possible, drop your fermentation temperature down to 45F.  Wait 24-48 hours.  At this point your fermentation should be completely halted.
A 1 (12oz) container of 100% frozen apple juice concentrate (make sure that there are no preservatives aside from Ascorbic Acid(Vitamin C)) for sweetness and flavor
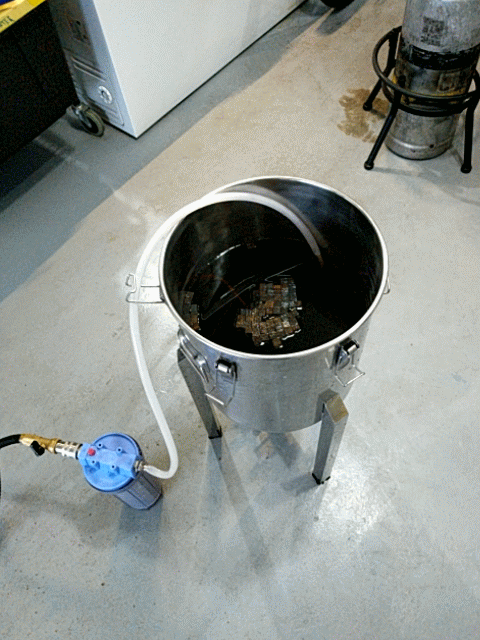
Add fruit if desired.  I added 2 can of Oregon Sour Cherries
Let the cider age at 45 F for an additional 7 Days

Step 4: Transfer Your Cider To The Keg

I use a keg partially because I am lazy and partially because it is the best choice.  If you want your cider to be carbonated and you chose to back sweeten or add fruit to it, kegging is your only reasonable choice. Otherwise you will need to add yeast to it once again to force carbonate it in the bottle and risk both over carbonating and undoing all of the effort you placed in to back sweetening the cider in the first place. If you keg, you are able to bottle once the carbonation level that you desire is reached and the cider will come out much cleaner!

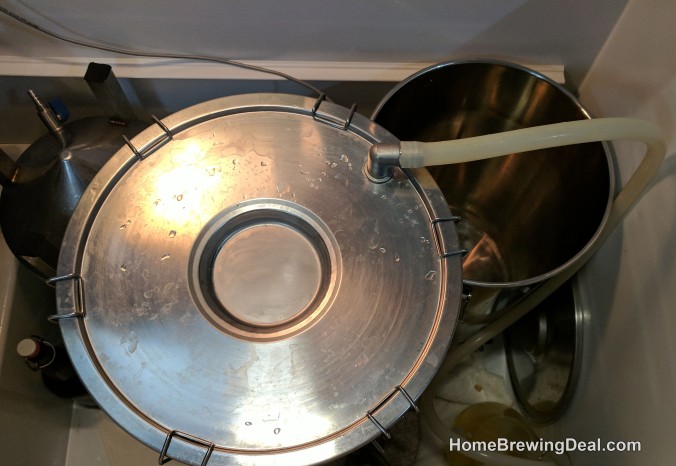
Clean and sanitize your keg and anything that will come in contact with the cider.
Transfer your cider from the fermenter to the keg, doing your best to avoid drawing in any of the particulates that have settled to the bottom of your fermenter.
Add oak sticks or oak cubes to the keg for additional complexity if desired. I think it adds a nice touch to the cider. Oak takes time to impact the flavor of your cider, so as it ages in the keg its flavor will become more noticeable.
Let the cider carbonate and condition in the keg for approximately 2 weeks. Your first few pours from the tap will be a little cloudy but after that it should begin to clarify rapidly.

That is it. If all goes well, you should now have a delicious glass of cider in front of you!  Please let me know how yours turns out or if you have any comments, questions or suggestion.


Making Hard Apple Cider At Home!

How to make hard cider at home #cider #brew #brewing #hard #howto

How to make hard cider at home #cider #brew #brewing #hard #howto

I have been an avid home brewer for over 8 years now and In that time I have probably brewed more than 70 batches of home made beer. I will always love beer and brewing it, but sometimes it is fun to trying something different. Not to mention, sometimes the different seasons of the year impact what my taste buds desire. With fall is upon us, I figured I would try brewing up a batch of hard apple cider and add a little diversity to my kegerator selection!


So I started to do a little research on home cider making, and just like home brewing, there are a few ways to go about making cider at home. Some methods are simple and others are a little more complicated and require more equipment. Since this is my first time trying my hand at home apple cider making, I figured I would keep it simple and use one of the home apple cider making kits that are available on the market. One of the great things about these home cider making kits is that they include almost everything you need to get started making your first batch of cider! One thing to be aware of is that most of the cider making kits that I checked out do require you to supply dextrose / corn sugar; so if that is the case with the kit you purchase, make sure you purchase some. You can also pick up optional items to personalize your home cider making recipe. For instance, I also decided to add some medium toast American oak cubes to my batch of home made hard apple cider to add a little additional complexity to my cider; it is not required to make a great hard cider but I think it will be a nice touch.


Here is a list of the items that I purchased for my batch of home made hard apple cider. You can click any of the links for more information or if you need to purchase any of the items:

1) Cider House 6 Gallon Home Cider Kit
(There are a variety of kits available, this was one I found at a good price)
2) Wyeast Liquid Cider & Mead Yeast
(The kit actually comes with yeast, but I figured I would step things up a notch with some specialized liquid yeast)
3) Toasted American Oak Cudes
(Not required but should enhance the complexity of the cider)
4) 3 LBS of Corn Sugar / Dextrose
(The recipe called for 2 LBS but I like to live on the edge)

STEP 1 – Read Your Cider Making Instructions

I know it is boring and you just want to get started, but…. it is always wise to read all of your instructions and home cider making recipe first.  Sometimes your kit may not include all of the ingredients you need or you may be missing an import piece of hardware that you will need to make your cider and this is your chance to determine that before it is too late!  You will probably also enjoy the process more if you understand what it is that you are doing before you begin.  Now that we have have that out of the way, we can get down to business and make some hard apple cider!


STEP 2 – Boiling Water & Sugar

After reading all of the directions that were included with my home cider making kit, I was pleased to learn how simple the process was. Step #1 was to boil 1 gallon of water with the dextrose that I purchased. The dextrose that I used was actually initially purchased for carbonating beer, but since I almost always keg now, I decided it to put it to good use for my batch of home made hard cider!

Corn Sugar - Dextrose for making cider at home

Corn Sugar – Dextrose for making cider at home


I used a large stainless steel kettle to heat 1 gallon of water.  Once the water was hot, I began to add the dextrose and slowly stir it.


How to make hard cider #cider

How to make hard cider #cider


Make sure that you use a large enough pot to boil the water and dextrose. If the boil becomes to rapid, you can have a boil over and those are no fun to clean up!  I let my water and sugar boil for approximately 10 minutes and then turned the burner off. At that point your should let your water and dextrose solution cool down.  You can either let it sit in an ice bath with a lid covering the kettle, use an immersion chiller or add some ice to the kettle; just be careful to keep everything sanitary.


Animated Cider Making Gif

Animated Cider Making Gif

STEP 3 – Clean, Sanitize & Prepare Your Fermentor


Just like home beer and wine making, cleanliness and sanitization are critical to making great cider! At this point you will want to make sure that you clean and then sanitize anything that will come in contact with your cider or water dextrose solution! Both the water and apple cider concentrate are loaded with sugars and any bacteria or wild yeast strains lurking about would just love to get hold of it! So make sure you sanitize your fermentor and any implements that will come in contact with your home made cider.  I recommend Star San, but you can use any odorless and tasteless food grade sanitizer.


The cider fermentor that I use is a 7 gallon stainless steel fermenter which I first cleaned with PBW and then sanitized with Star San. If you are looking for an incredible cider fermenter, I highly recommend this one and you can get it for a great price and with free shipping. You can also use plastic fermentation buckets, or glass carboys as cider fermentors. If using a glass carboy, just be very careful not to add boiling hot liquids as the fermentors can shatter making for an incredibly dangerous situation! There are also stainless steel 7 gallon brew bucket fermenters for just $229.


Stainless Steel Cider Fermenter #cider #fermenter #fermentor

Stainless Steel Cider Fermenter #cider #fermenter #fermentor

STEP 4 – Add Your Apple Cider Ingredients To The Fermentor


The next step is to add your different home cider ingredients to the sanitized fermenter.  I first added in my boiled water and dextrose solution.  Be careful as this still may be very hot!  Next I added in the package of apple cider concentrate that came with my kit.  Make sure that you sanitize the outside of the package and even the scissors that you use to open the kit, just to be safe! After pouring in the mixture, rinse the pouch with filtered and dechlorinated water (I use a carbon filter and seen in the photo, which highly reduces chlorine levels); and add the water to the fermentor.  I then tossed in my oak cubes and filled the fermentor to the 5.5 Gallon level. The home made cider directions recommend filling it to the 6 gallon mark, but as I mentioned earlier, I like to live on the edge! You will want to make sure that your fermentor can support at least 7 gallons if not more!  Keep in mind, the more sugar you add and the less water you add, the stronger your cider will be!  So use caution!


Animated Gif On Making Hard Cider At Home #hard #cider #home #brewer #making #how #to

Animated Gif On Making Hard Cider At Home #hard #cider #home #brewer #making #how #to

STEP 5 – Check Your Cider Temperature


Yeast is a delicate and will parish if the temperature of your cider is too high! The ideal fermentation temperature for cider is between 65F – 70F.  So, cool your cider down to no more than 70F before you add your yeast to the cider mixture. You also do not want your temperature too low or else the yeast will not activate, so try to get it above 65F.  I use a converted chest freezer with a digital temperature controller as a fermentation chamber so that I can keep a stable fermentation temperature.  If you do not have access to one, do your best to keep your cider fermentor in an area that has a stable temperature of approximately 67F.  Keep in mind that the fermentation process generates heat and your cider will be warmer than the ambient temperature of the room that the fermentor is residing in.

STEP 6 – Add Your Yeast To The Cider


Next add your yeast to the fermentor! The fermentation process for you cider will take about a week to complete, but may take more or less time depending on a variety of factors including temperature, quantity of yeast, health of yeast, quantity of available sugar and type of yeast.


Brewing Hard Cider #cider #brewing


You should begin to see fermentation activity within 24-48 hours of pitching your yeast.  If bubbles are not forming in your air lock, your yeast may not have been healthy enough for fermentation and you will need to add new healthy yeast as soon as possible.  It is always wise to keep some dry cider yeast on hand, just in case this occurs.  Dry cider yeast is far more durable than liquid cider yeast.


Fermenting My Hard Cider #cider #fermenting #fermenter #fermentation

Fermenting My Hard Cider #cider #fermenting #fermenter #fermentation


After the fermentation is complete almost all of the sugars will have been converted over to alcohol and the cider will be very dry.  So at that point I will add a sweetener to the cider that the yeast in unable to convert.  This will help to intensity the apple flavors in the cider.  At that point I will also keg and carbonate my cider and it will be ready to server approximately 7 days after that.  Once completed I will post the results!


You can purchase everything that you need to make cider at home at MoreBeer.com.  Here are links to some of the items I use! MoreBeer is great because you get free shipping on any order over $59, they have some of the lowest prices available on home cider making ingredients and cider making equipment and incredible customer service!


Cider Making Ingredient Kits
7 Gallon Stainless Steel Cider Fermentor
Cider Yeast
Cider Oak Cubes