West Coast Brewer Home Brewing Blog

Tag: how to (Page 1 of 3)

Installed New Blichmann RipTide Home Brewing Pump Upgrades


I initially purchased my March home brewing pumps about 7 years ago, well before stainless steel homebrew pumps were really a thing. Once stainless pumps became more popular, I considered upgrading, but my existing pumps worked fine and I could not justify the cost.  Then Blichmann released their RipTide home brewing pumps which feature a tri-clamp attached head!!! In my opinion that is a big deal because it allows you to easily gain access to the pump cavity for easy cleaning.  As it stood, I had to rely on hot water and PBW to do all of the cleaning unless I wanted to spend an extra 30 minutes breaking down, clean and then reassembling each of my March pumps; which is really not something I wanted to do after a long day of beer brewing.  The one down side was that a new Blichmann Rip Tide home brewing pump will run you $199+. So I waited…..

Then, Blichmann release the RipTide Upgrade Kit! The Rip Tide Upgrade Kit allows you to upgrade some of the most common existing home brewing pumps to a Blichmann Rip Tide, for just $99. With this RipTide Kit, you can upgrade your March or Chugger pump with the Riptide’s Tri-Clamp housing.  The RipTide’s head is made from stainless steel and can rotate 365 degrees to fit almost any home brewing setup. The kit also comes with Blichmann’s  integral linear flow valve, which provides superior control and eliminates the need for an upper ball valve in must situations.


Blichmann Rip Tide Home Brewing Pump Upgrade Kit

Blichmann Rip Tide Home Brewing Pump Upgrade Kit

Here is a list of home brewing pumps that the Blichmann Riptide upgrade kit is compatible with.

More Beer Homebrewing Pumps:

H340, H331, H332, H315HF, H350 and H375

Chugger Homebrew Pumps:

CPSS-CI-1 (115V),CPSS-IN-1 (115V), CPSS-IN-2 (230V), CPSS-CI-2 (230V), CPPS-IN-1 (115V), TCPSS-IN (115/230V) and TCPSS-CI (115/230V)

March Home Brewing Pumps:

809-SS-HS, 809-BR-HS, 809-PL-HS, 809-BR-HS-C, 809-PL-HS-C, 809-SS-HS-C, 809-BR, 809-PL, 809-SS, 809-BR-C, 809-PL-C, 809-SS-C, 815-BR, 815-PL, 815-SS, 815-BR-C, 815-PL-C and 815-SS-C

The Blichmann Riptide Upgrade Kit Can Be Purchased Here for $99


After verifying that the Blichmann RipTide Upgrade Kit would work with my current March homebrew pumps, I place my order for two of them.  After placing my order, it took about 8 days for them to arrive. I purchased them from More Beer, but the pumps were shipped directly from Blichmann.

RipTide Homebrew Pump Upgrade Kit

RipTide Homebrew Pump Upgrade Kit

Blichmann RipTide Upgrade Kit Installation Instructions

Next step was to read the instructions (which were relatively simple), make sure I had everything needed (which was just a screwdriver, a couple of wrenches and some PTFE thread seal tape. The instructions from Blichmann came in black and white and unfortunately the contrast made it so that it was difficult to see where the washer was supposed to go, so I included some color photos here to help you out if needed. I began by breaking down my existing march pump per the instructions and removing my existing fittings.  It is important that you just remove the pump head and NOT the magnet collar! The pump head was held on by 4 stainless steel screws in my case.  Here is an image to help:

Blacihmann RipTide Upgrade Instructions

Blacihmann Rip Tide Upgrade Instructions

Next I mounted my home brewing pump on to the included stainless steel pump riser. This was not required in my situation but I like the idea of it because it raised my pump up a couple of inches, bringing it close to my kettles, reducing the amount of tubing that I needed and giving me a little more space to empty the pumps when I had to clear wort from them.  Everyone’s situation is a little different, but it works well on my home brewing rig.  After that you will want to mount the Tri-Clamp adapter bracket on to your pump.  Blichmann includes two sets of screws to use, so make sure that you select the appropriate screws for your pump. Be careful not to over tighten the screws; doing so could crack the bracket or damage the pump. Next, place the impeller housing and the impeller into the pump magnet as shown in the following images:


Blichmann Rip Tide Homebrewing Pump Upgrade Instructions

Blichmann Rip Tide Home Brewing Pump Upgrade Instructions

Next is where I nearly had a problem.  Install the pump head o-ring and washer to the stainless steel RipTide pump head.  My first kit was missing the washer and the photo quality on the instructions that came with the kit were so bad, I could not tell if I was suppose to use one of the mounting washers.  Something did not seem right and I would have then been missing a mounting washer, so I checked my second pump kit and could see that there was a smaller washer that was intended for the pump head. It thankfully had two in that box, so all was good.  Here is an image to help you see where to place the o-ring and washer into the Blichmann RipTide pump head:

RipTide Upgrade Kit Installation Photos

RipTide Upgrade Kit Installation Photos

Lastly mount the Blichmann RipTide pump head on to your pump using the include stainless steel 3″ Tri-Clamp and attach any fittings that you may have. The entire process took me approximately 30 minutes per pump to upgrade an re-install onto my home brewing stand. Except for the issue with the washer, it was very painless.  Here are a couple of photos of the Blichmann RipTide homebrewing pumps after they were installed on to my homebrewing rig.


Finished Images Of The Blichmann RipTide Pump Upgrade Kit

Blichmann RipTide Home brewing Pumps On My Homebrewing Rig

Blichmann RipTide Home brewing Pumps On My Homebrewing Rig

Close up Image of the Blichmann RipTide Home Brewing Pump

Close up Image of the Blichmann RipTide Home Brewing Pump

After that I tested the RipTide home brewing pumps for leaks and checked to make sure all of the ball valve connections were free from leaks as well.  All was good and I also took a short video in case anyone was curious about the type of pressure or flow rate that you could expect from the RipTide upgrade kit.

Blichmann RipTide Pump Video


If you are looking to purchase a Blichmann RipTide Home Brewing Pump Upgrade Kit, they can be purchased here for $99


Converting a Home Brewery Banjo Burner To Natural Gas

Converting A Banjo Burner To Natural Gas

Converting A Home Brewery To Natural Gas


I do not know about you, but I am not the biggest fan of having to store and maintain propane tanks. They take up space, run out of gas in the middle of a boil, the pressure changes when the tank gets too low and they are expensive to refill; and all the while I have natural gas available 10 feet away from my home brewery.  So I decided that I would try converting my banjo burners from propane to natural gas. Let me start off by saying that I am not a professional plumber, a mechanical engineer, or a scientist that specialized in flammable gasses; so you should consult a professional. PLEASE CONSULT A LICENSED HEATING PROFESSIONAL FOR INFORMATION ON CONNECTING YOUR OUTDOOR BURNER TO YOUR HOUSE NATURAL GAS.

My home brewing setup uses 3 banjo burners and a 120v electric RIMS system to generate heat. So my first step was purchasing the natural gas valve to replace my existing propane valve.  Since natural gas is pushed with a lower pressure than compressed liquid propane, you can not simply use the same valve.  The good news is that the replacement valve is not that expensive.

Converting a banjo burner over to natural gas

Banjo Burner Natural Gas Valve

Williams brewing sells the valve for $9.99 and this Banjo Burner natural gas conversion valve is compatible with the  Bayou Classic KAB4, KAB6, and BG14 Banjo burner.  To use this valve, you will need a gas connection hose with a 3/8″ female flare end to attach to this valve to your natural gas source.  This valve has an orifice diameter of approximately 1/8″, and features 1/4″ male npt threads to attach to your gas burner. These home brewing burner natural gas conversion valves also fit the Blichmann Top Tier Burners and Blichmann Floor standing burners. You can see the difference in the two burner valves in the following photo.

Converting Bayou Home Brewing Burners to Natural Gas

Converting Bayou Home Brewing Burners to Natural Gas

The natural gas replacement valve is on the left.  You can see the gas outlet diameter is much larger than the propane on the right.

The process was pretty painless and I was able to replace all three burner valves and test for leaks in about 60 minutes.  I used natural gas safe teflon sealant on all of the valves. One important factor to keep in mind is that natural gas is lower pressure than propane and you are going to put out less BTUs than you would with a propane tank.  So if you were already struggling to achieve a boil with a propane tank, converting to natural gas is probably going to be a bad idea. I have yet to test how long it takes to reach a boil, but the flame tests all look great so far!

Converting A Home Brewery From Propane to Natural Gas

Converting A Home Brewery From Propane to Natural Gas

Once I have the test in, I will let you know how it work out!

Home Brewing

Home Brew #homebrew

Home Brew #homebrew


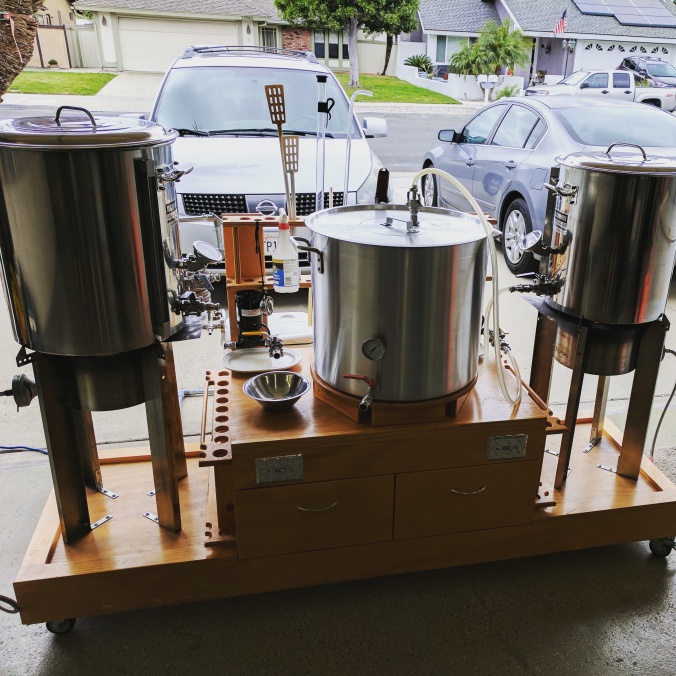
Recently I had the pleasure of brewing up a batch of home brew on one of my friends home brewing system. I always look forward to the opportunity to get another home brewers perspective on home brewing. I find that I learn a lot about the home brewing craft from examining other home brewers methods and practices.  Even better, both of us use similar home brewing hardware and like similar styles of beer so we can share home brew recipe tips as well.


Home Brewing Rig

Home Brewing Rig


One of the biggest differences in our home brewing systems and our beer brewing practices is when it comes to the mash. Where I have made my mashing process complicated (possibly over complicated) over time, doing my best to make sure my mash is at a specific temperature for the entire 60 minutes, he sets his mash temp, closes the lid and does not attempt to correct for any temperature loss over time.  By the time his mash has completed, the temperature in his tun has only dropped by approximately 6F.


My concern with a drop in mash temp would be that perhaps the finished beer would come out too dry or thin due to the lower average mash temp, the starches would only be converted to very simple sugars. Yet after sampling several of his beers, that did not turn out to be the case. I sampled 4 of his beers that day, varying from stouts to IPA’s and all of them were fantastic.  I would not describe any of his beers as too thin or too dry.


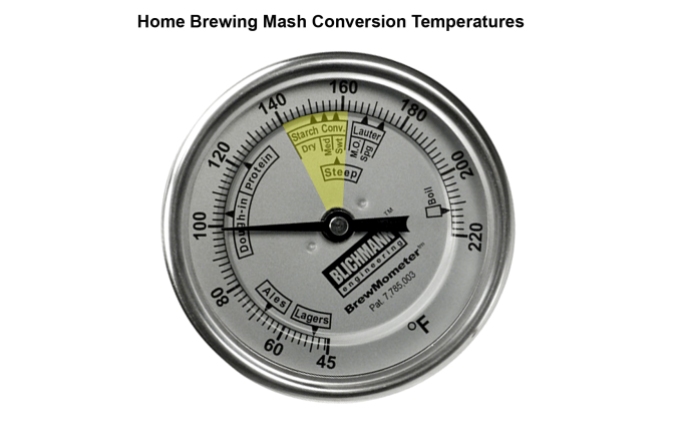
Home Brewing Mash Conversion Temperatures

Home Brewing Mash Conversion Temperatures


The image above is of my Blichmann BrewMomerter. I hi-lighted the segment that pertains to the mash conversion. As all grain home brewers, for the most part we mash at between 150-152 F to get a well rounded mash conversion. When I asked my friend if he was concerned with the temp dropping, he said that he felt that most of the starch conversion was occurring early in the mash process while his temperature was on target and that he had never noticed a degradation in the quality of his finished beer since he started conducting his mash in this manner. I am inclined to agree with him based on the high quality beer that he produces.


I think that sometimes as home brewers, out of our desire to brew “perfect” beer, sometime we go too far and over complicate things (or at least I do).  I am not saying to ignore your mash temperature or to only mash for 10 minutes. My point is more that modern varieties of beer have been produced for over 600 years, well before yeast was even discovered in 1857. Considering that our ancestors created beer with out having the benefit of such instruments as a Blichmann BrewMometer, perhaps there can be some flexibility when it comes to brewing.


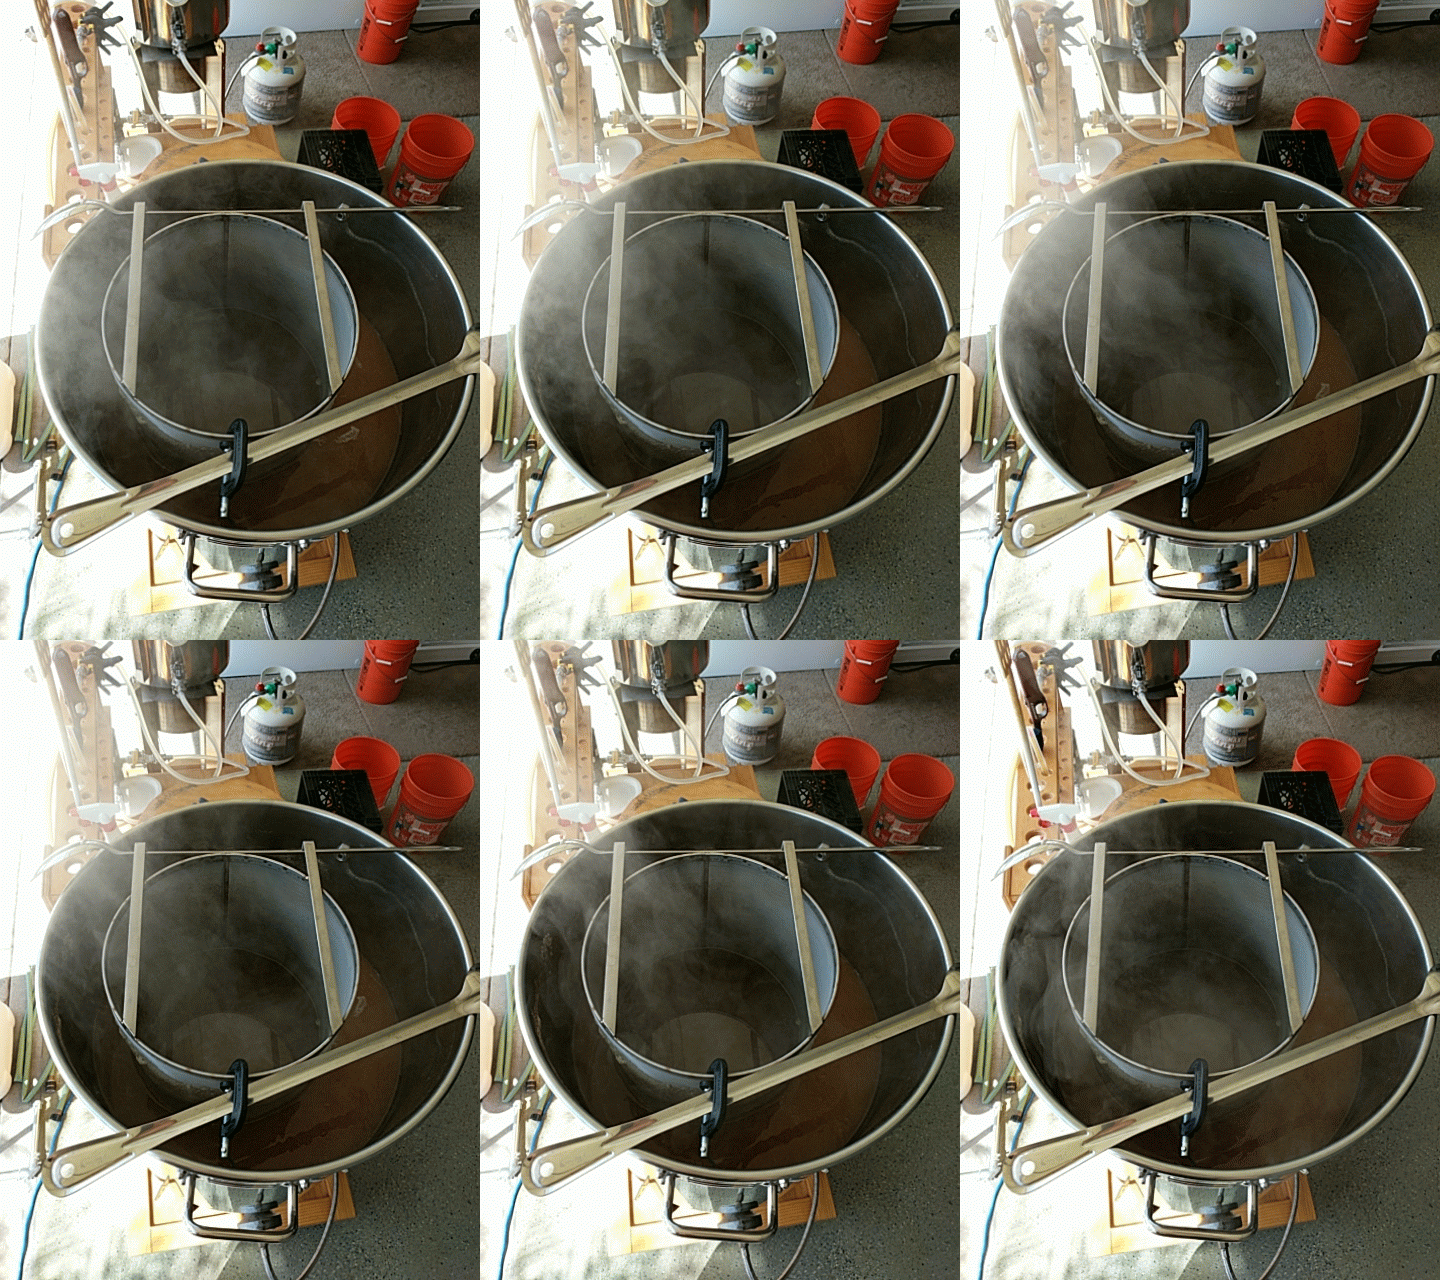
One of the home brewing items that he possess that I am pretty envious of is a large sized stainless steel hop spider.  When I say large sized, I mean large sized, this thing is giant as you can see from the animated image.  The photos were taken during the whirlpool process after the boil had completed. I have been trying to get a hop filtering system to work out on my home brew system for the last few batches with out a great deal of success.  I have been trying to overcome some challenges with clogging issues in my hop filter and he shared some great advice with me.  He said that in order for a hop filter to work properly and to get similar hop utilization compared to not using one, you need to have a hop filter that is at least half the diameter of your home brewing kettle. The size of the filter made a dramatic difference. I could see the wort moving around inside of his filter and he had hardly any clogging issues.


Home Brewing With A Hop Spider Animation

Home Brewing With A Hop Spider

I look forward to brewing with him again to see what else I can pick up from him. He has mastered the art of the Hazy IPA so I hope to pick his brain on that next.

How To Clean Beer Lines and Draft Beer Systems


Beer Line Cleaning Kit

Beer Line Cleaning Kit


Just about any good home brewer will tell you that one of the first rules of home brewing beer and making good home brewed beer is cleanliness. Unfortunately humans are not the only beer lovers on the planet.  Beer is loved by everything from insects to bacteria and your home brewing and keg systems are highly susceptible to bacterial growth. Beer lines, keg fittings and taps are often times places where the like to hang out and they should be cleaned regularly.  Thankfully there are several products out there to help you keep your systems sanitary and your beer tasting good!


The downside of having a home draft beer system means that you also have to care for it. So I purchased a draft beer line cleaning kit and some liquid beer line cleaner which is shown above. The kit was great, it came with instructions and everything that I needed in order to do the job. The beer keg line cleaning kit came with a 1 quart hand pump that pushes Beer Line Cleaner through the draft beer system. The faucet gets removed and cleaned with the included faucet wrench and brush.  The process is relatively quick and easy and takes about 20 minutes to clean a couple beer taps out.


If you are interest in purchasing a draft beer line cleaning kit you can find it here:

Keg line cleaning kit


Keg Line Cleaning Solution


Here are some instructions on how to clean your keg beer lines and draft beer system:

1) Remove the tap from the keg. Use a beer faucet wrench to remove the faucet (the piece that the beer actually flows though to your glass) from the draft beer shank. The beer faucet collar should have a few holes in it, insert the wrench end into a hole and spin the collar clockwise to remove.


2) Next, disassemble the faucet to the point that the shaft inside can slide out. Place these parts in a bowl with 2 cups of warm water and ¼ teaspoon of Beer Line Cleaner. Put one cap full of beer line cleaner into the beer line pump jar and fill with warm water. Attach the lid pump unit back on the jar. Get a bucket to collect the fluid running from the tap. Insert the cleaning brush small end into the bottom of the tap to allow the flow to go through if needed.


3) Pump the cleaning solution though line and tap allowing the solution to sit in the lines for 10–15 minutes, then pump through. Follow this with 1–2 jars of water to rinse. Remove the brush from the tap.


4) Use the brush and a towel to clean the draft beer faucet and then rinse with clean water. Reassemble the faucet, hand tighten parts, leave loose enough so that they move freely. Attach the faucet back onto the shank again, using the wrench, do not over tighten, just tighten enough so that it does not leak any precious beer!


Just let me know if you have any questions on how to clean your draft beer system and keg lines.

How to Dry Hop Beer and Homebrew


How to Dry Hop Beer

How to Dry Hop Beer


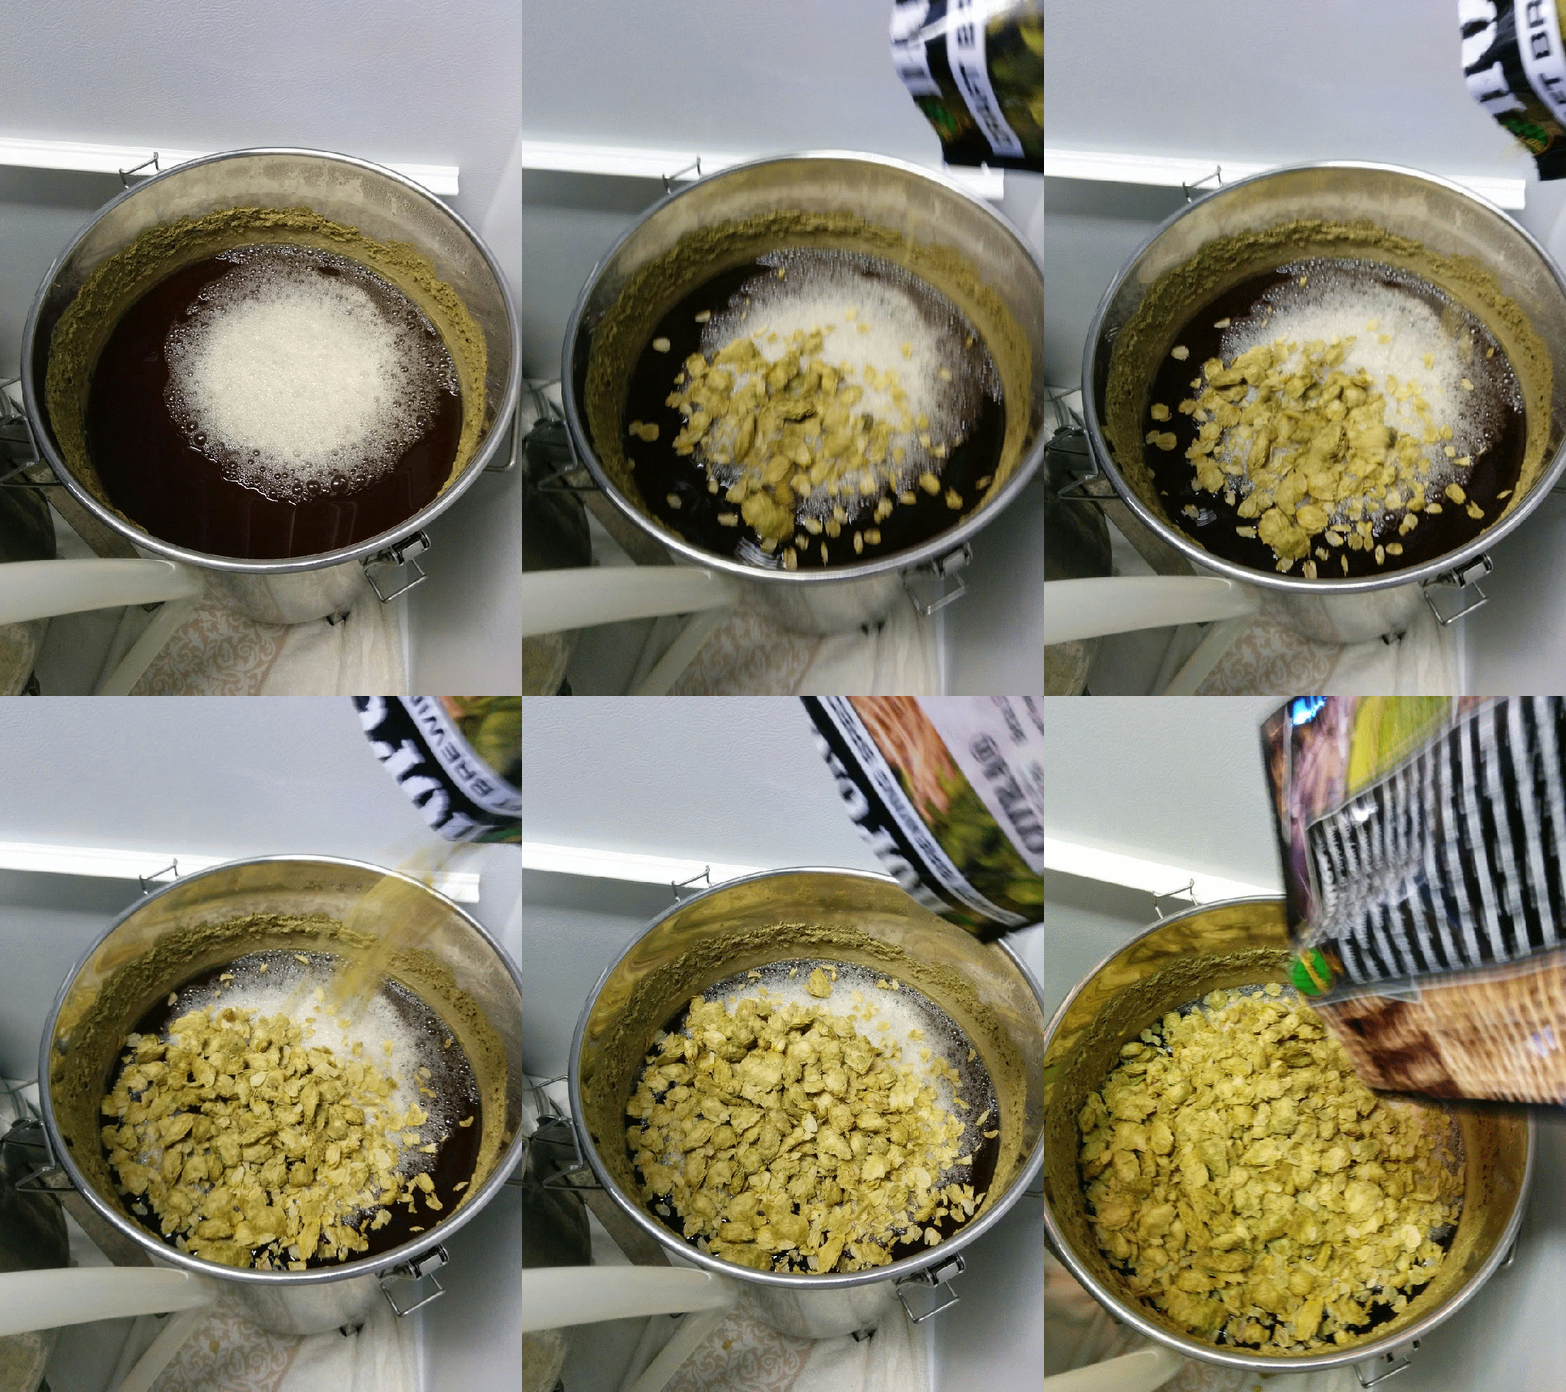
Dry hopping your beer is one of the easiest ways to make a good beer great and is supper simple to do!  At this point I dry hop any Pale Ale or IPA that I brew. It does not make the beer more bitter but instead gives the impression of hoppyness and freshness with fragrant hop aroma. To dry hop your beer, wait until fermenation has completed and CO2 is no longer being generated.  The reason for this is so that the escaping CO2 does not carry away the hop aroma with it because you want those odors to stay in contact with the recently fermented beer.  I use either whole hops or pellet hops for dry hopping but prefer to use whole hops if available.  Depending on the beer I will add between 2oz to 6oz per 5 gallon batch ( I typically go with 2oz, but my Pliny the Elder recipe calls for 5oz). I leave the hops in contact with the fermented beer for approximately 5-7 days and then either transfer to keg or cold crash for another 2 days.  The process is that simple and I encourage you to try it on your next hoppy beer batch.  When you pour your first pint focus on the aroma and if possible compare it to a batch of homebrew that you did not dry hop to see the difference!


How to install a thermowell

How to install a thermowell in a stainless steel brew kettle or fermentor.

How to Install a Thermowell

How to Install a Thermowell


I live in Southern California and it is not unusual for me to get daily temperature deviations of more than 30 degrees depending on the time of the day.  As you can imagine, this makes regulating fermentation temperatures a bit of a nightmare.  So about a year and a half ago I purchased a chest freezer to use as a fermentation chamber.  The chest freezer greatly helped in creating a more stable environment for my fermentation but I was taping the temperature probe of my digital thermostat to the side of my carboy or fermentor and that was not giving me a true reading of the actual temperature of the fermenting beer. As beer ferments, especially during times of high yeast activity a good amount of heat is created inside the fermentation vessel which means that the temperature of the beer can differ significantly from the ambient temperature of your fermentation chamber.  If the temperature in your fermentation vessel gets to high, your yeast may begin to create off or undesired flavors in your beer.  Since the heat produced by yeast activity changes significantly over the course of fermentation, simply compensating by moving the thermostat temperature down a few degrees is not ideal.  For this reason, many home brewers choose to either purchase a fermentor with a thermowell built in or add a thermowell to their fermentor.


A thermowell is a hollow thin walled tube that reaches from the outside wall of the fermentor to a near center point of the inside of the fermentor.  The hollow chamber of the thermowell allows you to insert a thermostat temperature probe so that you can get a far more precise reading of the actual temperature inside of the fermentation vessel.


For my fermentation vessel I use a 7 Gallon Stainless Steel Brew Bucket.  If is far less expensive than some of the higher end stainless steel fermentors but unfortunately it does not come with a thermowell built in.  That being said, it still costs a couple hundred dollars and the last thing that I wanted to do was ruin it by improperly installing a termowell. After doing a little research I was able to install the thermowell with no issues and it only took me about 20 minutes to do.  The tools that I used were a center punch, hammer, electric drill, 2 small drill bits, step drill bit, crescent wrench and a little fine grit sand paper.


How to Install A Thermowell Step1

How to Install A Thermowell Step1


First things first, you will want to gather your tools and mark the point on your fermentor where you want to place your thermowell.  The thermowell should be near the center of the fluid level of your filled fermentor.  Also consider that if you prepare different sized batches in your fermentor, you will want to place the thermowell so that it will be able to read the temperature of small batch sizes as well, so it may make sense to place the thermowell a little lower in the fermentation vessel.  After you mark your installation spot on your fermentor, you will want to use a punch or sharp instrument to make a starting point for when you drill your pilot hole.


Thermowell Installation Step 2

Thermowell Installation Step 2


Next you will want to drill your pilot hole as shown in the image above.  In my situation I actually increased the size of the initial pilot hole with a slightly larger drill bit to help accommodate the head of my step drill bit.


Thermowell Install Step 3

Thermowell Install Step 3


I then used my step drill bit to increase the diameter of the hole until the thread of my thermowell was  able to enter it snugly.  Once I verified that it was able to enter, I used the fine grit sand paper to remove any sharp metal and to polish the edges of the drilled hole.  Next I mounted the thermowell, making sure to use the included silicone o-ring.


Thermowell Step 4

How to Install a Thermowell Step 4


Lastly I cleaned the fementor and thermowell and tested it to insure that there were no leaks.  The install was a success and I currently have a batch of beer in it and the thermowell is working well as expected!


If you are looking to either purchase a fermentor or a thermowell for an existing fermentor, here is where I purchased mine.


Click Here for Fermentors and Thermowells


Dry Hopping Your IPA

How to Dry Hop Beer

How to Dry Hop Beer


Lately, with the trend of craft breweries moving towards ultra hoppy, high IBU IPA’s; home brewers need to be on their game if they want their home brewed beer to stand up to what the breweries are releasing. One of the greatest advantages that a home brewer has over a craft brewery is freshness.  As beer ages the potency of hop bitterness and aroma diminishes and that is accelerated by heat and oxidation. Since a home brewer does not need to contend with their beer sitting in a hot warehouse during distribution or having the sun beat down on their bottles in a stores showcase, you should do your best to take advantage of your beers freshness.  Always do your best to store your beer in a cool dark place if possible.


Whole Citra Hops

Whole Citra Hops


Another way to make the most of your IPA’s freshness is to dry hop.  The reason a brewer dry hops their beer is to impart the beer with fragrant and fresh hop aroma.  Since the beer is cool when the hops are added, the oils from the hops will not be infused with the beer and they will pass on little to no bitterness. Dry hopping is typically conducted once primary fermentation has completed and the hops are typically left in contact with the beer for between 7 and 14 days.  The hops are usually added after primary fermentation has completed so that less CO2 is being produced and the hop aroma can stay in contact with the beer as opposed to being carried out of the fermentor with the escaping CO2.  I personally like to use whole hops for dry hopping, but pellet hops can be used as well. When the beer is ready to be transferred to a keg or bottle, the beer is siphoned as normal and the hops are left behind in the fermentor to be discarded.  I typically add about 2 ounces of hops for every 5 gallons of beer, but more can be added if desired.

How to wire a Ranco digital temperature controller – 120v

How to Wire a Ranco Digital Temperature Controller

How to Wire a Ranco Digital Temperature Controller


Ranco Digital Temperature Controllers and Accessories Available Here


Recently I decided that I would create a temperature controlled RIMS systems for my home brewery. I picked up a Ranco Digital Temperature Controller (model # ETC-111000-000) to manage the temperature regulation.  I have not quite completed the entire Recirculating Infusion Mash System, but I just wrapped up the Ranco wiring and thought that I would share what I learned in case it will help out anyone else.


The RIMS heating element that I am using is a stainless steel 120v heating bar, so I have configured the Ranco for 120, but the Ranco thermostat is also capable of handling 240v; it just requires a slight wiring modification. I would like to point out that I am not a professional electrician. Electricity can be extremely dangerous to work with and may result in death. You should always consult with a professional electrician when attempting a project such as this.  Manufacturer hardware designs sometimes change and you should refer to your instructions prior to beginning. Here is a wiring diagram that I used for my Ranco Temperature Controller.


Ranco Digital Temperature Controller Wiring Diagram

Ranco Digital Temperature Controller Wiring Diagram


I cut apart a heavy gauge extension cord to use for my wall power connection and for the wiring I used to connect to my output plug.  Inside the extension cord is a ground wire, common wire and hot wire.  In the diagram above I use the green wire to represent ground, the white wire to represent common and the dark red wire to represent hot.  Please be aware that different cables use different colored wire to represent different things, these colors are just meant to be an example.  I ran the grounding cable from my extension cord directly to my output plug ground connection and also grounded it to the metal case that I am using to house my Ranco temperature controller, plug and switches.  I spliced the white common cable from the extension cord and connected it to the “COM” port on my Ranco and ran an extension wire to the common connection point on my output plug. Since the RIMS heating element that I am using is 120v, I ran the hot wire from my extension cord to the Ranco “120” port.  I then connected a small length of heavy gauge wire from the “120” port on the Ranco to the “C” port on the Ranco Temperature Controller.  Lastly, I ran a segment of red wire from the Ranco “NO” port to the hot wire connection on my output plug. I reviewed my work to make sure that all of the wires were connected properly and there was no bare wire exposed.  I then connected the device to a GFCI outlet and tested the device with a voltage meter to make sure that everything was working as intended.  The Ranco is great because you can select whether you want the power to activate when the temperature drops below a certain point or rises above a certain point which means that it can be used for either a RIMS type device or to control the fermentation temperature in a freezer or refrigerator without having to rewire the device or modify the hardware.


Ranco Digital Thermostat

Ranco 120v Thermostat


If you are not comfortable doing electrical work or if you would prefer to avoid the hassle, you can purchase a wired Ranco Digital Temperature controller.  You can find several different options available here at a great price via the link below.  They also have spare temperature probes and mounting brackets for the Ranco available if needed.

Ranco Digital Temperature Controllers


Good luck with your project and happy brewing!


Seven Easy Ways to Improve Your IPA!

7 Easy Ways to Improve Your IPA

7 Easy Ways to Improve Your IPA


Recently I came across a great article (5 Tips for Better IPAs) from the American Homebrewers Association where they interviewed Vinnie Cilurzo (Owner and Brewer at Russian River Brewing) and he gave 5 recommendations on how fellow brewers can improve their IPA’s.  I thought that I would take some of Vinnie’s fantastic advice and expand on it a bit with a few of my own suggestions!


Here are 7 easy ways on how you can improve your Home Brewed IPA!


 1) Every Beer Starts with Water!


Never under estimate the importance of beers primary ingredient, water.  The water that you are using to make your beer is critical, especially when it comes to all grain brewing.  Water plays an important part in everything from the taste and the mouth feel of a beer to the sugar conversion and acidity in a finished beer.


If you are using city water that has been treated with chlorine, always make sure that you are removing the chlorine with a carbon filter or alternative method.  It is also a good idea to check your city’s water report to see if you are lacking or have an over abundance of minerals in your water that may be impacting your beer.  Vinnie suggests treating your water with gypsum in both your mash and your boil to heighten the hop flavor of your beer.  You can also use low level sodium additions to have a similar effect.  Before making these additions you should first examine your existing levels to make sure that it will not detract from the quality of your finished beer.


2) Dry Hop Until You Just Can’t Dry Hop Anymore!


Unlike adding hops early in the boil, dry hopping adds little to no bitterness to the finished beer but what it does add is a strong and fresh hop aroma!  When dry hopping beer, I always recommend adding the hops after the airlock has stopped bubbling in fermentation.  That ways the escaping CO2 will not carry the hop aroma out of the fermentor along with it.  Vinnie suggests adding multiple dry hop additions at different times which may deliver additional hop aroma to your finished IPA!


3) Do Not Rush Your Fermentation!


We all want to try out our latest beer as quickly as possible, but there is allot to be said for patience in home brewing!  If you have the ability to temperature control your fermentation, set the temp between 65F to 67F.  Yeast loves a low stable temperature and produces far less off flavors than at higher temps.  It will take longer to ferment at a lower temperature but your beer will come out cleaner tasting so that your robust hop profile can really shine in the finished beer!  Also, cold crash your beer once your fermentation has completed.  Try to crash at around 36F for 2 weeks if possible.  This will help force any residual yeast out of suspension and leave you with a cleaner tasting and clearer beer!


 4) Don’t Skimp On the Yeast!


Now a days home brewers have a huge variety of options when it comes to yeast.  If you want your beer to be as good as possible, then you are going to have to use the best and most suitable yeast for the style of beer that you are brewing.  A great West Coast IPA yeast strain is the White Labs WLP001 Ale Yeast, available here.


Make sure that you create a yeast starter, insuring viability and that you pitch a sufficient quantity of yeast for the strength of beer that you are brewing.


5) Do Not Overload Your Beer With Crystal or Malty Grains!


Vinnie suggests that you add crystal malts sparingly to your grain bill. He remarks that the sweet flavors and aromatics derived from those grains can compete with the flavors and aromas of your hops.  An IPA is a showcase for the hops and the other ingredients should complement them not detract from them.


6) Consider Adding Hop Resin Extract to Your Boil!


Pure hop resign extracts can be a great way of boosting the bitterness of your wort with out having to add an extreme amount of hop additions to your boil.  Just like with actual hops, in order for the bitterness to be captured by the wort, the hop resign still needs to be boiled in the wort for a sufficient amount of time.


7)  Opt For a Dryer Beer!


A dryer  beer can really help the hops in your IPA stand out!  Vinnie suggests supplementing approximately 5% of your grain bills sugars with dextrose. Dextrose is a very simple sugar that yeast can easily ferment.  Another option would be dropping your mash temp down by a degree or two in order to create less complex sugars during the mashing process.


If you are looking to try your hand at one of Russian River’s IPAs, you can find a couple of excellent kits available here:


Russian River Blind Pig IPA Kit


Russian River Pliny the Elder Home Brewing Recipe Kit


Good luck and happy brewing!


Reusing beer yeast and how to harvest and clean your beer yeast.

Reusing and harvesting beer yeast

Reusing and harvesting beer yeast

While cleaning out your fermenter have you ever wondered if you could reuse the yeast that has collected on the bottom?  The answer is yes, you certainly can!  You can actually often reuses your yeast 4 or 5 times with out the likelihood of having any ill effects from mutations or high quantities of alternate yeast strains impacting the flavor of your beer.  Yeast isn’t cheap at around $7-$10 for a vial of the good stuff, so you might as well get your moneys worth!


Here are some basic things to consider when reusing your home brewing yeast.  

It is best to reuse the yeast as soon as possible.  You will probably want to consider discarding it after approximately 6 months.  If you are pitching the yeast more than 30 days after harvesting it from your fermenter, I would recommend creating a starter with it to help insure viability.


Only reuse your yeast 4-5 times.  Each time you reuse the yeast, mutations will occur and the probability of alternate yeast strains impacting the flavor of your beer will increase.


Do not reuse the yeast if the ABV of the beer that you harvested it from exceeds 6.5%.  High alcohol levels weaken and destroy your yeast.


Do not reuse yeast from a heavily hopped beer.  Like with alcohol, an over abundance of hops (from a dry hopped IPA for instance) will diminish the longevity and potency of your yeast.


Do your best to avoid harvesting the trub along with your yeast.  This is most easy accomplished via a conical fermenter. It is also possible transfer the yeast slurry and then rinse and decant your yeast with sanitized water to separate it from the trub.


Harvesting Beer Yeast

Harvesting Beer Yeast


Yeast should be stored at approximately 36 F in a sanitized vessel.  Keep in mind that even at that temperature the yeast may still be active and can create CO2.  So beware as your container may explode if too much fermentable sugar remained behind in your harvested yeast solution and the vessel is unable to vent the pressure.


If you are interested in purchasing a conical fermenter or yeast harvesting cylinder; many options can be found here:

Conical Fermenters and Yeast Harvesting

Brettanomyces and Beer!

Vrettanomyces

Brettanomyces – Brett Beer

Sometimes how brewers take for granted how big of an impact yeast makes on a beer.  It seems like the grain bill and the hops garnish the lion share of attention, but the truth is that the yeast can play just as large of a role in certain beers.  This is especially true with sours, lambics, gueuze and wild ales.  One of the main yeast stains commonly used with wild ales and sours is brettanomyces or also commonly called brett.


Brettanomyces is very special because in addition to converting sugars to alcohol and CO2, it also creates a high amount of acetic acid and off flavors in certain environments.  Brett or Brettanomyces is often described as adding a funky or horse blanket like flavor to beer and as you can imagine, in most cases is undesirable.  It is important to note that if you are going to dabble in the use of brettanomyces or other souring bacteria such as lactobacillus and pediococcus you will want to consider setting aside specific equipment such as fermenters, kegs and racking canes for your wild ales and sours.  Once these yeasts and bacteria come in contact with your fermenting equipment they can be more difficult to eradicate than typical brewing yeast strains due to their ability to survive in high temperatures, tolerate high alcohol levels and their ability to survive in low pH environments.  If not, it is very important to make sure that you practice proper cleaning and sanitization methods to insure you will not contaminate future batches of beer.


Recently Brettanomyces has made become very popular in alternative beer styles.  It is a powerful tool to have for a creative brewer who is working on designing interesting and flavorful beers. It is also an important reminder of just how important both yeast and fermentation conditions are in creation of a beers taste.


If you are looking to taste examples of well crafted brettanomyces  beers, I highly recommend Russian River Sanctification which is a 100% brett beer and also any one of the Crooked Stave 100% brett release beers.


Here are a few Brettanomyces yeast varieties for home brewing 

How to build a home brewery brewing stand!

How to build a Home Brewery \ Beer Brewing Stand \ Brewing Rack \ Single Tier Brewing Sculpture

How to build a Home Brewery \ Beer Brewing Stand \ Brewing Rack \ Single Tier Brewing Sculpture


I can not speak for everyone, but for me, once I had made the change from extract to all grain home brewing I began having visions of what I wanted my home brewery to look like.  In a way, a big part of the allure of home beer brewing for me was making the best beer possible.  For me that included building my own home brewing rack, doing my best to perfect the process and being as efficient as possible.  I am not going to lie, there were a few times along the way that I questioned what the hell I was thinking and why I did not just buy a home brewing stand, but now that all is said and done I am a bit proud of what I was able to accomplish with my own hands.  In hopes of helping some of my fellow home brewers out I am going to supply some general information on how I put mine together.  If you need any specifics on something I do not list here, please feel free to drop me a line with what details you are looking for.


Home Beer Brewery

Home Beer Brewery


The dimensions of my brewery are 61″ Wide, 20.5″ Deep and 20.5″ tall excluding the wheels. The following is a list of parts that I used to create my home brewing sculpture, but many of the items such as the kettles, sparge arm and pumps can be traded out for other items of your preference. I am assuming that you have some basic welding experience (it is not that hard) and the required tools including a welder, cut saw, drill and grinder.


For the frame of my single tier home brewing stand I used 2″ x 2″ steel fence post that I cut into the appropriate sizes.  I made two large 61″ x 20.5″ rectangles for the top and the bottom, with a supporting vertical bar on each corner of the brewing stand.  In between each of the 3 burners, I placed 2 bars for spacing and support.  Even with all 3 kettles full of liquid, the beer rack is incredibly stable.  Here is a link to the fence post available at home depot:

Fence post for the brewing rack


The burners are really an item of personal preference.  I started with 54,000 BTU burners, but then later upgraded to a 210,000 BTU Bayou Cooker Burners.  The smaller burners were more efficient as far as propane usage goes, but the larger bayou cooker burners certainly get the job done much quicker.  I welded brackets onto the bottom of the top level of my home brewing stand to hold the burners in place.  Initially I had a flexible line with a regulator running from each burner to a master regulator that was hooked up to the propane tank, but then later ran pipe with separate valves for each burner. The bayou cooker banjo burners are available here:

Banjo Burner – 210,000 BTU Bayou Cooker Home Brewing Burner Stand


For the home brewing kettles I opted for the Blichmann 20 gallon kettles.  They include a site gauge so you can easily see the volume in your kettle, a 3 piece stainless steel ball valve and adjustable thermometer.  These stainless steel brewing kettles are one of the best buys that I have ever made and have no regrets about them.  They have a variety of options including a false bottom for your mash tun, hop blocker for your boil kettle, and sparge arm.  I opted for the false bottom and hop blocker and have been very happy with them.  I do mostly 10 gallon batches, but could go as high as 15 gallons with these 20 gallon kettles.  You will want to buy kettles that are appropriate for the batch size that you intend to brew.  Blichmann currently offers 10 gallon, 15 gallon, 20 gallon, 30 gallon and 55 gallon kettles.  You can find the kettles and optional items available here:

Stainless Steel Home Brewing Kettles


You will need to get 2 high temperature food grade pumps for your single tier home brewing rack.  I placed my pumps in between the hot liquor tank \ mash tun and the other between the mash tun and boil kettle.  With two pumps you will be able to conduct your sparge while also transferring wort from your mash tun to your boil kettle.  I use high temperature rated march pumps with stainless steel quick disconnects.  The pumps and disconnects can be found here:

Home Brewing Pumps and Quick Connects


As far as sparge arms go I have tried several.  The best one that I have ever come across is the morebeer ultimate sparge arm.  It is made of stainless steel, has a ball valve built into it to easily control the flow rate and can be used to recirculate or lauter your wort in addition to sparging.  The ultimate sparge arm can be purchased here:

Ultimate Home Brewing Sparge Arm


Lastly for my wort chiller I use a convoluted counter flow chiller.  Much like the sparge arm, I have tried just about every chiller from immersion chillers to plate chillers and I have found the convoluted counter flow chiller to be the best.  What I like most about it is that it is just about impossible to clog, it is compact, it cools wort incredibly quickly and it is easy to clean and sanitize.  These convoluted counter flow chillers are also sometimes referred to as chillzillas.  They can be found here:

Home Brewing Convoluted Counterflow Chillers


Those are the basics on my home brewing stand \ single tier brewing sculpture.  If you have any specific questions or comments, please leave a comment or shoot me an email and I will do my best to assist you.  Best of luck to you on building your own all grain home beer brewing stand.  If it seems like a little more work then you are up for, there are also some really fantastic pre-manufactured stainless steel home brewing racks and brewing sculptures available here:

Stainless Steel Home Brewing Stands and Brewing Sculptures


Brewing Sculpture

Stainless Steel Home Brewery


« Older posts