West Coast Brewer Home Brewing Blog

Tag: brewery (Page 1 of 3)

Home Brewing A Hazy Session IPA Tomorrow!

It feels like it has been way too long but, I’m brewing up a new batch of homebrew tomorrow! For this batch I’m converting one of my old session IPAs into a hazy. I’m excited to see how it turns out.

One of the modifications is using Wyeast London Ale III for the yeast. I’m also adding a pound of flaked oats, and making modifications to the hop additions, especially during fermentation.

I will be sure to post the recipe if it comes out well!

For the yeast starter I also used Fast Pitch canned wort.  It certainly speeds up the yeast starter process since I do not need to spend the time boiling and chilling the wort. I open the can, place the wort in a sanitized flask, add the same quantity of water, pitch the yeast, placed the sanitized stir rod, place it on the stir plate and that is all she wrote!

The New RoboBrew v3 Electric Brewery Is Now In Stock And SHIPS FREE!

robobrew home brewery promo code coupon

robobrew home brewery promo code coupon

RoboBrew v3 Promo Code Link: ROBOBREW PROMO CODE LINK
Right now, while supplied last at More Beer, you can get FREE Shipping and A FREE Wort Chiller when you purchase the all new Robo Brew 3 electric home brewing system.  The RoboBrew home brewery is an all in one electric and digital home brewery. It features built in electric heating elements for heating and boiling water and wort. It also has a built in home brewing pump for recirculation! The onboard water resistant control panel allows for setting and monitoring brewing temperatures, making for a simplified homebrew day!  The removable grain basket makes cleaning the RoboBrew a snap and a built in spigot makes transferring your wort easy. The RoboBrew v3 Electric Home Brewery is loaded with high end home brewing features.  Here are some of the specs on the New RoboBrew 3 home brewery:
Robo Brew Home Brewery

Robo Brew Home Brewery

ROBOBREW 3 HOME BREWERY

  • Stainless steel construction
  • Large 9 gallon total capacity with a finished beer output of 5-6 gallons
  • Digital temperature controller
  • Standard 110 v power
  • Dual heating elements for total control (1000 watts and 500 watts)
  • Stainless steel 1/2 inch ball valve
  • FREE Immersion wort chiller included
  • Stainless steel malt basket
  • Volume markers
  • Glass lid
  • Magnetic drive pump for recirculation
  • Recirculation arm
  • Temperature reads in °F or °C
The Robo Brew 3 All Electric Home Beer Brewing System is the ultimate portable all grain home brewery! The RoboBrew uses standard 110 v power so you can brew beer anywhere. The built in magnetic drive pump easily recirculates the wort during the mash. Dual heating elements run off of a single 110 volt plug and have individual switches allowing for more control over the heating process. One element is 1000 watts and the other is 500 for a combined 1500 watts! Use both when you need to ramp up the temperature quickly either at the start to get to your mash temp or to go from your mash temp to boiling.

Click the following link to take advantage of this More Beer Coupon Code:

ROBO BREW FREE SHIPPING PROMO CODE LINK

RoboBrew 3 Electric Home Brewing System

RoboBrew 3 Electric Home Brewing System

All The Small Things – Notch-Yo Lid

Like with many hobbies, home brewing has a learning curve.  Initially there is a lot of information to take in and many processes to keep track of. In time, you gather knowledge and experience and you master the fundamentals of brewing.  Where home brewing differs from many hobbies is that once you have done so, there are a variety of tangents that you can pursue. For instance you can explore water chemistry and the impacts on different styles of beer, design your own beer recipes and figure out which hops best compliment a specific yeast strain, try different mashing techniques and focus on boosting your brew house efficiency or even build and customize your own brewing hardware. At some point along the way, if you home-brew long enough; what makes your beer unique is all of the small things that you learn, apply in your process and customize along the way.

On the topic of all of the small things, one of the things that I should have done long ago was place a notch in my mash tun lid to accommodate my sparge arm. Prior do doing so I had to leave my lid ajar, allowing heat to escape from my mash tun, requiring my RIMS system to use more energy to compensate.  I am not going to lie, any upgrade or project that requires me to drill into or cut in to one of my stainless steel Blichmann kettles make me a little nervous. After all, the last thing that I want to do is ruin one of my vital pieces of home brewing hardware. The good news is that I almost never use a lid on my Boil Kettle, so if I jacked up the mash tun lid bad enough, I had a backup!

I used three tools for this project, an angle grinder (costs about $30 if you do not already have one), a file to clean up the rough edges and sharp spots and a dremel (or drill) with a fine grinding bit to shape the groves more precisely so that the lid would fit snugly against the sparge arm. Although initially intimidating, it really was not so challenging.  My best advice is to measure conservatively for your initial grinder cut and use the dremel to remove any excess metal. The vertical cuts are easy with the grinder, but the horizontal cut can be challenging if you are not careful. As a final touch I may add a silicone stopper and trim it to fill some of the small gaps that still exist; but even with out that I am very happy with how it turned out! Also, if you are looking for an incredible stainless steel sparge arm, I can not recommend the More Beer Ultimate Sparge Arm highly enough.  I have used it for around 3 years now and it had performed flawlessly.

More Beer Stainless Steel Sparge Arm

More Beer Stainless Steel Sparge Arm

NEIPA Hazy IPA Recipe

I just finished up my latest batch of NEIPA, North East IPA, Vermont Style IPA,  New England Style IPA, Juicy IPA or Hazy IPA; however you chose to label it and it turned out incredible so I wanted to share the recipe in case anyone else out there was interested in brewing one. The basis for this recipe is MoreBeer’s Haze Craze IPA which can be purchased in either an Hazy IPA Extract Beer Recipe Kit or Hazy IPA All Grain Beer Recipe Kit. I just made a couple of small tweaks to mine. Although the West Coast was slow to latch on to the NEIPA trend, we have sunk our teeth in and they are currently all the rage. The haze of the yeast, hops and yeast esters pushes the boundaries of what an IPA is and can be. In order to fully enjoy them you need to discard your expectations of what an IPA is and embrace the haziness and sometimes juicy and tropical flavors that are created by new varieties of hops and unconventional yeast strains.

Hazy NEIPA All Grain Beer Recipe


Beer Name:Hoptic Thunder Hazy IPA / More Beer Haze Craze IPA
Beer Style:New England Style Hazy IPA
Recipe Type:All Grain
Batch Size:5 Gallons
Mash Type:Infusion
(60 Min) 152F
(10 Min) 169F Mash Out
1 tsp Calcium Chloride
.5 tsp Gypsum / Calcium Sulfate
Grain Bill:11 LBS Pale 2 Row US
1 LBS Flaked Oats
2 LBS Flaked Wheat
8 oz Carapils Malt
8 oz Wheat Malt
4 oz Honey Malt
Hops:.5 oz Warrior – 60 minutes
1 oz Citra – 10 Minutes
2 oz Mosaic – 0 Minutes
1 oz Citra – 0 Minutes
Other:DO NOT USE A CLARIFIER
Yeast:London Ale III Wyeast #1318
Fermentation:2 Week Primary @ 70F
– I ferment this at a slightly higher that usual temperature to increased ester production
and to create a more active fermentation)
On day 3 of active fermentation make the following hop additions
2 oz Mosaic
1 oz Citra
On day 7 of fermentation make the following hop additions
1 oz Mosaic
2 oz Citra
Once fermentation has completed or on day 10, cold crash and transfer to keg or bottle.
Notes:The More Beer Haze Craze IPA Beer Kit can be purchased here:

More Beer Haze Craze Hazy IPA Beer Recipe Kit


NEIPA Hazy IPA Beer Recipe

NEIPA Hazy IPA Beer Recipe


Brewer’s Edge Homebrewing System

Brewers Edge Homebrewing System #homebrew #homebrewing #brewers #edge #brewersedge

Brewers Edge Homebrewing System #homebrew #homebrewing #brewers #edge #brewersedge


Brewers Edge Mash & Boil Homebrewing System


Retail Price: $299
Homebrewing Rig Style: All In One Homebrewing System
Home Brewing Rig Details: The Brewer’s Edge Mash & Boil is probably the best deal going for an all in one all grain home brewing system.  With the Brewer’s Edge, there is no need for an outdoor burner, complicated brewing system, or even a 220 volt special circuit. The Brewer’s Edge homebrew system plugs right in to any standard 110 volt GFI household outlet. The Brewer’s Edge Mash and Boil’s exclusive double wall stainless construction conserves heat to achieve a rolling boil with only 110 volts and 1600 watts, and its precise thermostat and internal sparging basket lets you mash and boil in the same vessel!

How to Build a Kegerator

Guide on how to convert an old refrigerator in to a kegerator #kegerator #guide #howto #DIY

Guide on how to convert an old refrigerator in to a kegerator #kegerator #guide #howto #DIY


For the last several years, I have been using a boring old white refrigerator to store my kegs. Originally when it came time to purchase one, I was just looking for the best deal out there on a refrigerator that could keep my homebrew cold. I have been serving my beer from picnic \ cobra taps that sit lose on top of the kegs in my fridge. A couple of weeks ago I decided to take the keg fridge to the next level and convert it to a full fledged Kegerator with for taps to accommodate all of my kegs. After ordering the beer tap hardware at MoreBeer and taking a trip to the local hardware supply shop, I had everything that I needed to begin my work.


My goal for this homebrewing blog entry is to list out all of the basics of what you will need to conduct the process yourself but I am sure to miss something and if you need any specifics please feel free to ask; I am happy to help if I can.  Please keep in mind that I am not a carpenter, engineer or machinist; so there are probably 10 better ways of doing this, I am just trying to share my experience in case it helps someone else out.


Step 1 – Ordering your gear!
I figured that if I am going to take the time to do this project, I was going to do it right!  Recently MoreBeer started to carry Intertap stainless steel beer facuets – tap, which are basically the Holy Grail of beer taps and the best beer faucets currently available!


Intertap Stainless Steel Beer Faucets, Shanks and Beer Taps! #intertap #beer #taps #faucets #stainless #steel

Intertap Stainless Steel Beer Faucets, Shanks and Beer Taps! #intertap #beer #taps #faucets #stainless #steel


I chose these intertap beer faucets for a few different reasons.  For one, they offered an all stainless steel faucets which is important to me because I want it to last, I want my homebrew beer serving to be as sanitary as possbile and I do not want to be worrying about releasing strange metallic particulates in to my beer like I do when using an old chrome tap that erodes after time. Another great thing about  these Intertap beer faucets is that they are forward sealing and with forward-sealing faucets the faucet keeps beer in it so the inside doesn’t have a chance to get sticky. This makes cleaning your draft beer system far easier. It also reduces the chance of off flavors transferring to your beer while you are pouring. One of the things that sets Intertap beer taps apart from other forward sealing beer taps is that Intertap faucets use a sliding shuttle that guides the internal o-ring into the perfect position every time. The Intertap stainless steel faucets are also modularly designed  allowing you to add helpful items like a ball lock spout, stainless steel growler filling spout and an elongated stout beer spout! They have two varieties of beer faucets in all stainless and 1 features a flow control lever.  I ended up getting one of the stainless steel flow control beer faucet and three of the standard stainless steel beer faucets.


MoreBeer has the best price I have found for Intertap Faucets and they also offer free shipping on any home brewing equipment or supply orders over $59.  Here are links to them as well as links to the anti-microbial beer line which I also highly recommend. Do not forget to pick a shank for each beer faucet, I got the 4″ shanks and they have me plenty of extra room to run them into my refrigerator door.


Intertap Forward Sealing Stainless Steel Beer Faucet


Intertap Forward Sealing Stainless Steel Beer Faucet with Flow Control


Intertap Stainless Steel Beer Faucet and Beer Tap Shanks


Ultra Barrier  Antimicrobial and PVC Free Beer Tubing


West Coast Brewer Beer Tap Handles

West Coast Brewer Beer Tap Handles


For now, I am using chalkboard tap handles, which make it convenient to remind me which beer is on which which tap in case I consume a few too many and can no longer remember. At some point I would like to design a handle for each one of my home brewed beer that I make;  but for now, these look great and are very functional tap handles.  They come in both chalkboard style tap handles and white board dry erase tap handles:


Chalkboard Beer Tap Handles


Whiteboard Dry Erase Tap Handles


Depending on what draft beer equipment you are starting with or if you have anything at all for that matter, there may be a few other items that you want to pick up, such as a CO2 manifold (which permits you to dispence CO2 to multiple beer kegs from one tank or regulator), homebrewing beer kegs, a CO2 Tank and regulator. Here is a link to a great place to start if your are looking for an entire draft beer setup or just random draft beer and keg items:


Draft Beer and Keg Equipment


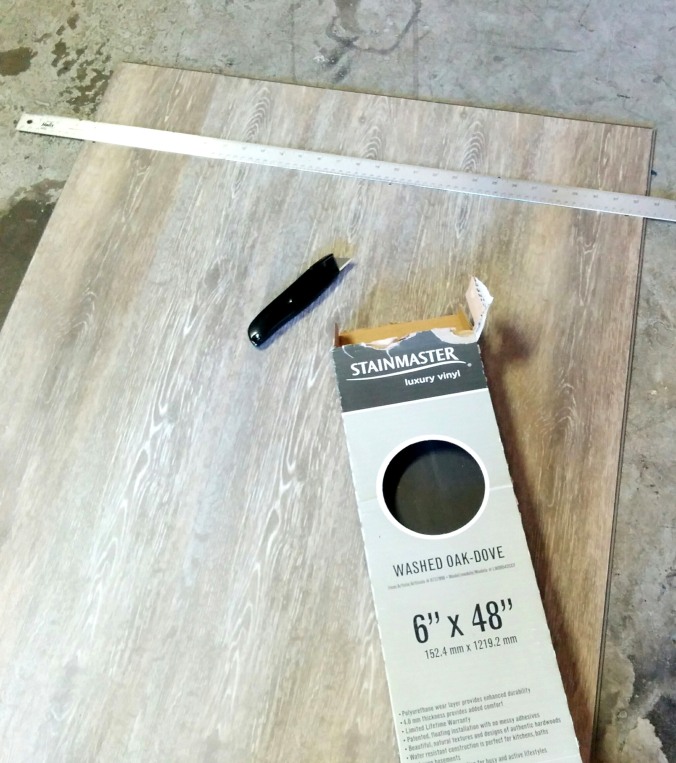
Those were the items that I picked up at MoreBeer, the remaining items I purchased at my local Lowes. I purchased 1 box of Stainmaster Vinyl flooring, which is great because it is resistant to liquid and stains; two things you need to consider when building your kegerator. Normal wood flooring does not do well with moisture so I would recommend avoiding it if possible.

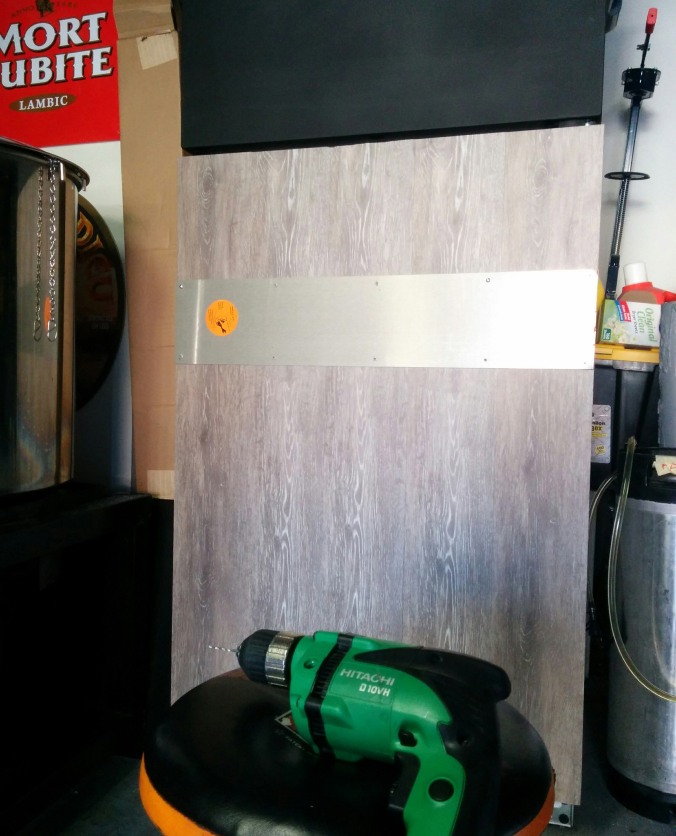
I also picked up a small container of vinyl flooring adhesive, a plastic spreading knife, a razor blade cutting knife (to cut the vinyl flooring), a 1″ drill bill to cut the shank holes for the beer taps, chalkboard spray paint (for the refrigerator upper door), a 3″ wide plank of wood (to make a frame for the upper door), some wood stain to match the vinyl flooring, black duct tape for trim and a brushed aluminum kick plate to put on over the vinyl but under the beer faucets and tap handles.


Vinyl Fake Wood Flooring for my Kegerator Door

Vinyl Fake Wood Flooring for my Kegerator Door


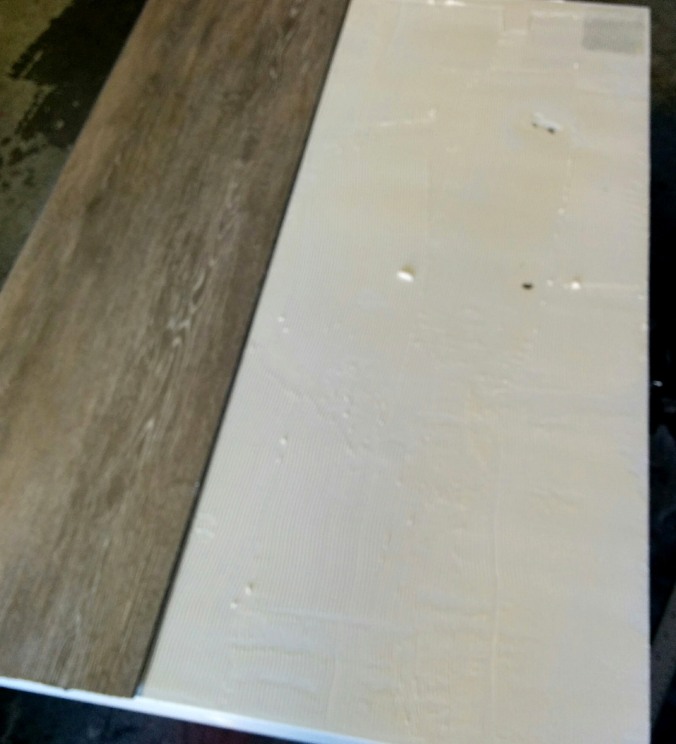
Once you have all of your supplies in hand, it is time to get to work!  I started off my shutting off the refrigerator and giving it a good cleaning. Next I removed both of the refrigerator doors and all of the handles and hardware from the doors. I then sanded the refrigerator doors with a high grit sandpaper to make them more receptive to the vinyl adhesive and chalkboard spray paint. I did not remove all the paint but instead just roughed them up a bit. I then measured and cut the flooring so that it would fit my refrigerator door.  After making all of the needed cuts, I applied the adhesive to the lower refrigerator door. I waited approximately 10 minutes as per the instructions for my adhesive and began to put the vinyl planks in place. I tried my best to mix the planks up a bit so that it did not look to repetitive as can be the case with synthetic flooring.


Placing the vinyl flooring on the refrigerator door.

Placing the vinyl flooring on the refrigerator door.


These Stainmaster vinyl flooring planks were very easy to install. They locked in to place with one another crating a strong bond. After placing all of the vinyl wood planks, I put pressed down on each of the planks firmly and then set it to the side to allow it to dry.  Next I began work on painting the upper door, building the wood frame and preparing the mash paddle door handle for the kegerator.

After giving it a little thought, I figured that I would paint the upper door with a chalkboard spray paint. I was hoping it would add some contrast to the kegerator doors and would also give me the option of adding some notes about the beer being served or allow me to change the appearance of the fridge easily by modifying the drawing on the board. Painting the door was very easy and I gave it two coats of paint.


Chalkboard kegerator door

Chalkboard kegerator door


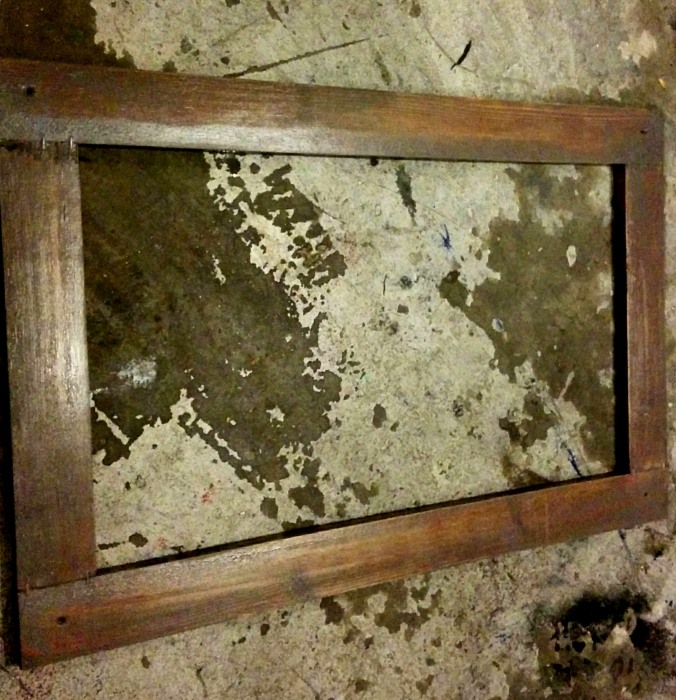
After the upper kegerator door was painted, I began my work on creating a simple frame to give it a border and add some cohesion with the rest of the kegerator. I searched for the cheapest 3″ wide plank I could find at Lowes and had them cut it to the appropriate sized lengths which they are always kind enough to do at no cost. I joined the pieces together with some wood glue and staples. I was going for a rustic look so was not too concerned with any rough edges or the staples showing. I sealed some of the gaps with putty, sanded it down a bit and then stained the wood. Lastly I applied a clear acrylic coat once the stain had dried.


Chalkboard upper door frame for the homebrewing kegerator

Chalkboard upper door frame for the homebrewing kegerator


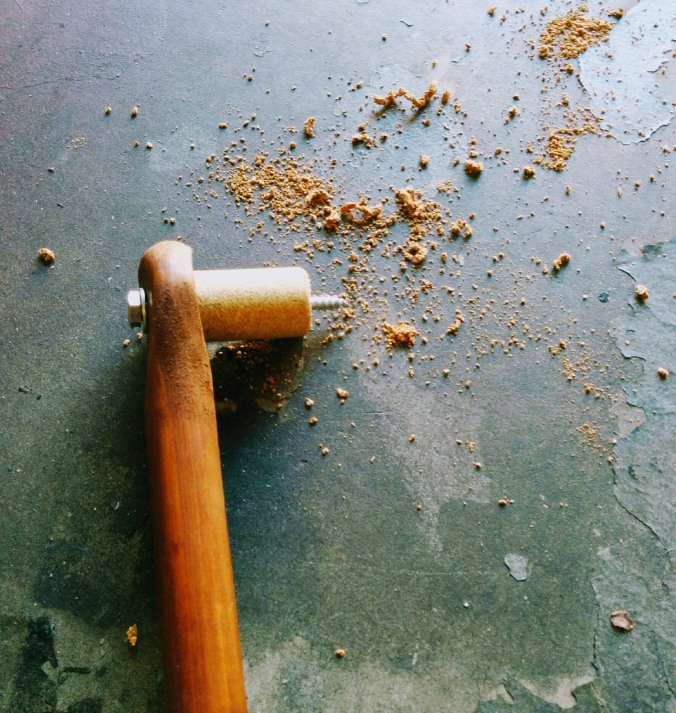
Next up was crating a door handle for my homebrew kegerator.  I wanted a door handle that said beer and homebrewing when you looked at it! So I decided to use an old mash paddle that I had hanging around the garage. I am really pleased with how it worked out, it is very functional and has the look and feel that I desired for my kegerator. I started by staining the mash paddle to a color that would contrast the wood on the doors but compliment the beer tap handles. I then drilled the mounting holes and used a wine cork as a spacer so that the top of the handle would have about an inch of gap between the kegerator door to make it more easy to open. I used a heavy stainless steel bolt to mount the top of the handle so that it would not pull off the door if one of my buddies starts lifting weights and pull the door open too hard.


Home Brewing Mash Paddle for a refrigerator door handle

Home Brewing Mash Paddle for a refrigerator door handle


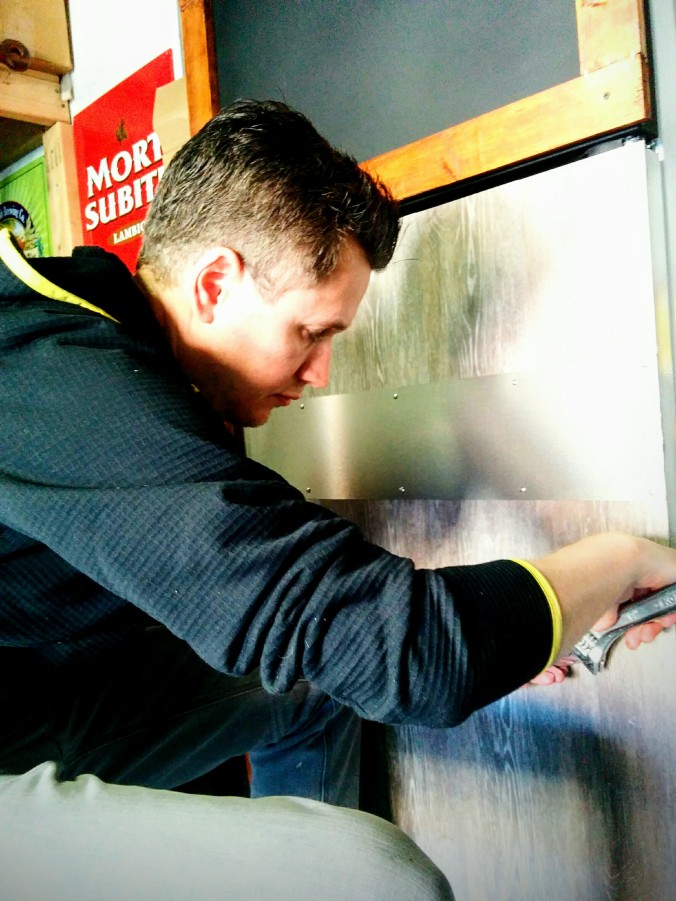
Once the kegerator door handle was completed I mounted the doors back on the kegerator after I had verified that the flooring had adhered well enough and the paint had dried. Next I installed the brushed aluminum kick plate to the lower door after measuring it and cutting the excess metal off with a pair of tin snips. I placed the kick plate in the center of the area where I was planning on installing my stainless steel beer taps. I simply drilled it in with screws that would be long enough length to make it into the door but not so long as to pass in to the interior of the kegerator.


Home Brewing Kegerator Stainless Steel Plate for Tap Handles and Faucets

Home Brewing Kegerator Stainless Steel Plate for Tap Handles and Faucets


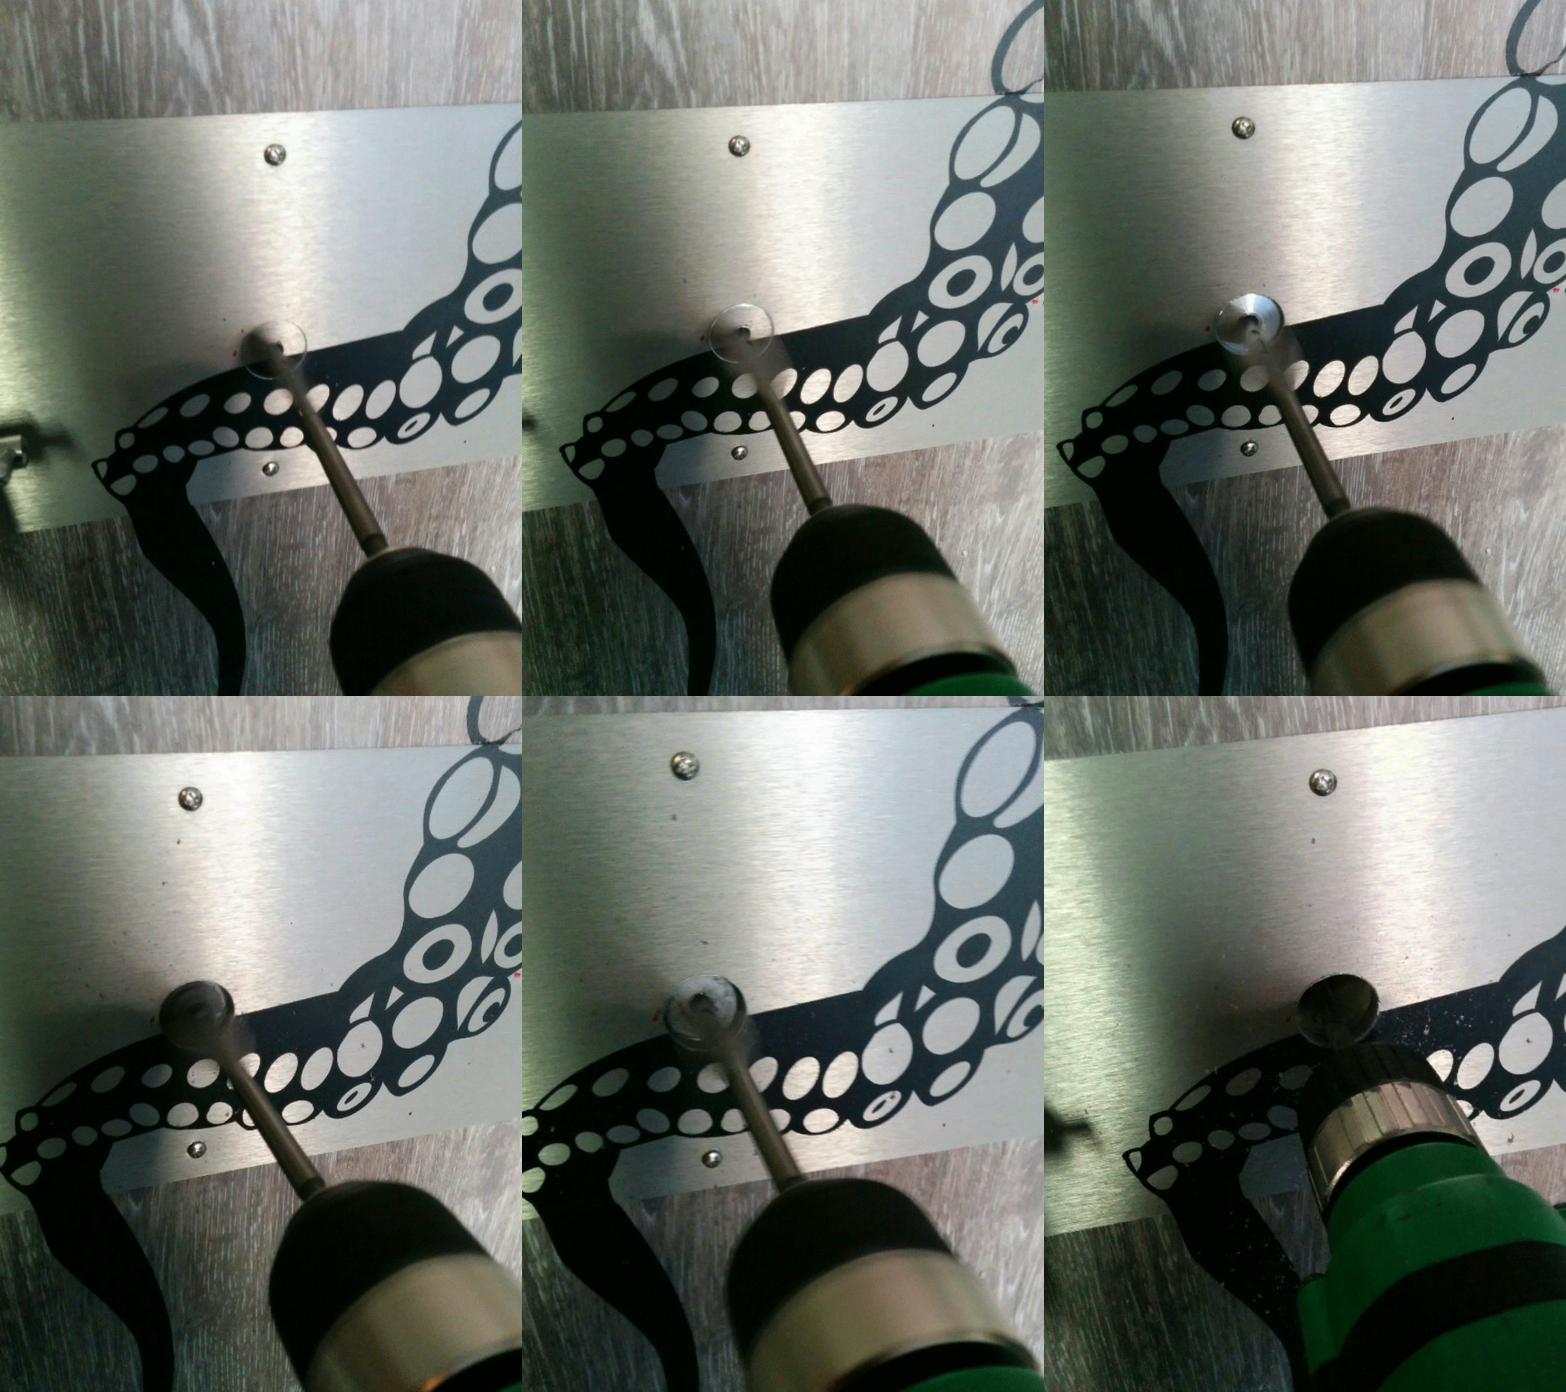
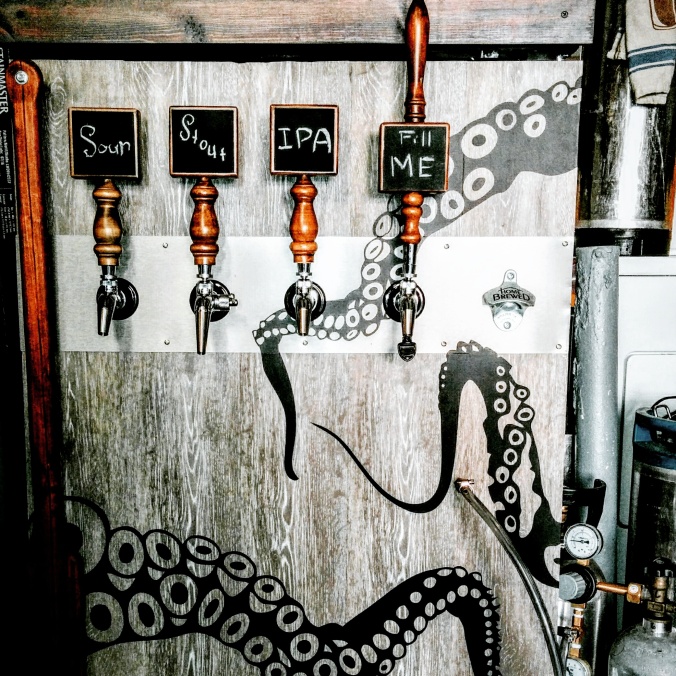
Once the kick plate was installed, it was time to position and install the frame for the upper kegerator door. I drilled some pilot holes and affixed the frame to the upper door with 4 screws. I then mounted the mash paddle kegerator door handle and applied some vinyl squid decals that I picked up online to add a little something different to the kegerator. It was then time to install the beer tap shanks! I drilled pilot holes and used my 1″ drill bit to cut the 4 holes for the stainless steel Intertap tap shanks.  If I had this part of the process to do over again, I think I would have switched drill bits to a 1″ saw style drill bit as I think the holes would have been a little cleaner. On one of the holes that I drilled, some of the plastic splintered on the inside of the kegerator.  It was not a big deal, but could have been better.


How to cut a draft beer tap hole for your kegerator

How to cut a draft beer tap hole for your kegerator


If you are like me and do not have room to fit your CO2 tank in your kegerator and or do not want to store your CO2 tank in the kegerator then you will need to drill a hole in the door to pass the CO2 line.  I did so with a 1/4″ stainless steel pipe and brass fittings. It works well and makes it easy to disconnect from the kegerator door if needed. Eventually I am also going to drill 3 additional holes so that I can connect my SS BrewTech conical fermenter chilling system; but that is for a later homebrewing blog!


Install the CO2 hardware for your kegerator

Install the CO2 hardware for your kegerator


if you are reading this while you are building your own kegerator, at this point all of the hard work is behind you and you are probably ready for a beer! Next clean up the mess that you have certainly created from drilling in to vinyl and styrofoam. Then slide the shanks in to the holes and tighten down the bolts on the inside of the homebrew kegerator.  Once the stainless steel tap shanks are tightened in to place, you can install the beer taps – faucets on to the front of your kegerator. They make an actual wrench specifically for doing this but if you do not have one, you can simply hand tighten them. Next, attach your beer tap handles.  All that is left is to connect the kegs, test for leaks and you are ready to enjoy a nice cold beer!

I really enjoyed this project and my hope is that some of this information will help a fellow home brewer or beer lover. If you have any questions or suggestions about converting a beer fridge in to a kegerator, please feel free to shoot me an email or leave a comment on the blog.


Building a kegerator!

Building a kegerator!

Homebrewing Brewrig Sale at MoreBeer!


Save $500 on a More Beer Stainless Steel Brewing Rig

Save $500 on a More Beer Stainless Steel Brewing Rig

Coupon Code Date: 9/2/2016 to Unknown
Promotion Details: Save $500 on a More Beer Stainless Steel Home Brewing Rig
Promo Code: BREWRIG SALE
Product User Rating: 5/5
Availability: In Stock

Coupon Code Description: MoreBeer currently has a sale going on that will save you $500 on one of their famous stainless steel homebrewing sculptures. More Beer makes the very best home brewing systems available and they rarely go on sale.  So if you have been looking to purchase one, this might be the time. This is truly the easiest to use all-grain system out there. With nothing electrical to go wrong, simple valves to control flow, easy to view mashtun, and no pumps its just plain easy. The frame of this homebrew rig is made from 304 stainless steel and welded in the MoreBeer metal shop in California. The low profile  heavy duty stainless steel homebrew kettles are formed in a mold via the use a punch. This means they are made from a single piece of stainless with no welded seams. These beefy kettles then get an added aluminum layer that is capped with another layer of stainless. The added aluminum helps keep the kettle bottom from scorching and allows for easier cleaning.

  • 304-Stainless Steel Frame made in USA
  • 15 Gallon Heavy Duty Kettles
  • High-Quality Analog Thermometers on All Kettles
  • Piped Propane Gas System with single regulator to run off one propane tank
  • Perforated stainless steel screen in Mashtun
  • More Beer Stainless Steel Quick Disconnects

To take advantage of this home  beer brewing promotion, use coupon code listed above if applicable and click on the following home beer brewing promotion link:

Click Here For This More Beer Brewing System Promo Code


Save 20% on Homebrewing Equipment and Supplies


Adventures in Homebrewing Sale

Adventures in Homebrewing Sale

Adventures in Homebrewing – Homebrewing.org


Sale from Adventures In Home Brewing – Homebrewing.org – July  2016
Sale Date: 8-2-2016 to 8-4-2016
Promotion Details: Save 20% On Almost Everything at Homebrewing.org
Homebrewing.org Sale:  Homebrewing Sale
Sale Description: Adventures in Homebrewing currently has a great sale going where you can save 20% On Almost Everything at Homebrewing.org! This sale expires soon, so stock up and save.  No promo code is needed for this deal.


Click Here for this Homebrewing.org Homebrewing Sale

New Homebreiwng Device Called The Trub Trapper

Trub Trapper Homebrewing Screen

Trub Trapper Homebrewing Screen


Every now and then a new homebrewing product comes out that catches my eye and I say, I can not believe nobody had thought of that. The Trub Trapper is one of those home brewing equipment idea.


So what is the Trub Trapper and why is it so great? Well, lets start by talking a little about trub first. Trub is that thick sludge left at the bottom of your boil kettle after you have transferred your wort to the fermenter.  It is a combination of hops, compounds, proteins and solids left over after the boil. The problem is that it is very difficult to stop the trub from passing in to your fermenter. Trub formed during the boil can adversely affect fermentation and produce undesirable flavors and haze in your finished beer. It is something that you want to avoid if at all possible and I will explain further in a couple of paragraphs. You worked to remove these unwanted compounds and byproducts during the boil so you do not want to allow them in your homebrewing fermenter.


How does the trub trapper work? Well, it is pretty simple really, you place the TrubTrapper in the bottom of your home brewing kettle so that your brew kettle dip tube is outside the tub trapper ring before you fill your boil kettle. You conduct your boil as you normally would and then whirlpool post boil.  Let the wort settle for approximately 10 minutes and you are ready to go. It is that simple.  The high temperature soft silicone gasket and overall weight of the TrubTrapper will keep it in place during the boil and whirlpool so there is no need to re-position, or try and unclog anything.  A small amount of the overall trub will settle outside the trub trapper filter ring during the whirlpool process, and a portion of that will flow in to the fermenter but the grand majority of the trub will be trapped inside the trub trapper which is where you want it.


The TrubTrapper

The TrubTrapper


Why is trub transferring in to your fermenter such a bad thing? Well, excessive trub can coat yeast membranes impeding transport in and out of the cells which encourages metabolic by-products.  Not to mention fine particulates in trub can lead to haze formation in your finished beer. Trub can also be responsible for head retention issues, impact aroma, flavor stability and off flavors such as sulfur, harsh bitterness and soapy notes.  If you have been experiencing any of this in your home brew then the trub trapper may be exactly what you are looking for.


If you like to reuse your homebrewing yeast, the trub trapper can help with that too. Excessive trub affects your ability to harvest and re-use yeast effectively and efficiently.  High trub levels make it more difficult to collect and clean the yeast and poor yeast health caused by excessive trub eliminates the ability for you to maintain the quality of your yeast which impacts the quality of your beer!


So how much is the trub trapper and where can I get it? It runs for about $50 and you can find the TrubTrapper here!

Brutus Stainless Steel Homebrewing Rig

Brutus Stainless Steel Home Brewing Stand

Brutus Stainless Steel Home Brewing Stand


Right now Adventures in Homebrewing / Homebrewing.org is offering a Brustus stainless steel homebrewing stand for $1299, with the burners included.  This is a beautiful home brewing rig done in stainless steel. It sits a bit higher than the one that I built and has a few other structural differences but pretty darn similar, best of all, you don’t need to weld it yourself!


This stand is a great base to build off of and the frame allow you to easily add on items like home brewing pumps, a RIMS controller and just about anything you can dream up.  One of the best things about it is that it does not come with a bunch of extras that you may not need such as kettles and wort chillers, like other home brewing stands do.  This way you can use your existing equipment to save money and only pay for what you need.


Click here for more information or to buy this Home Brewing System


Home Brewing System Upgrade

Home Brewing System

Home Brewing System


It seems like I am always trying to make small improvements to the home brewing rig to make it as functional as I can.  This weekend was no different.  I ended up changing the propane lines out for flexible versions that are easier to adjust and adding some sanitary fittings and a sight glass to the RIMS heating bar to enable me to clean it more easily and have some visibility if I run into issues during recirculation.


I think my favorite of the additions was the site glass.  In the photo above you can see it in the center of the RIMS heating element bar.  I like that it allow me to inspect the condition of the heating bar so that I can tell if it needs to be scrubbed and also allows me to check on the fluid volume level of the bar to make sure I am not running dry.


I picked the site glass up here at MoreBeer: RIMS Sight Glass


The Anatomy of a Brew Rig

Homebrewing_Rig


Here is the most recent image of my home brewing rig.  I recently added a whirlpool arm and switched back to an immersion chiller shown in the image.  Aside from that I just replaced some switches in my RIMS controller.  I thought that I would post an shot of my current gear in case it helps anyone else with their design.  If you have any question on my homebrewing setup please feel free to reach out to me.


« Older posts